iProcurement Setup Document
Mandatory Setups for iProcurement:
Profile Options
Shopping Category Creation
Category Hierarchy
Top Category (Browsing Category) - Create Top-Level Category
Child Category (Browsing Category) - Create Child
Shopping Category (Item Category) - Insert Existing Child
Purchasing Category Creation
Category Mapping
Item Creation and Purchasing Category Assignment
Content Zone Creation
Information Template Creation
Smart Form Creation
Create Stores
Blanket Purchase Agreement Creation
Personalization's (Profile Option - "Personalize Self-Service Defn = Yes")
1. Profile Options:
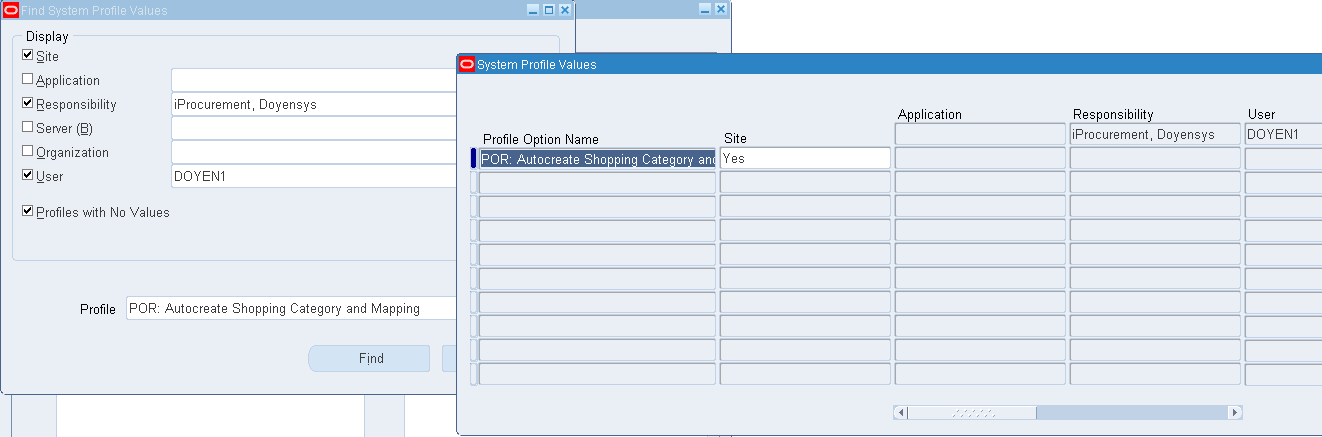
POR: Autocreate Shopping Category and Mapping = Yes
POR:Allow Manual Selection of Source = Yes
The rest of the profile options will leave it with defaulted values.
2. Shopping Category Creation:
We will build one case. Based on that we will define the categories and then will do the Category Mappings.
Case:
It's a Top Down approach.
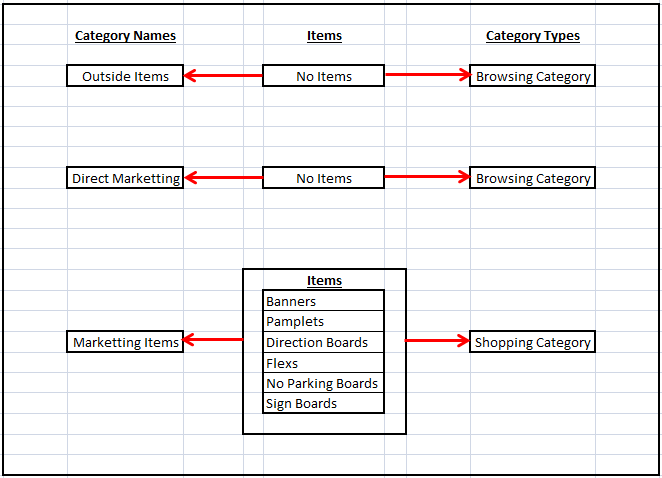
First we will have a Top level category (Root Category) called "Browsing Category". Under that, either we may have multiple child Browsing Categories or Shopping Categories.
First we should create the bottom level category called "Shopping Category"
Responsibility: iProcurement Catalog Administration
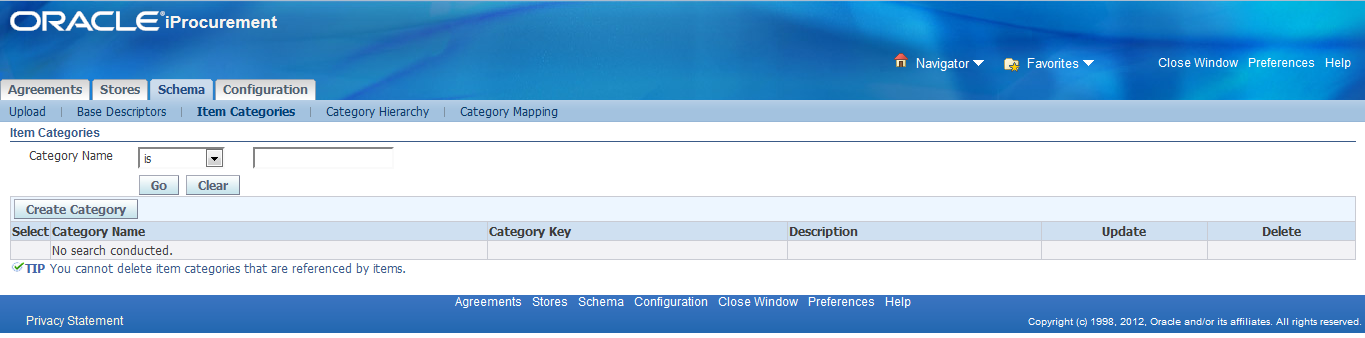
Navigation: iProcurement Administration: Home Page > Schema > Item Categories
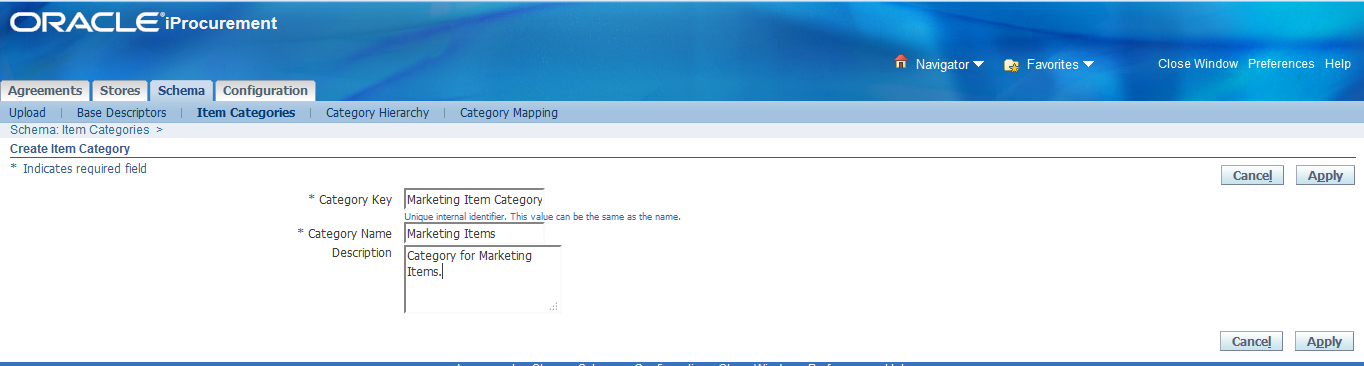
Click "Create Category"
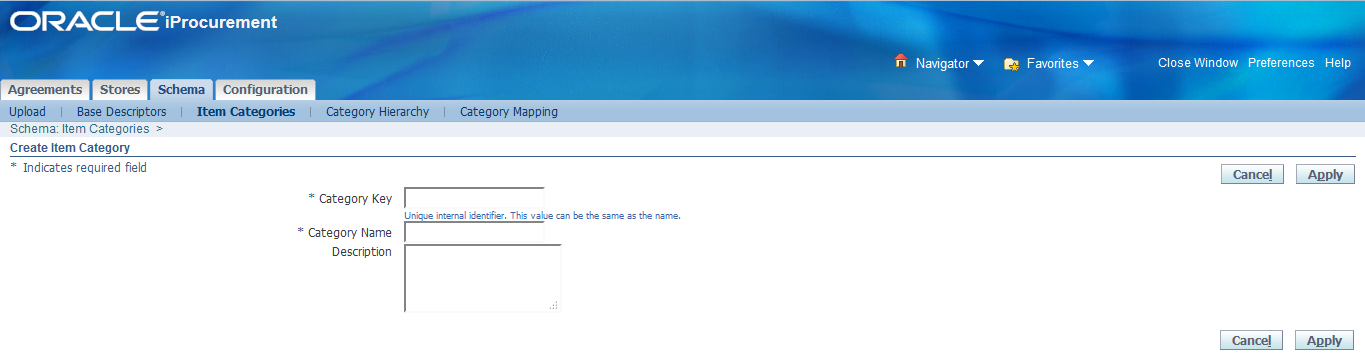
Enter the Category Details
Note:
1. Category Key: Once we enter the value and save, we can't modify.
2. Category Name & Category Description: We can change the values even after save by clicking "Update" button.
3. Category Key and Category Name values may be same.
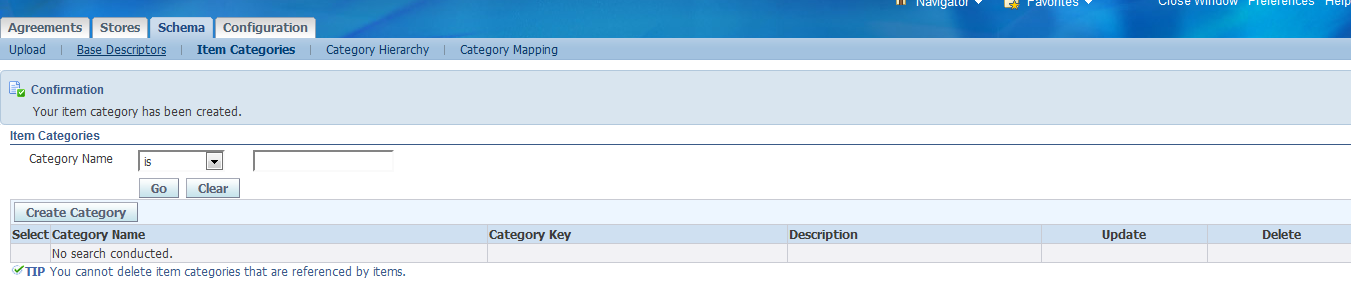
Click "Apply"
Confirmation page will come.
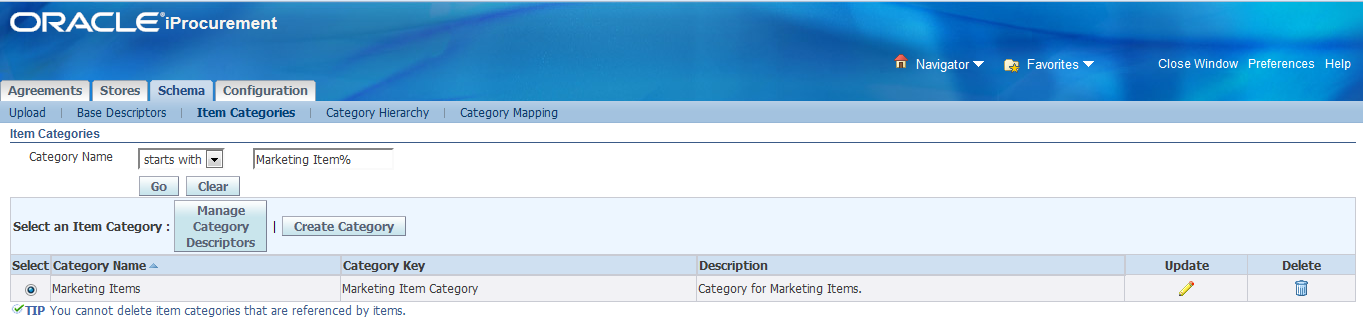
Search the Category Name and check the newly created Category.
Now, we have successfully created the Shopping Category (iProcurement Category)
Now, we will see the "Category Hierarchy"
3. Category Hierarchy:
Root Category (Browsing Category) ===== > Outside Items
Child Category (Browsing Category) ===== > Direct Materials
Child Category (Shopping Category) ===== > Marketing Items
Create the Root Category (Browsing Category) first
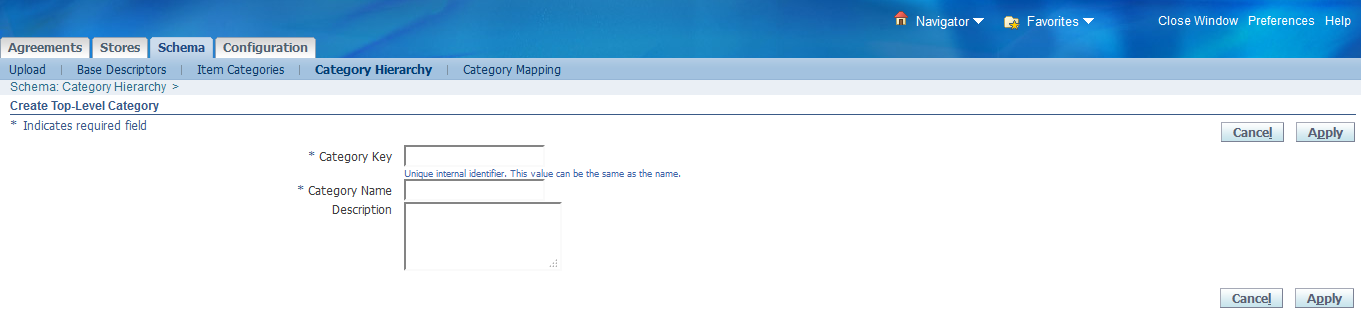
Navigation: Schema > Category Hierarchy > Create Top-Level Category
Click on "Create Top-Level Category"
Enter the values in respective fields
Click on "Apply"
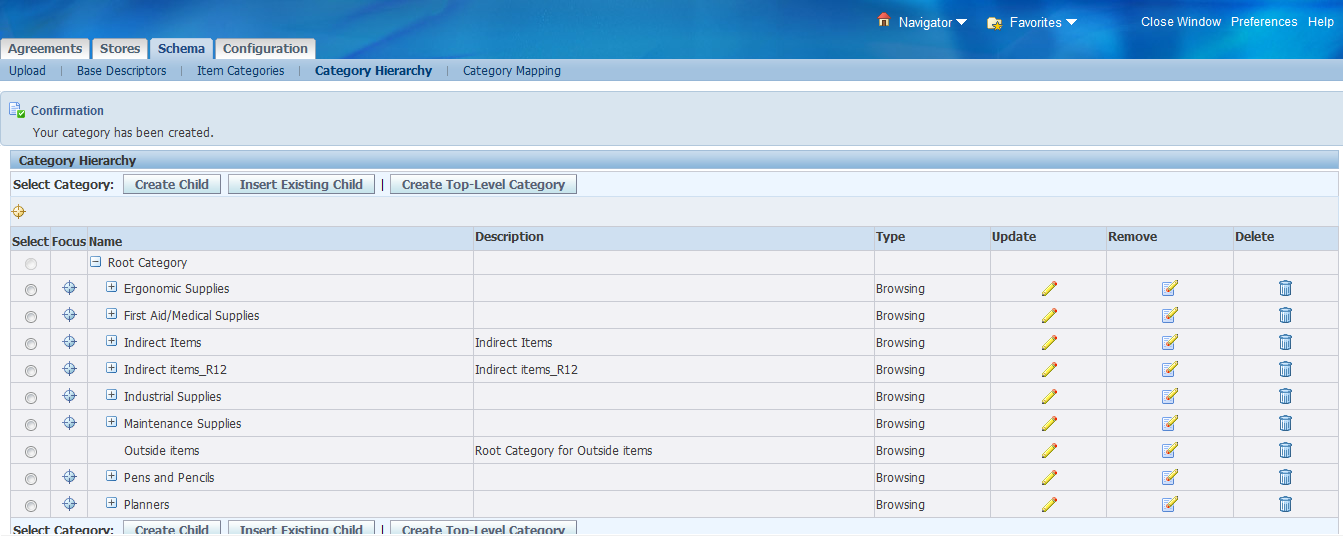
Upon Apply, you will get the confirmation page and you can see the newly created category with Type as "Browsing".
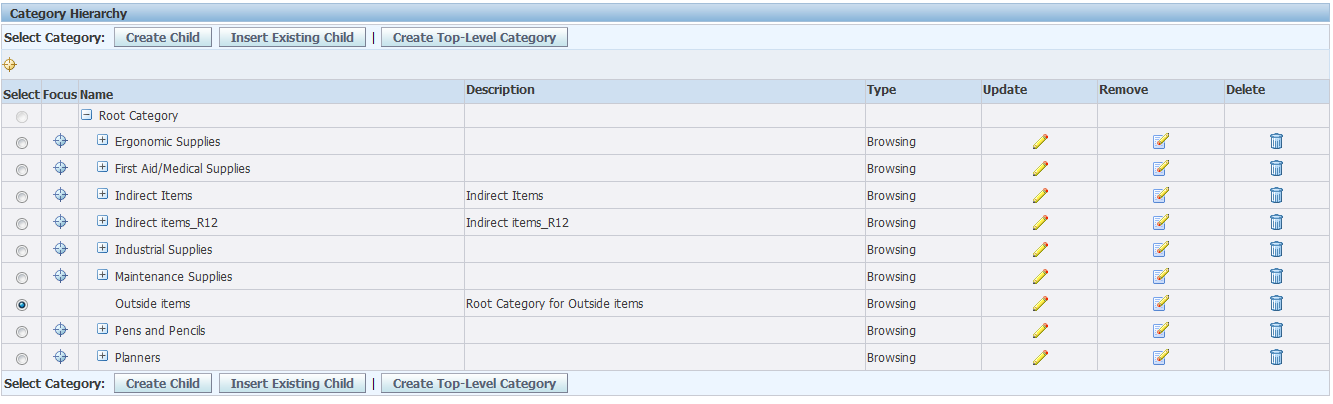
Select that newly created category "Outside items" and click "Create Child" to create another Browsing Category called "Direct Materials".
Click on "Create Child"
Enter the details
Click on "Apply"
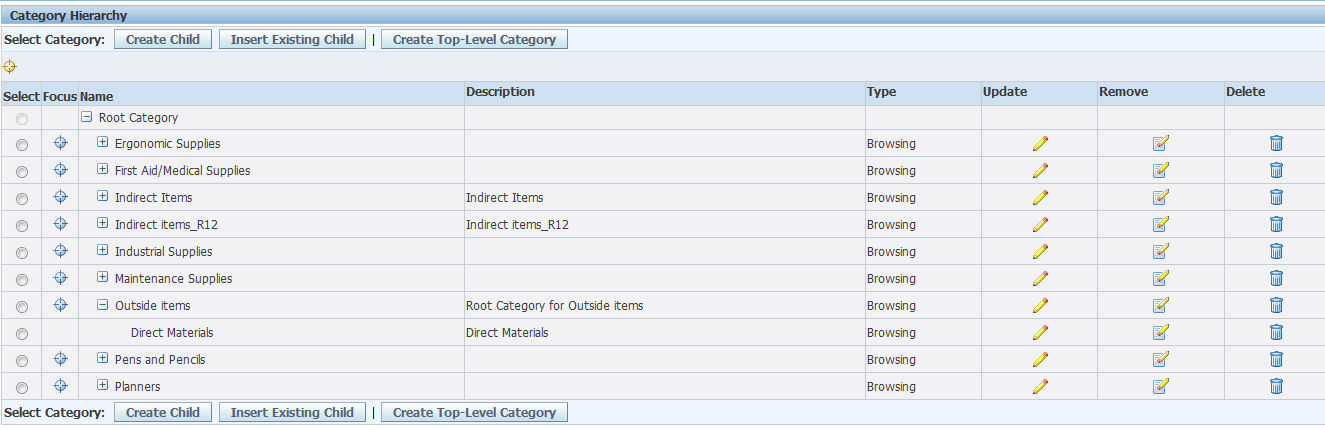
Now, you can see "Direct Materials" Browsing Category under "Outside Items" category
Now, you insert the Shopping Category "Marketing Items" into this Hierarchy
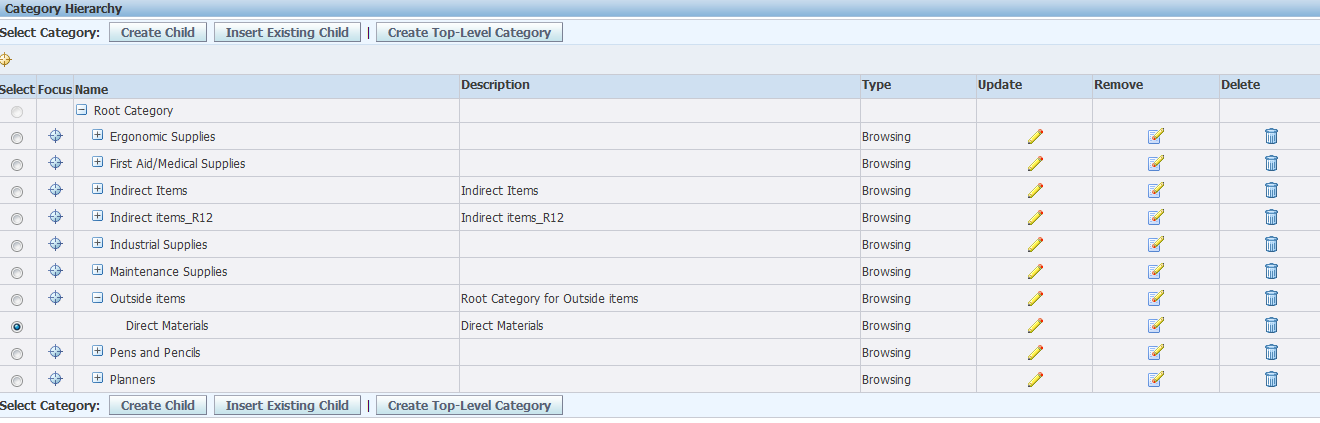
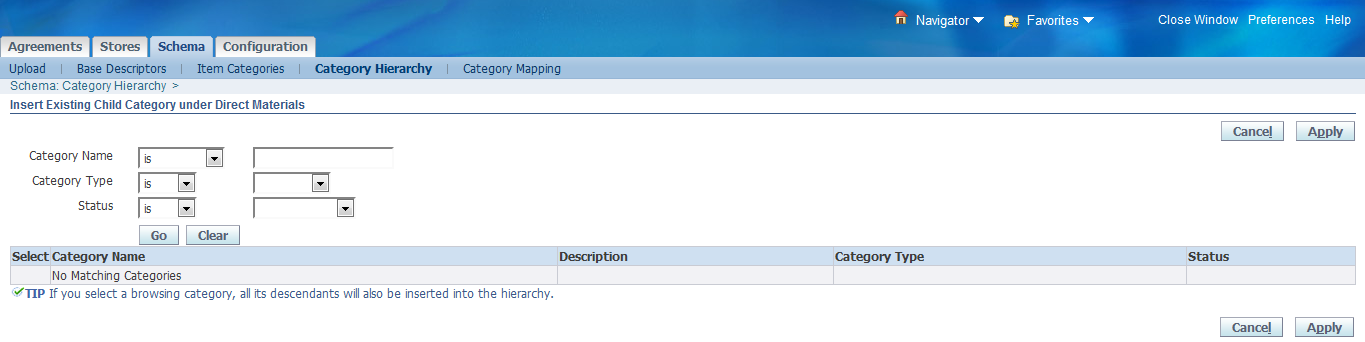
Select the Browsing Category "Direct Materials" and click on "Insert Existing Child"
Click on "Insert Existing Child"
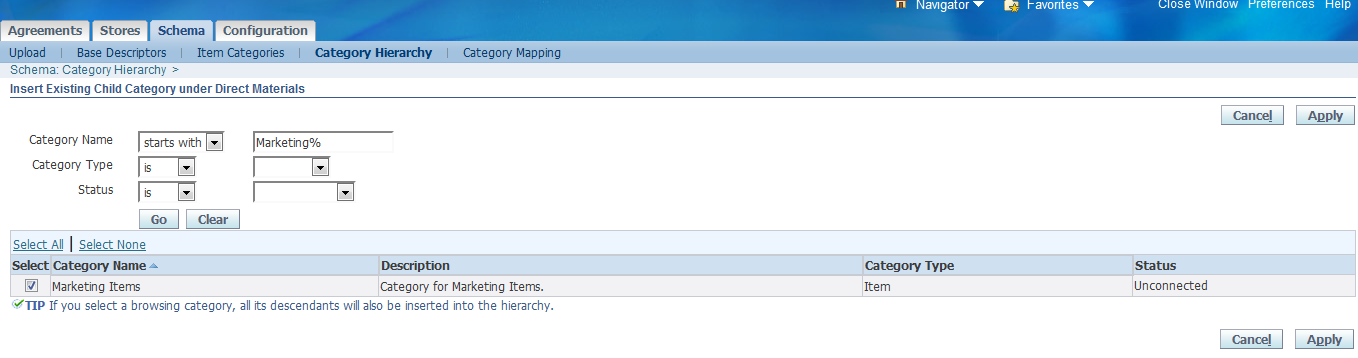
Query the existing category "Marketing Items"
Retrieved the existing category.
Select that category
Click on "Apply"
Now, you can see the entire Category Hierarchy like below.
Outside Items ==== > Direct Materials ==== > Marketing Items
We have successfully created the Category Hierarchy.
4. Purchasing Category Creation:
Now we will create one new item in Inventory module with new Purchasing Category and then will map that Purchasing Category into our Shopping Category in iProcurement.
Lets create a new Purchasing Category called "Marketing Materials" in Inventory Module. To create the new category, we need to add these new values into Value set. To find out that KFF and Value Set, follow the below steps.
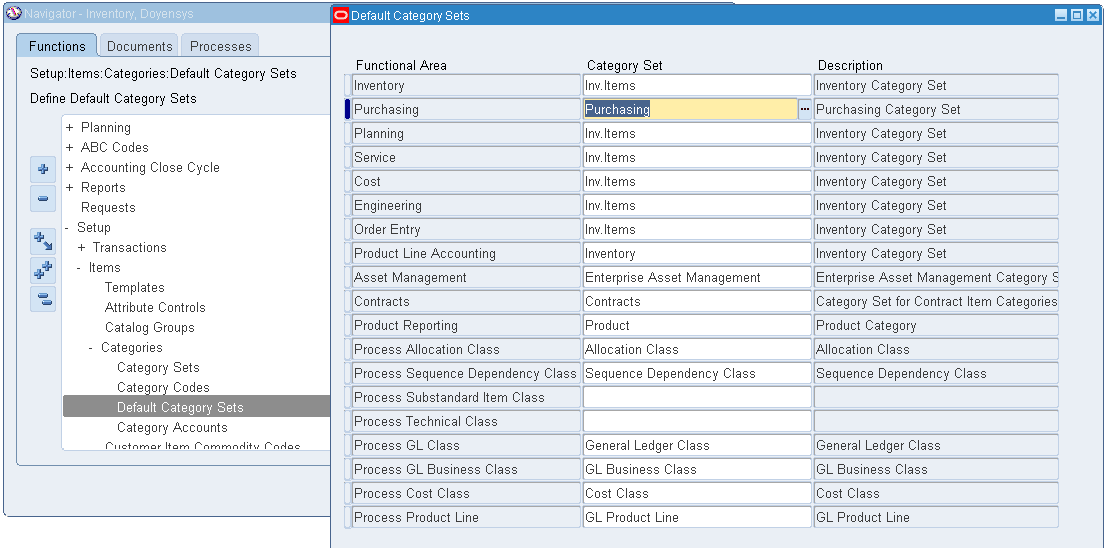
Step 1: Find out the "Default Category Set" for Purchasing
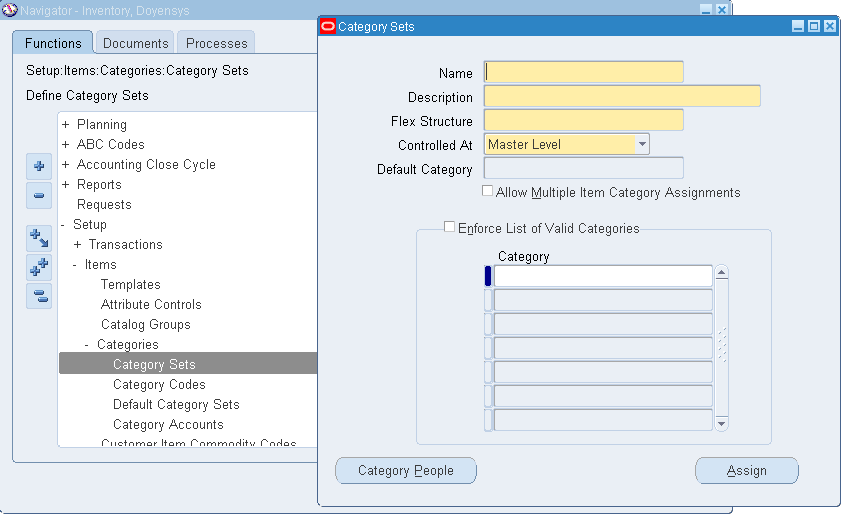
Navigation: Inventory > Setup > Items > Categories > Default Category Sets
Note down the category Set Name for the functional area "Purchasing"
Default Category Set for Purchasing = Purchasing
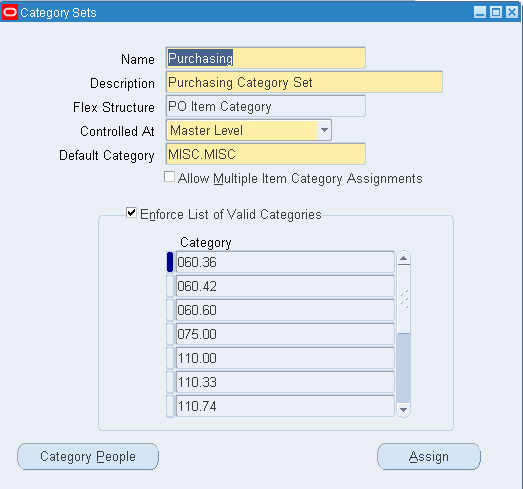
Step 2: Open the Category Set and note down the Flex Structure
Navigation: Inventory > Setup > Items > Categories > Category Sets
Flex Structure = PO Item Category
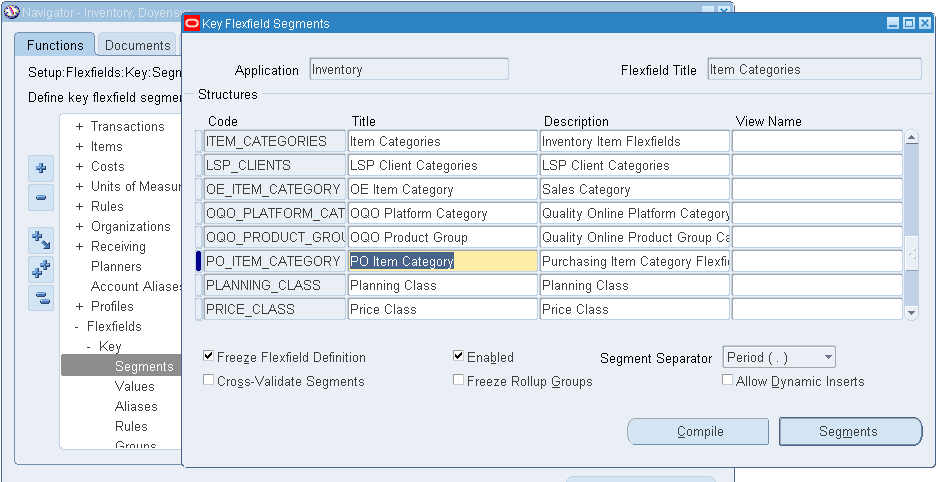
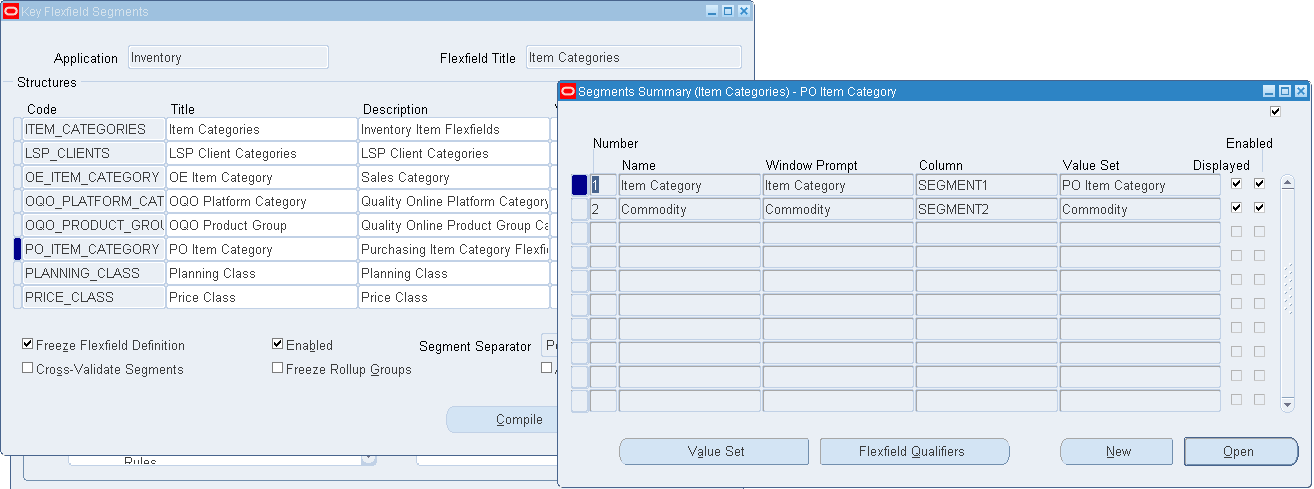
Step 3: Find out the KFF Segments
Navigation: Inventory > Flexfields > Key > Segments
Query by
Application: Inventory Title : Item Categories
Once query retrieves the result, find out the Purchasing Flex Structure name "PO Item Category"
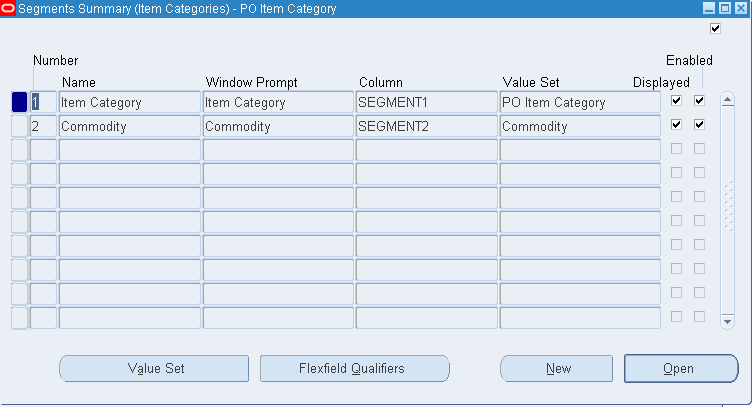
Click on "Segments"
Note down the Value Set Names for both the Segments
Segment1 = Item Category (Value Set = PO Item Category)
Segment2 = Commodity (Value Set = Commodity)
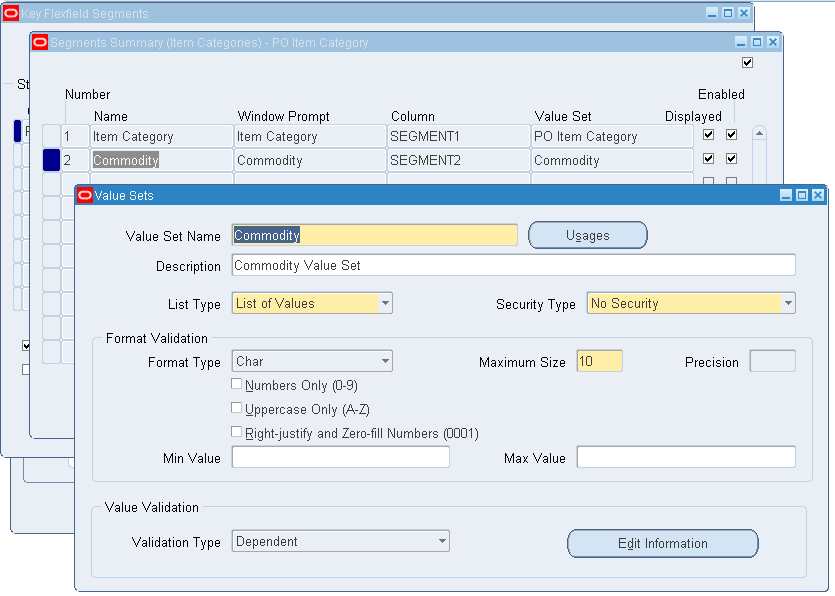
Click on "Value Set" for the SEGMENT1 "Item Category" and check the Validation Type
Note down the Validation Type. It's Independent.
Now, click the another segment "Commodity" and check for Value Set Validation Type.
It's "Dependent"
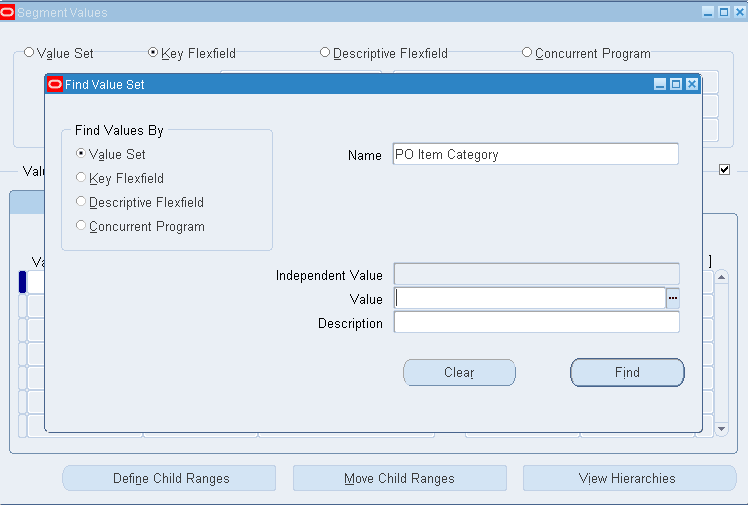
Step 4: Add the values into Value Set
Navigation: Inventory > Setup > Flexfields > Key > Values
Click Find
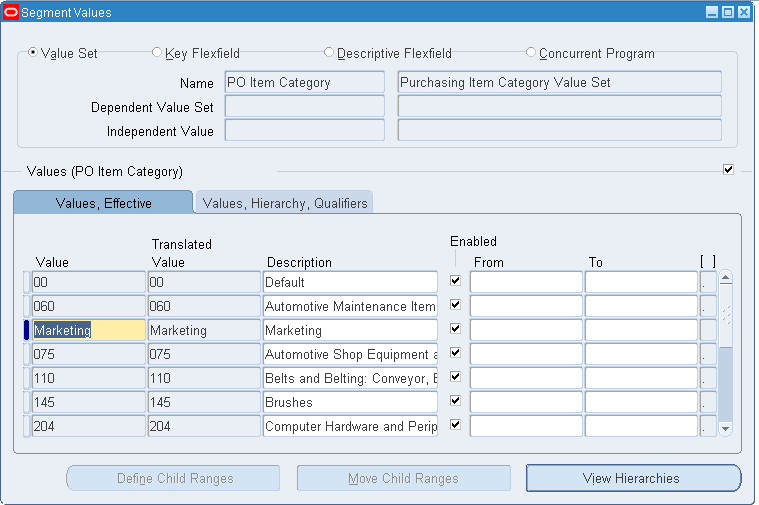
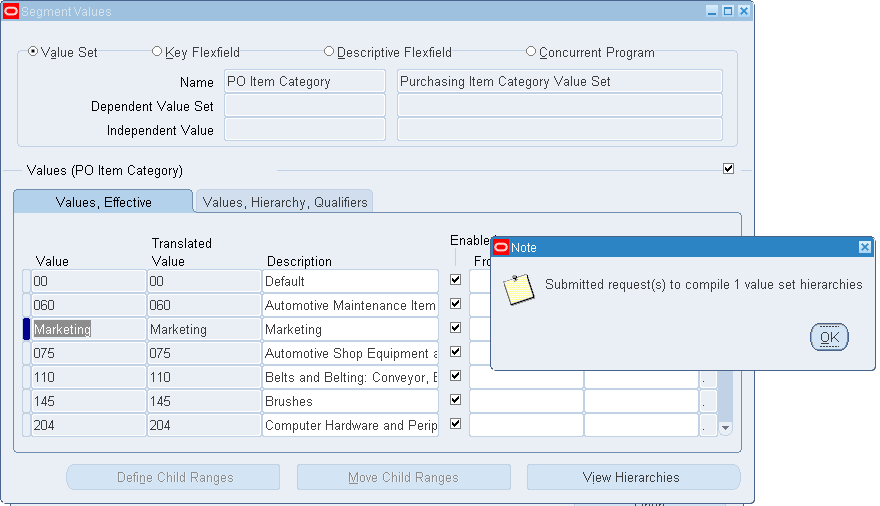
Add the new value "Marketing"
Save
Note: PO Item Category value set Validation Type is "Independent". So, what ever the values we are adding into this value set, all values will display. But, the "Commodity" value set is "Dependent" value set. So, We need to define the Dependent value from previous value set and then we need to add the new value.
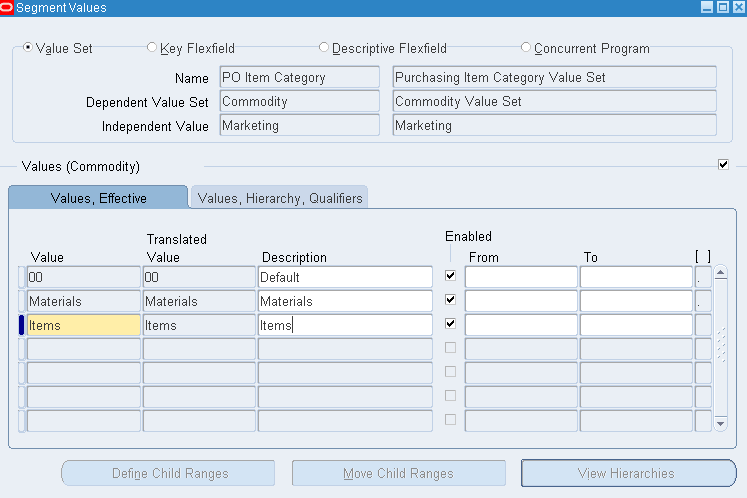
Now, add the another value "Items" in the value set "Commodity"
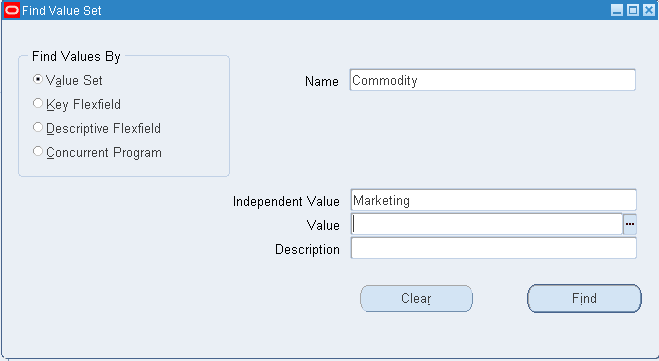
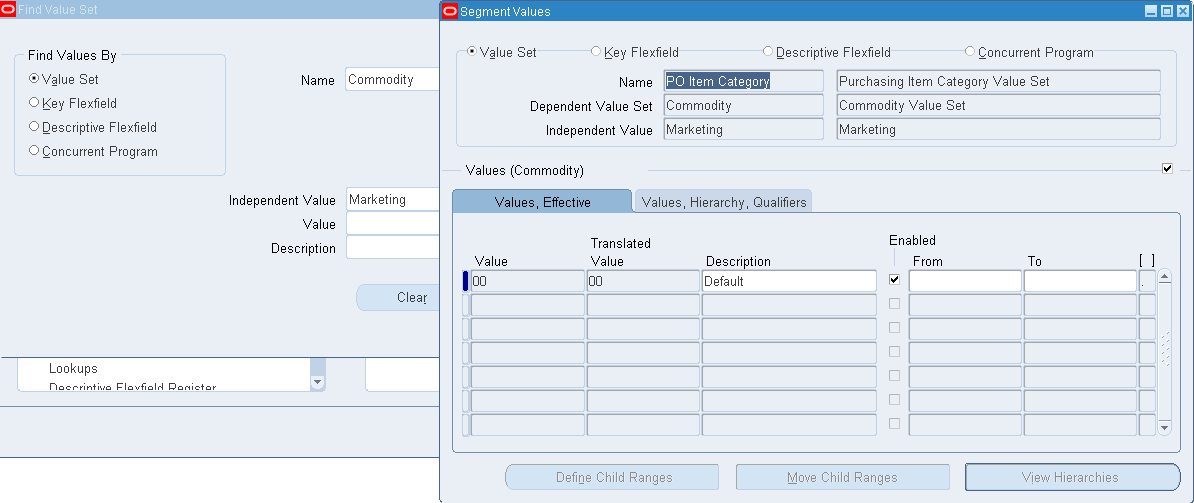
While adding the new value in the Dependent Value Set, we need to mention the Independent Value of the previous value set. In our case, the previous value set is PO Item Category. So, we need to enter the value from that value set.
Add two new values like "Materials" and "Items"
Now, create the Purchasing category "Marketing Materials" and "Marketing Items" and assign it to Purchasing Category Set
Step 5: Create Purchasing Category Code
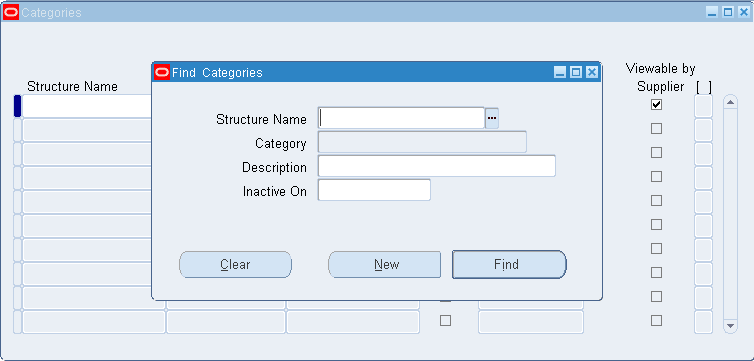
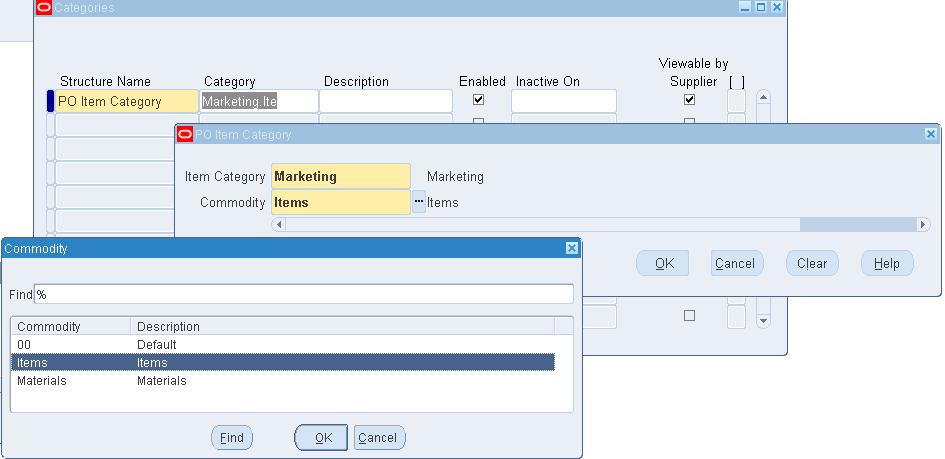
Navigation: Inventory > Setup > Items > Categories > Category Code
Click on "New"
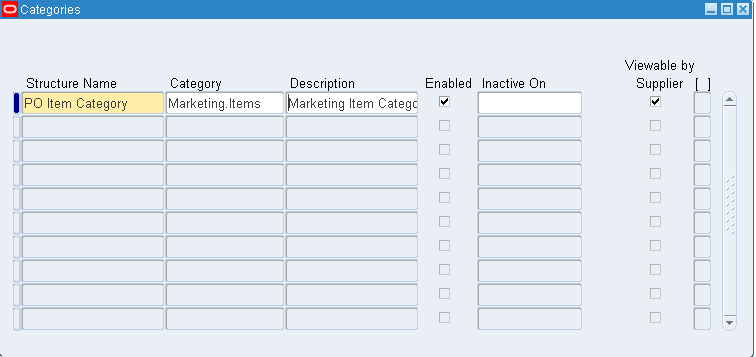
Create a new Category Code like "Marketing.Items"
Save
Step 6: Assign Category into Category Set
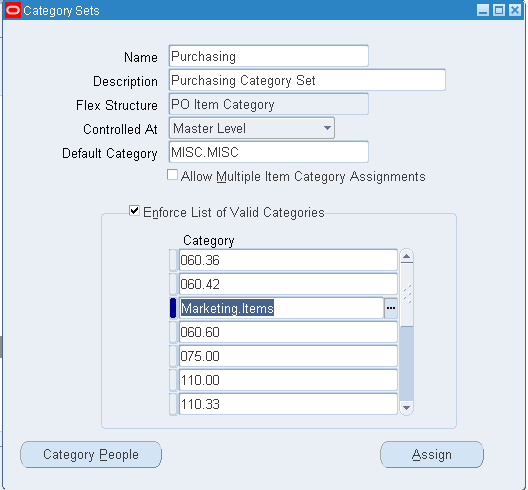
Navigation: Inventory > Setup > Items > Categories > Category Sets
Query the default "Purchasing" Category Set and add the Category "Marketing.Items" into that Purchasing Category Set
Save
5. Category Mapping:
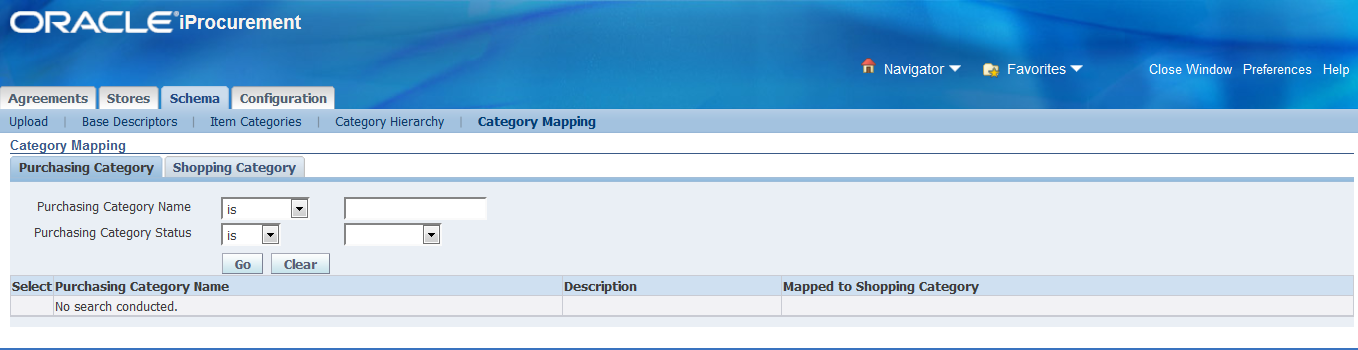
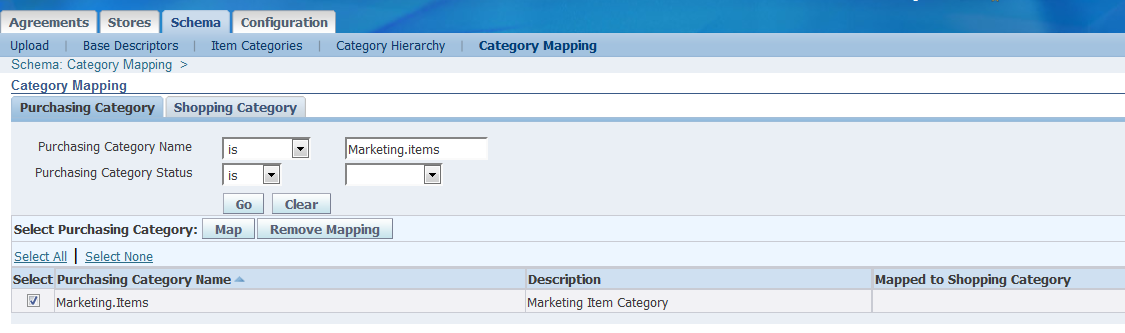
Query the newly created Purchasing Category and map it to Shopping Category.
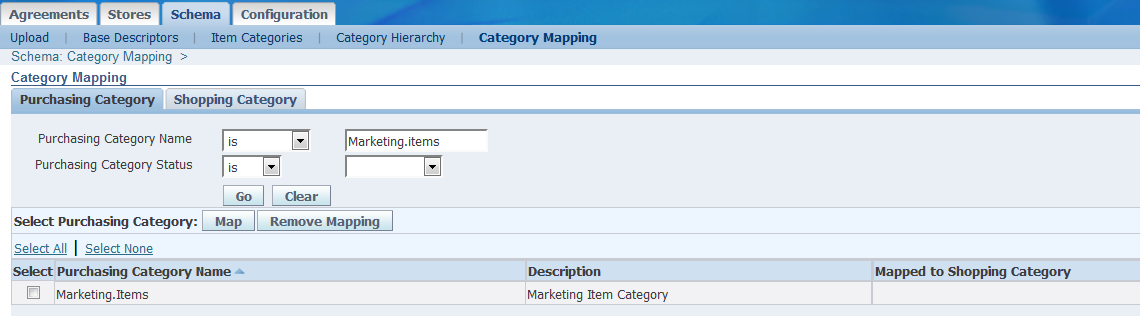
In our case, the newly created Purchasing Category is "Marketing.Items" and Shopping Category is "Marketing.Items"
Responsibility: iProcurement Catalog Administration
Navigation: Schema > Category Mapping
Query by either "Purchasing Category" name or "Shopping Category" name
Select the check box
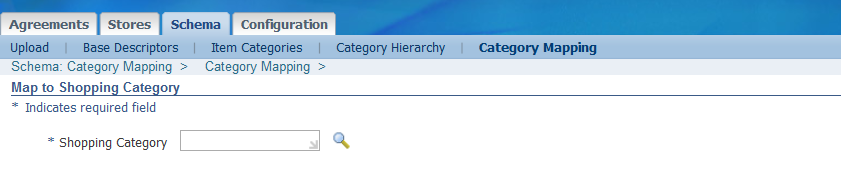
Click on "Map"
Query the Shopping Category "Marketing.Items"
Click "Apply"
Now, it's mapped.
Purchasing Category "Marketing.Items" have been mapped to Shopping Category "Marketing.Items"
6. Item Creation and Purchasing Category Assignment:
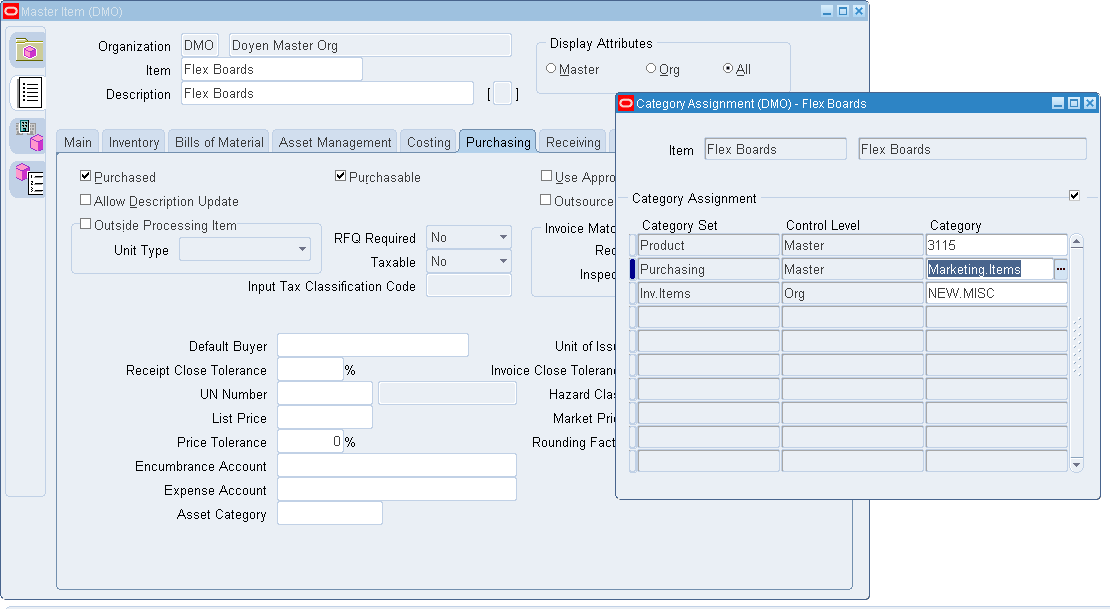
Now, create the new item and assign the newly created Purchasing Category "Marketing.Items"
Navigation: Inventory > Items > Master Items
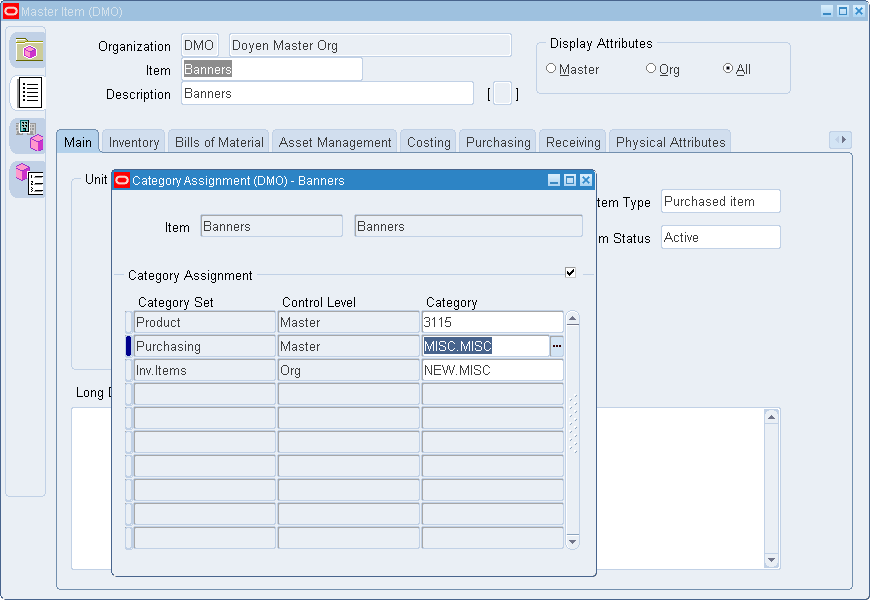
Apply the Purchasing Template
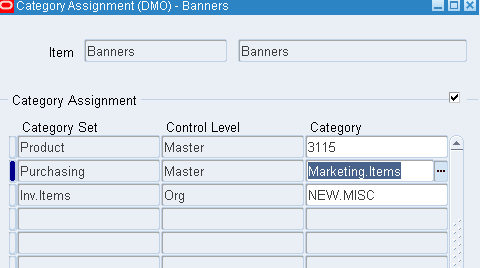
Assign the Purchasing Category
Navigation: Tools > Categories
Change the default category name from "MISC.MISC" to "Marketing.Items"
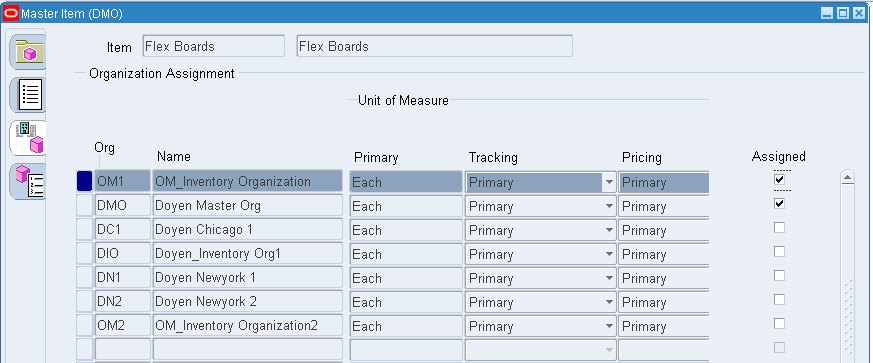
Assign it to required organizations
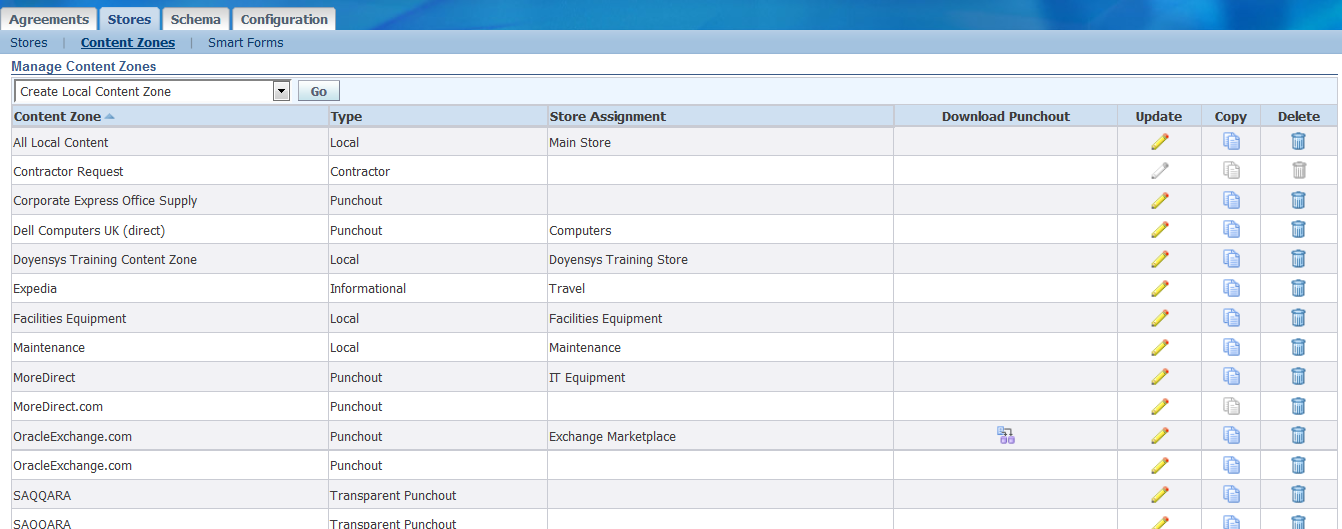
7. Content Zone Creation:
Responsibility: iProcurement Catalog Administration
Navigation: Stores > Content Zones
Select the Action "Create Local Content Zone" option from the LOV and click on "Go"
Enter the Content Zone Name and Description. And select the "Suppliers", "Categories" and then assign the "Content Zone Security"
Note for Suppliers:
Include items from all suppliers: Users can create the requisitions for all the items for all the suppliers (It should have Blanket Purchase Agreements)
Include items from specific suppliers: Users can create the requisitions for the items which was assigned to a specific supplier. If we enable this option then we need to enter that specific supplier name (It should have Blanket Purchase Agreements)
Exclude items from specific suppliers: Users can not create the requisitions for the items which was assigned to a specific supplier.
Exclude items that are sourced from suppliers: Users can not create the requisitions for the items which was already sourced from the suppliers (ASL and Sourcing Rule).
Include items without suppliers: Without the Blanket Purchase Agreements, the users can create the requisitions for all the items. As soon as we create the items with purchasing category and if that purchasing category mapped into shopping category then we can raise a requisition. 
In the above case, we have created the "Doyen Content Zone" and restricted by specific category "Marketing.Items" and operating Unit "OM_Operating Unit". So, we can raise a requisitions for all the items that belongs to "Marketing.Items" category without the Blanket Purchase Agreements.
Click "Apply"
Get the confirmation page and our newly created content zone "Doyen Content Zone".
8. Information Template Creation:
You can set up information templates to gather additional information in Oracle iProcurement to pass necessary order processing information to suppliers. When an information template is assigned to a category or item, the application prompts requesters to provide the information specified in the template when the item is added to the shopping cart. This information becomes a line-level attachment to the requisition.
For example, you can implement information templates for items such as business cards that require additional information (name, address, e-mail address, phone) from the requester. Oracle iProcurement prompts for name, address, e-mail address, and phone number when you order business cards. Each information template must be associated with an Oracle Purchasing item or item category. If an information template is associated with an item category, all items belonging to that category are also associated with the template.
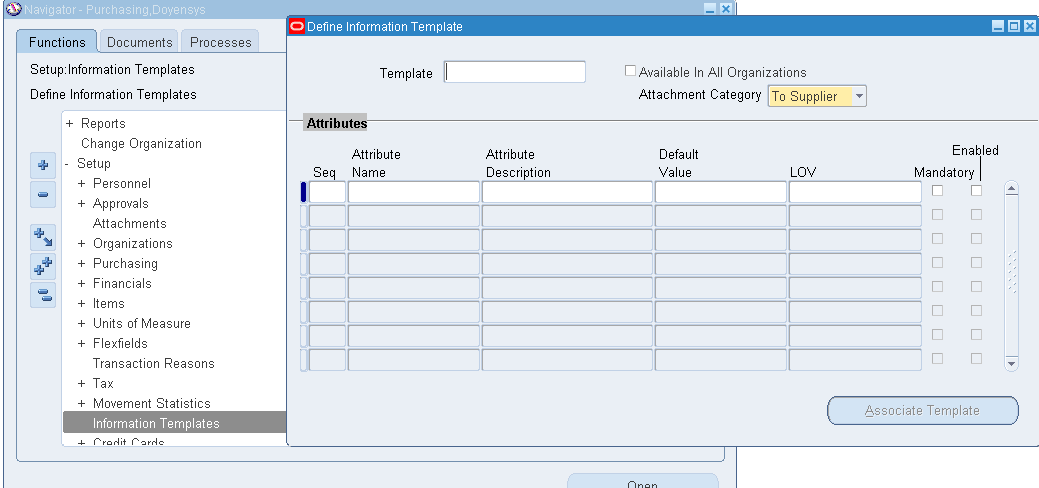
Responsibility: Purchasing Super User
Navigation: Setup > Information Templates
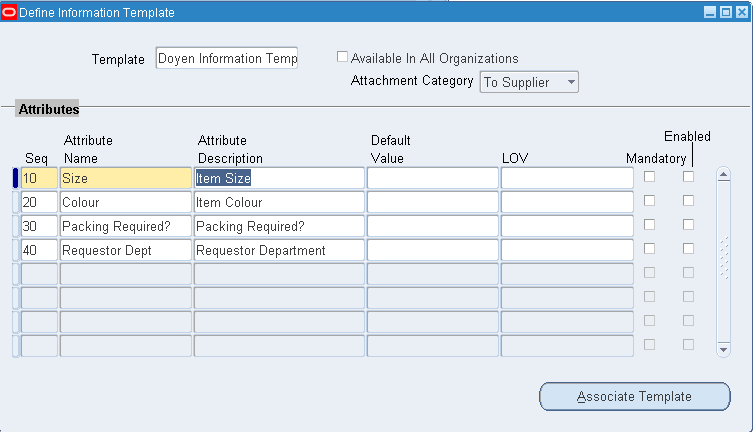
Define the Template Name and enter all the other details
Created the "Doyen Information Template" and saved
9. Smart Forms Creation:
Requesters can procure an item or service that is not found in the catalog. For these cases, they can use a non-catalog request. The non-catalog request offers the ability to add an item or service to the shopping cart based on a description of the item or service. Through the use of smart forms, companies can conveniently control both the list of fields and whether a particular field is enterable or pre-defined. For example, purchasing organizations can lock-down the purchasing category for certain requests and thereby more accurately categorize spend. Similarly, purchasing administrators can ensure spend is exclusively directed to preferred suppliers, and default contract numbers achieve touchless buying.
The following figure shows the non-catalog request that requesters can enter. In the Item Type field, requesters can enter goods billed by quantity, service billed by quantity, or goods or services billed as an amount.
In addition to this standard non-catalog request, you can create different smart forms and assign them to one or more stores.
Oracle iProcurement provides a default standard smart form. The catalog administrator can create multiple additional smart forms. For example, you can create a Computer Services smart form and an Office Services smart form. Once these smart forms are assigned to a store, both appear for the requester to select from.
To use the single, standard smart form that Oracle iProcurement provides, you do not need to perform any setup other than the profile options.
Responsibility: iProcurement Catalog Administration
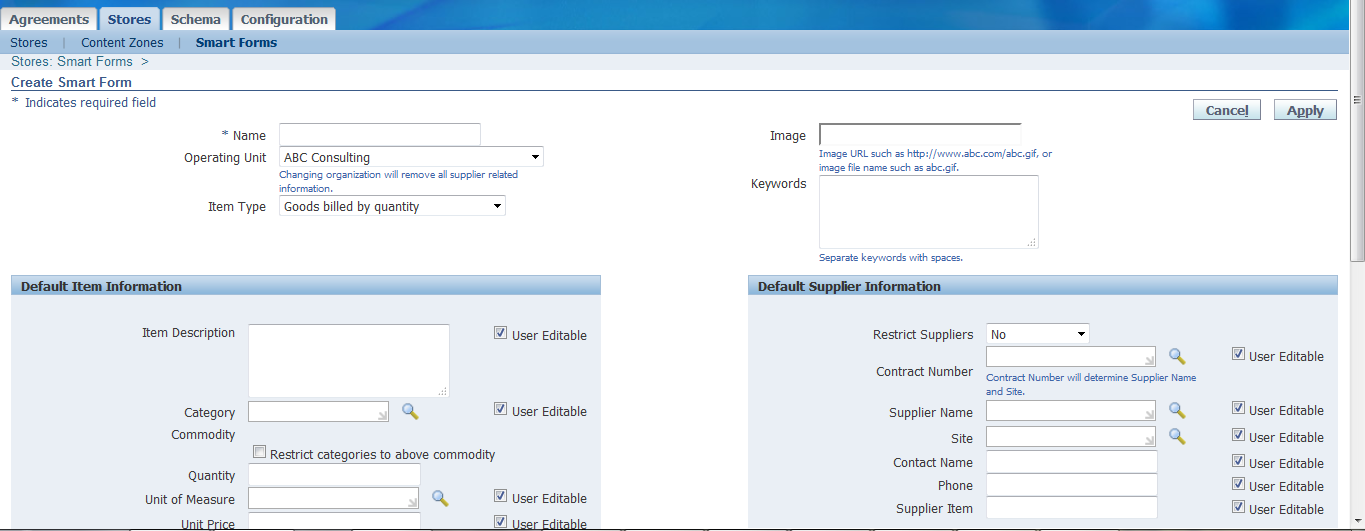
Navigation: Stores > Smart Forms
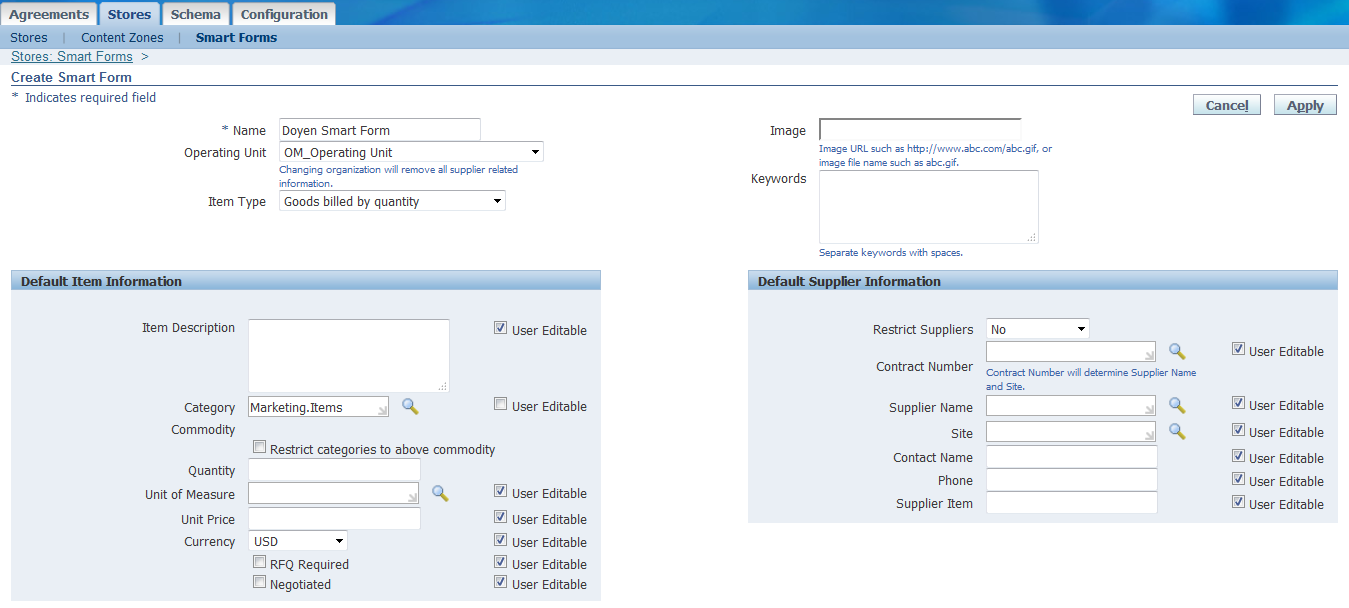
Click "Create Smart Forms"
Create the Smart Form by entering Name, OU, Item Type and Default item Information and Default Supplier Information details.
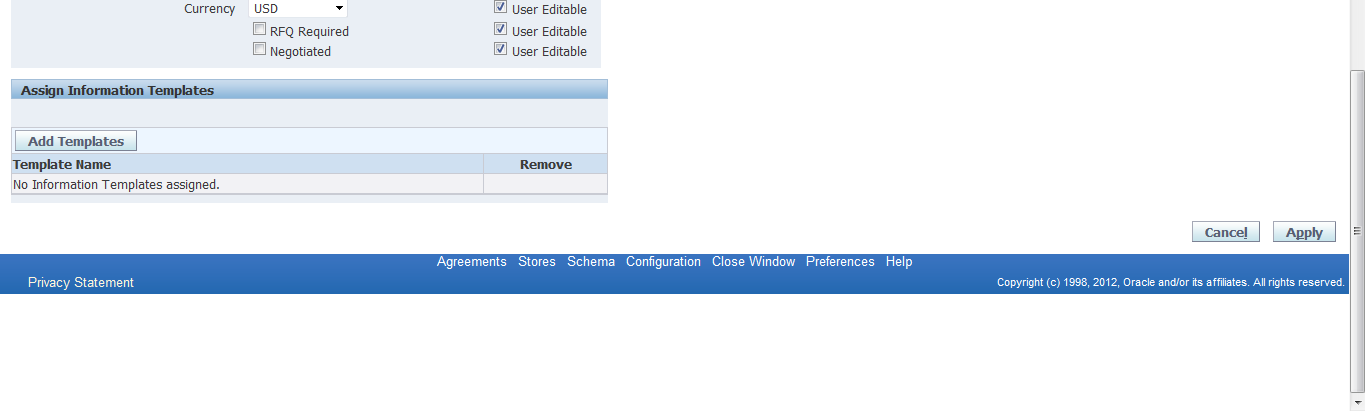
Assign the "Information Template" which was created earlier
Attached the Information Template "Doyen Information Template" which was created earlier to this Smart Form.
Click "Apply"
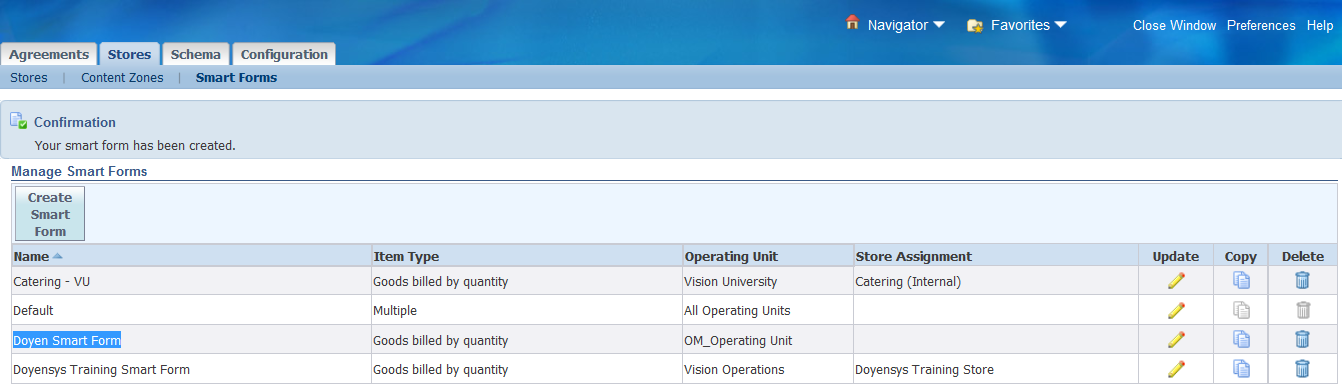
Will get the Confirmation page and it will display the newly created Smart Form name.
10. Create Stores:
A store enables you to group content zones and smart forms into a single, searchable store. The store should be easy for requesters to understand - for example, a store containing all computer supplies or all office supplies.
Responsibility: iProcurement Catalog Administration
Navigation: Stores > Stores
Click on "Create Store"
Enter the Store details and assign the Content Zones and Smart Forms
Click on "Continue"
Sequence Stores:
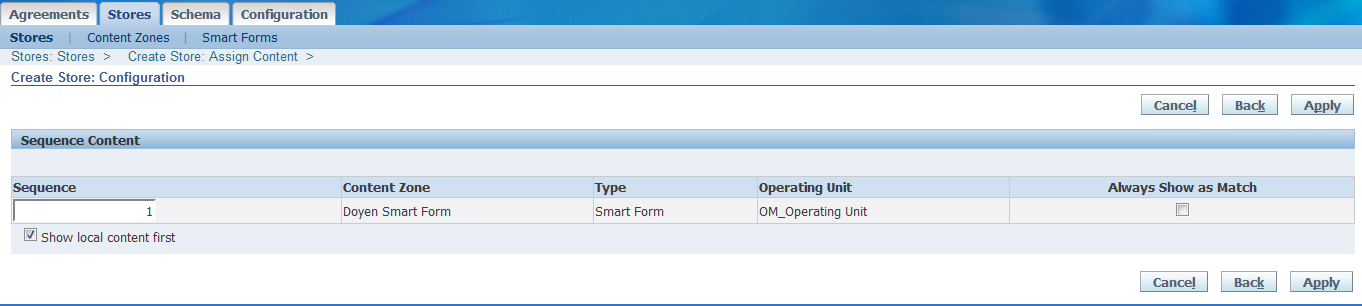
Assign the "Sequence"
Click "Apply"
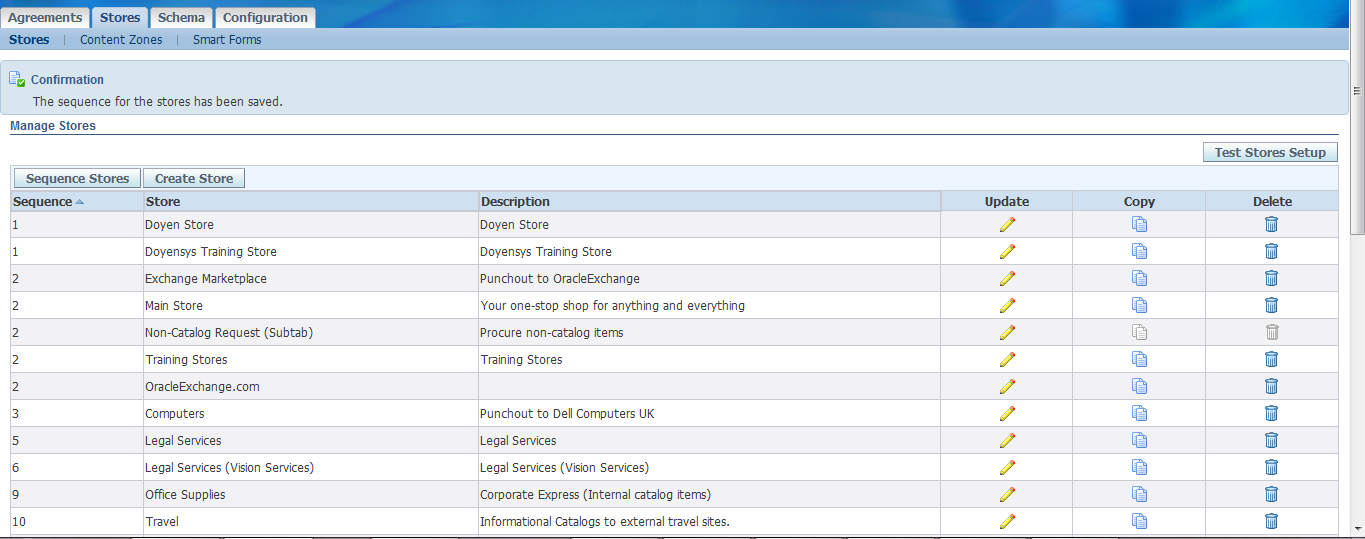
Store is created successfully. But, it's not in the front in the list.
Click "Sequence Stores"
Assign the Sequence Number to our Store "Doyen Store"
Click "Apply"
Now, it's sequenced and displayed in the front.
11. Create iProcurement Responsibility:
Responsibility: System Administrator
Navigation: Security > Responsibility > Define
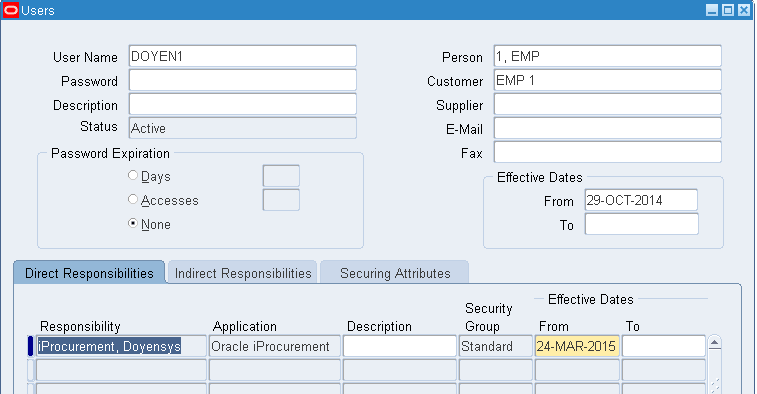
User - Responsibility Assignment:
Assign it to User "Doyen1"
Navigation: Security > Users > Define
Profile Options:
Create the Requisition:
Case I - Item without and with List Price:
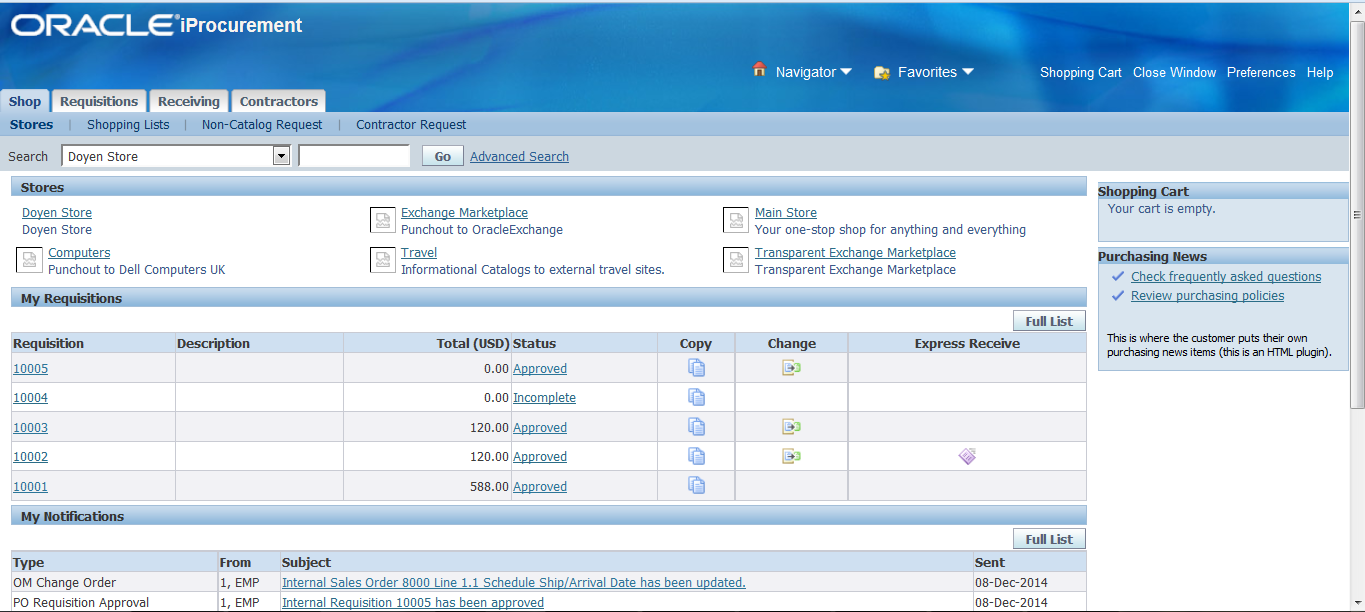
Responsibility: iProcurement, Doyensys
Navigation: iProcurement Home Page
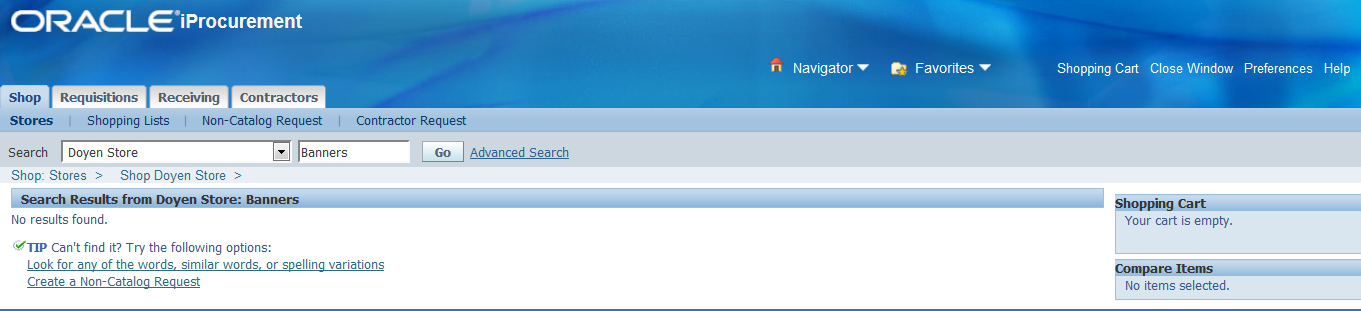
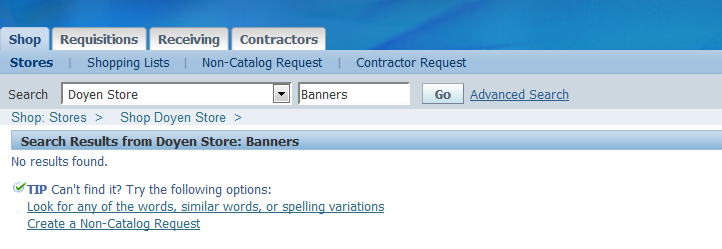
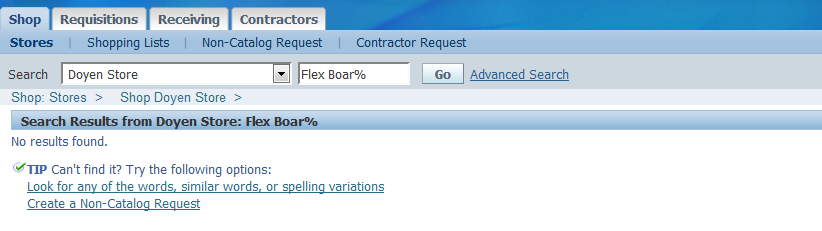
Search our item "Banners" in our Store "Doyen Store"
Item not available in our Store
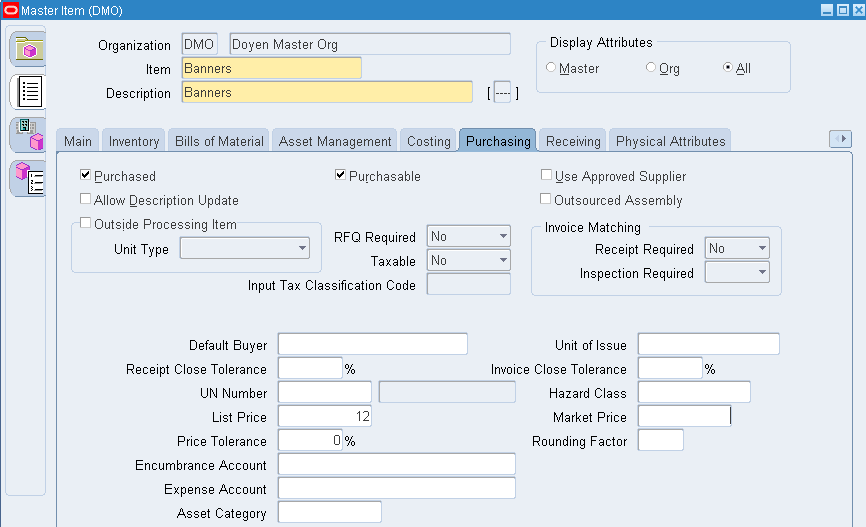
List Price at Master Organization level:
Check the Item's "List Price" in Item Master
Navigation: Inventory > Items > Master items
List Price is not available for this item "Banners"
Enter the List Price in Master Org level and then check whether it's available in iProcurement.
Entered List Price in Master Org is 12.
Now check whether this item is available in iProcurement for shopping.
Responsibility: iProcurement, Doyensys
Navigation: iProcurement Home Page
Search for the Item "Banners"
Still this item is not available for shopping.
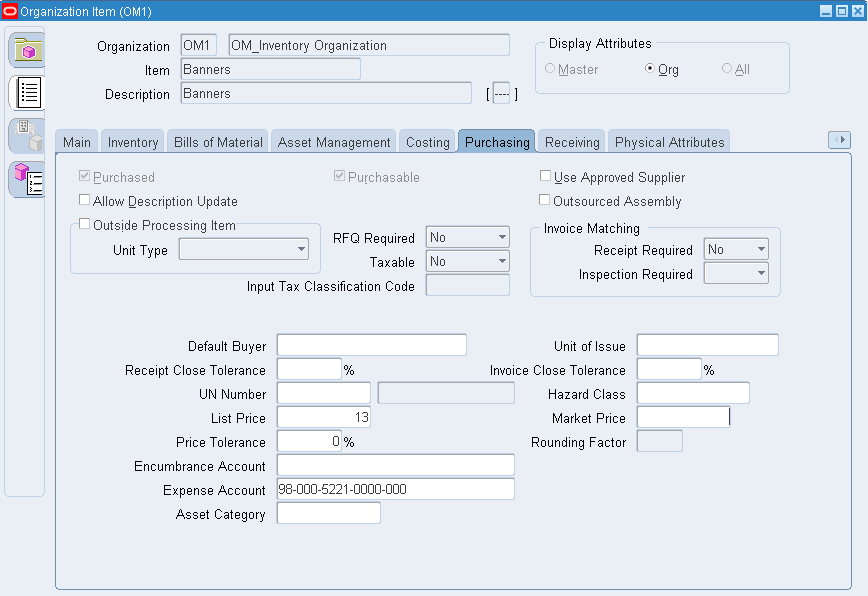
List Price at Inventory Organization:
Now, enter the List Price in child Organization
Navigation: Items > Organization Items
Query the Item and enter the List Price as 13.
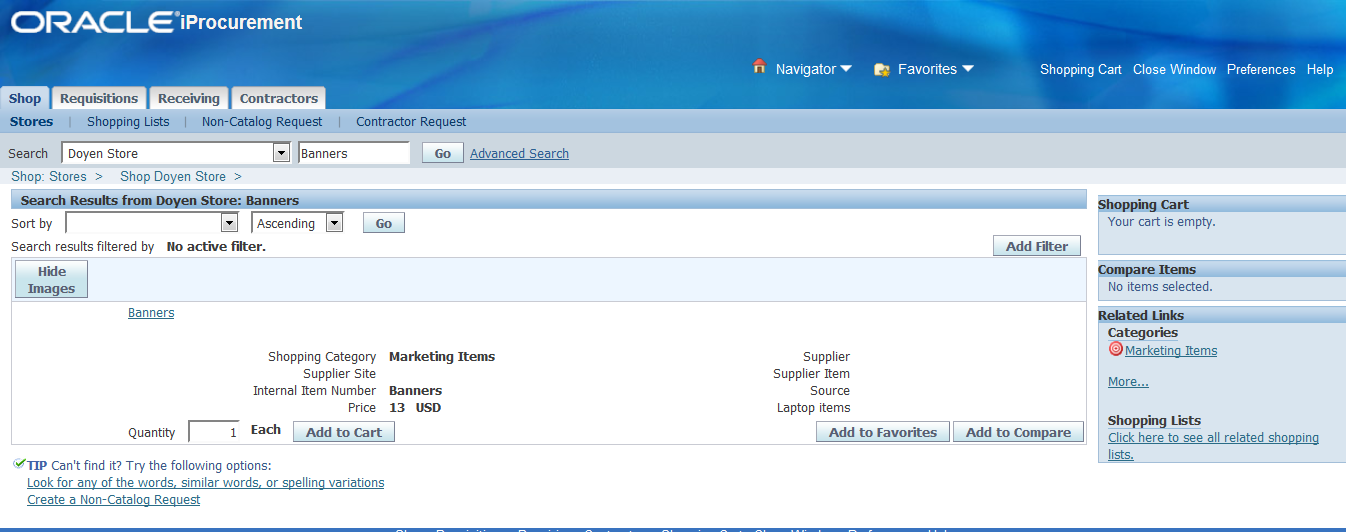
Now query this Item in iProcurement
Responsibility: iProcurement, Doyensys
Navigation: iProcurement Home Page
Search for the Item "Banners"
Now, this item is available for Shopping.
Create Catalog Requisition:
Click "Add to Cart"
Item have been added into Cart.
Click "View Cart and Checkout"
Click "Checkout"
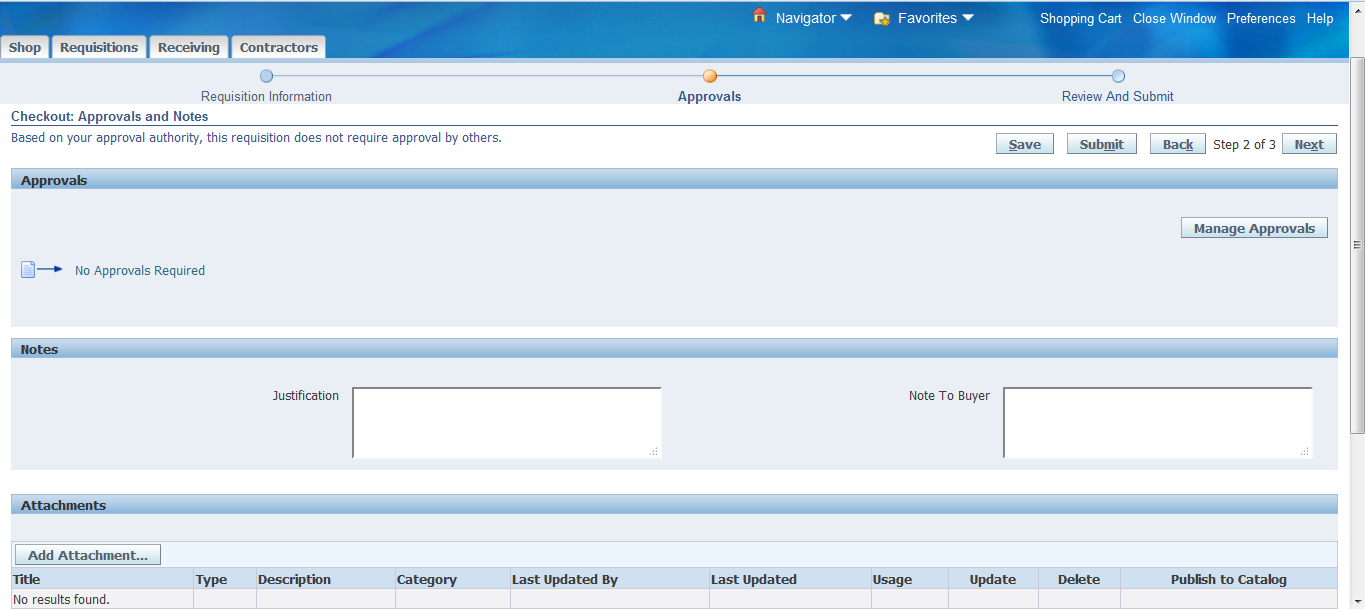
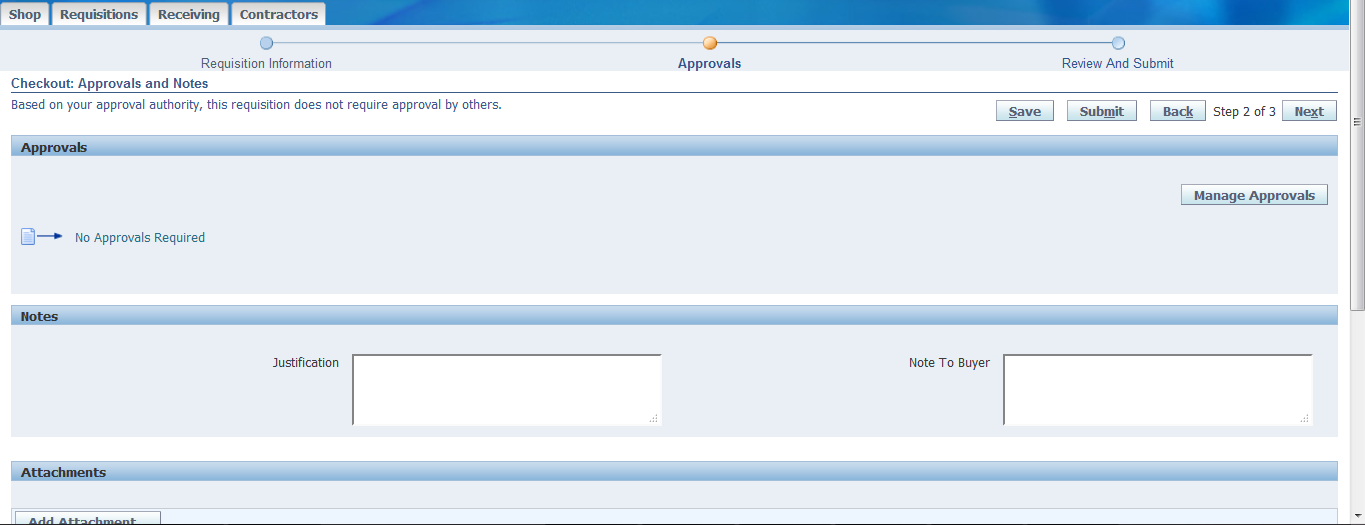
Click "Next"
Note: Approval list has not been generated. Because, "Owner can Approve" is enabled and preparer have the limit to approve this document.
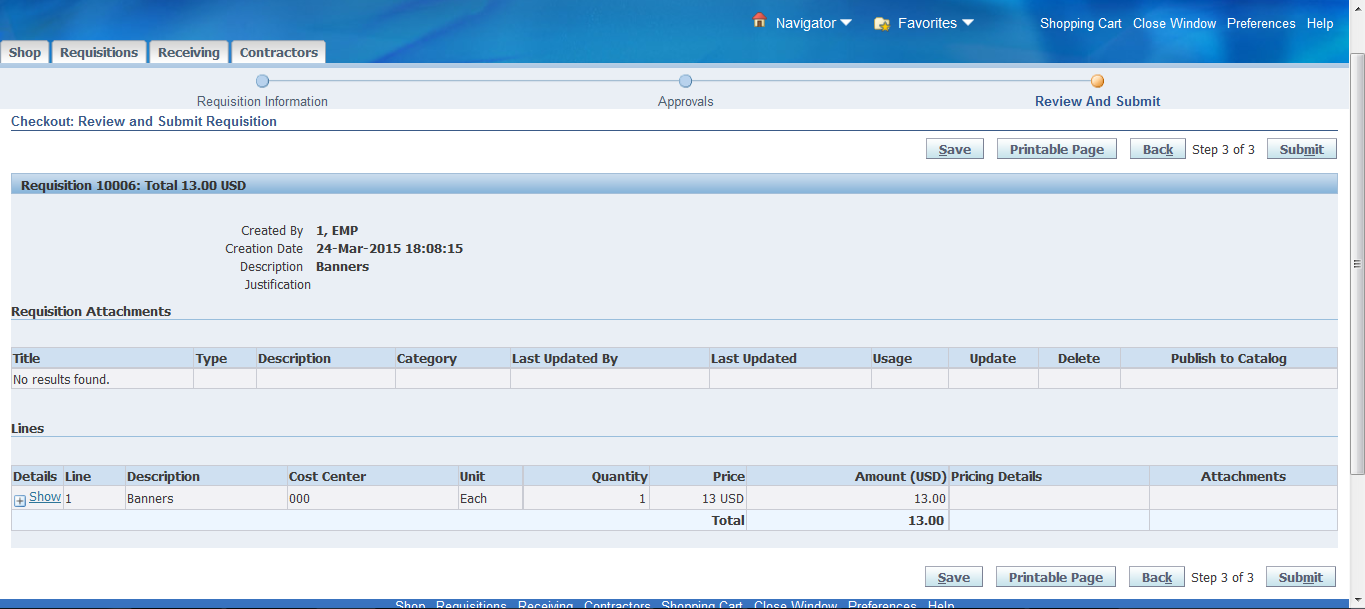
Click "Next"
Click "Submit"
Requisition# 10006 has been created and submitted.
To check the Requisition status navigate to "Requisitions" TAB
Requisition# 10006 has been Approved.
Check the "Requisition Summary"
It's a Purchase Requisition and it's in Approved status.
So, List Price is must at Inventory Organization level.
Case II - Item with Blanket Purchase Agreement and without List Price:
Create the new item "Flex Boards" and DON'T enter the LIST PRICE. Also assign the Purchasing Category "Marketing.Items".
Assign it to Inventory Organization "OM1"
Now, check this item is available in iProcurement for shopping
Item is not available in iProcurement for Shopping.
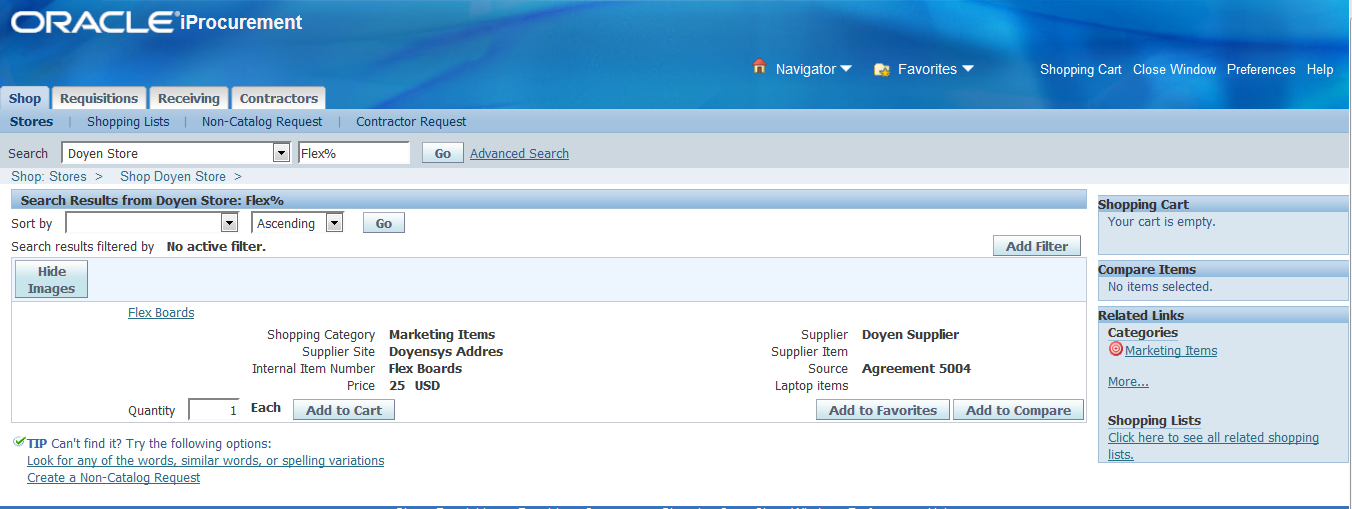
Create the Blanket Purchase Agreement for the item "Flex Boards" with Price USD 25.
Responsibility: Purchasing Super User
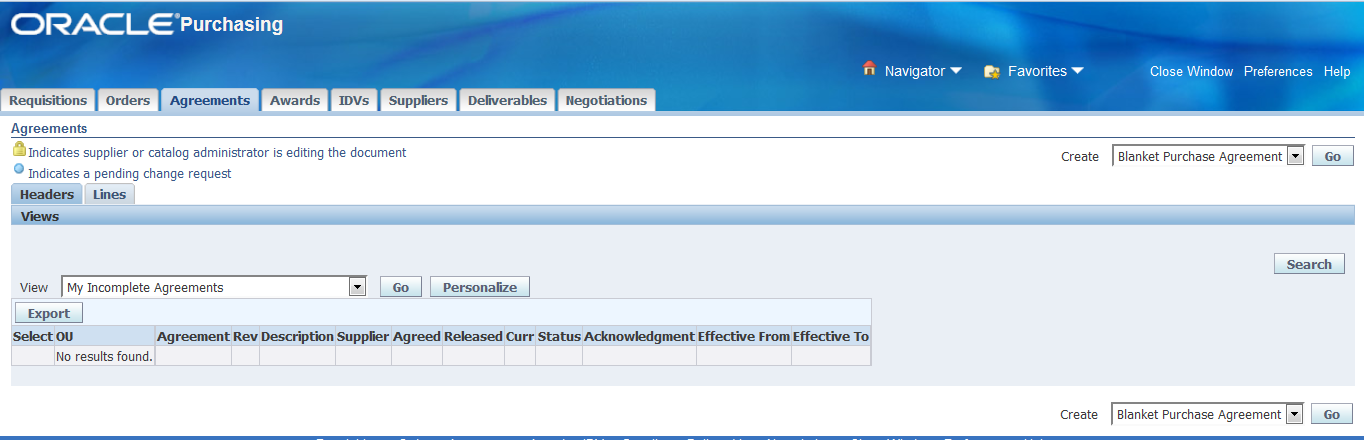
Navigation: Buyer Work Center > Agreements
Create "Blanket Purchase Agreement" and click "Go"
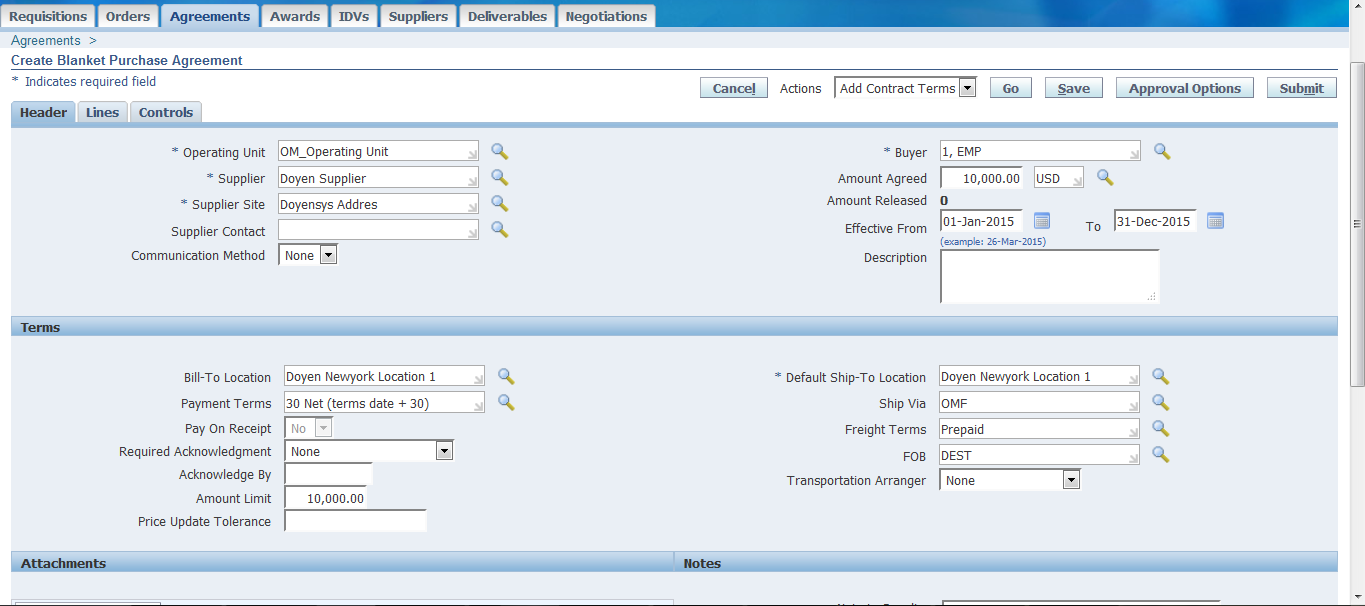
Enter the Header Details
Enter the Line Details
Price of the item "Flex Boards" is 25 USD
Click on "Approval Options"
It follows the hierarchy "PO Approval Hierarchy"
Click on "Submit Document"
Blanket Purchase Agreement# 5004 has been Created and Submitted for Approval.
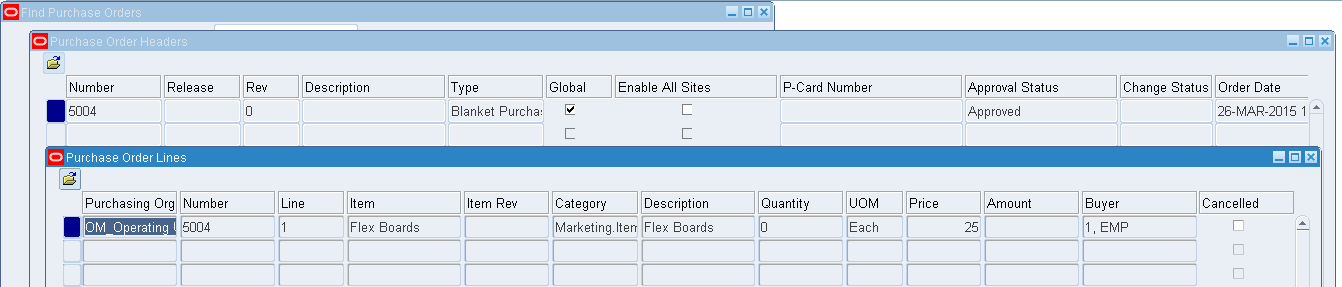
Check the BPA Status in "Purchase Order Summary" form
BPA has been "Approved" successfully.
Now check this item in iProcurement
Now, this item is available in iProcurement for shopping with Price of USD 25 which is from BPA and can see the Source as "Agreement 5004".
Case III - Item with List Price and Blanket Purchase Agreement:
Create a new Item "Pamphlets" and enter the List Price as 30 USD
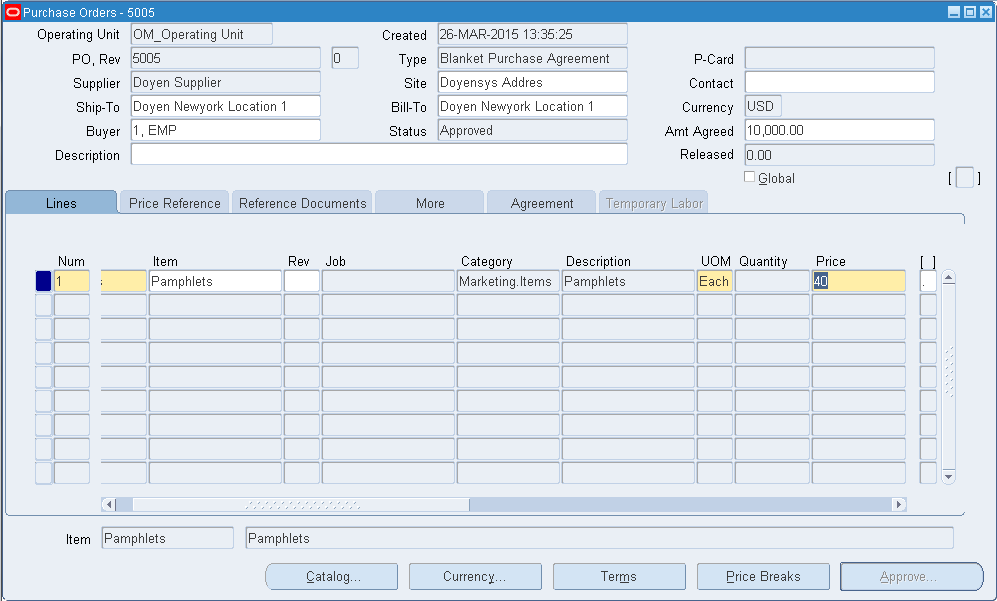
Create the BPA for this item with Item Price as USD 40
Blanket Purchase Agreement# 5005 has been created and Approved for the Item "Pamphlets" with USD 40.
Now check this item in iProcurement
This item is available in iProcurement with List Price USD 40. This price is from BPA and not from List Price.
Case IV - Item Without Shopping Category:
Step 1: Profile Option:
Set the Profile Option "POR: Autocreate Shopping Category and Mapping" to "Yes" (Site Level)
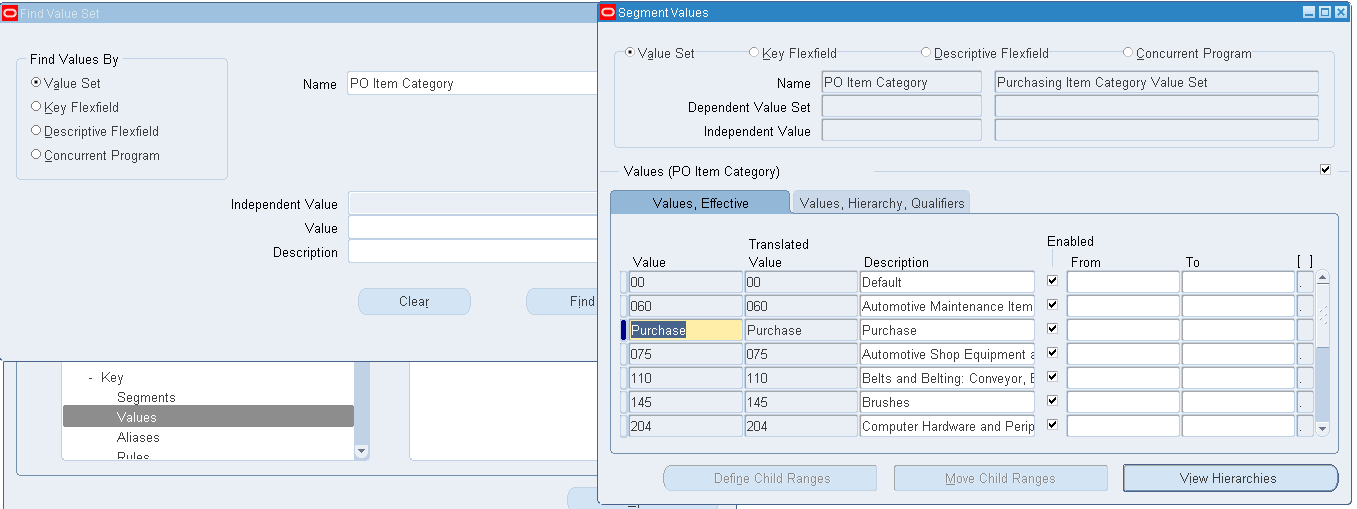
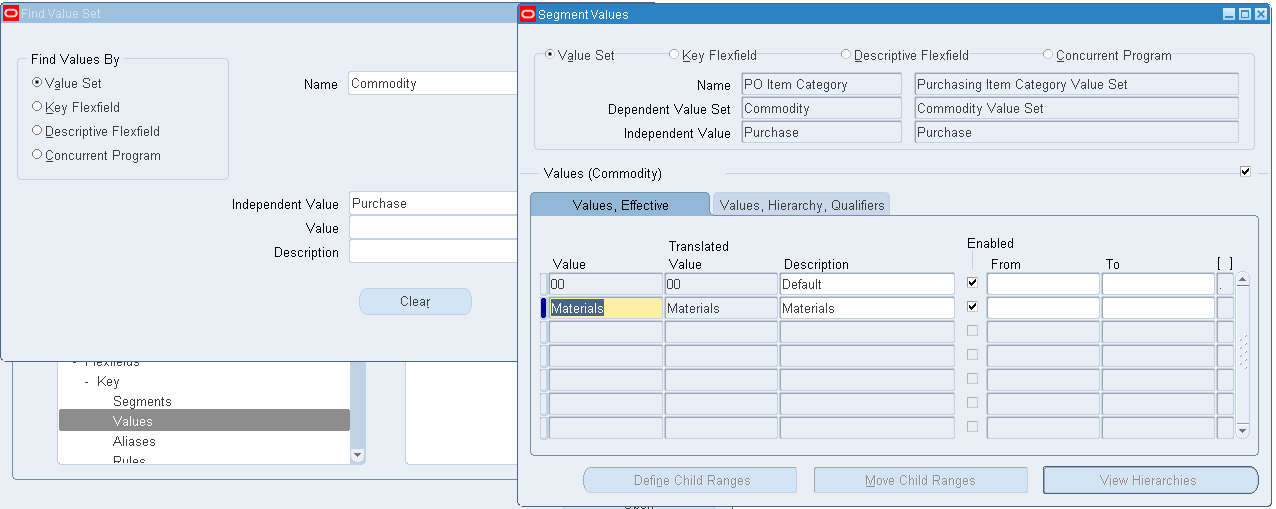
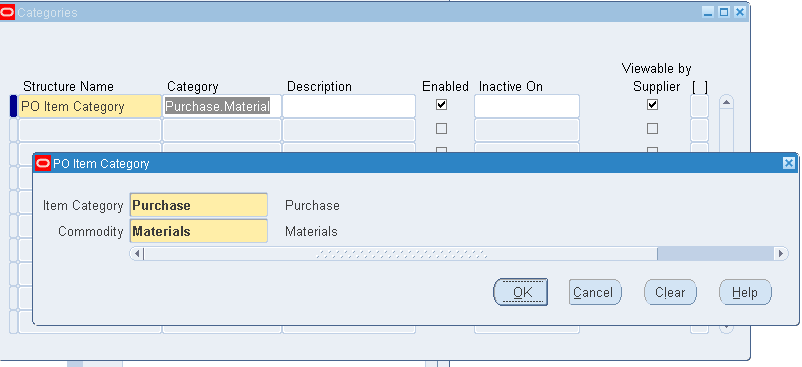
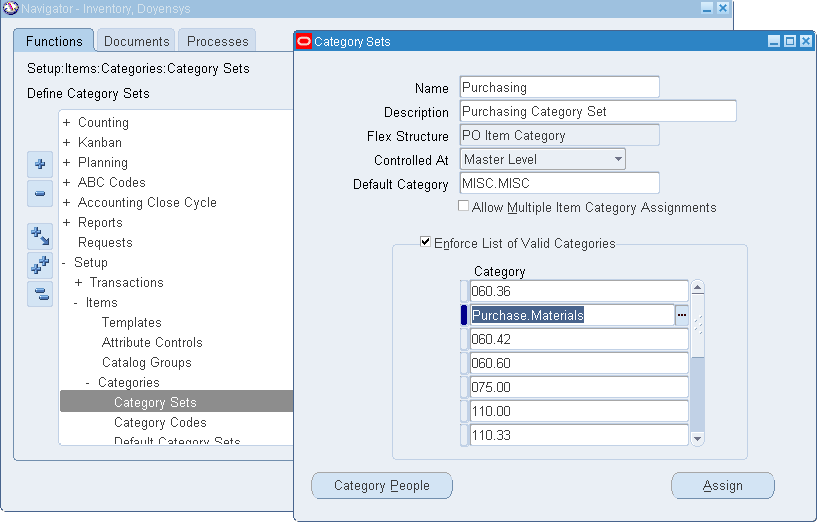
Step 2: Create new Purchasing Category "Purchase.Materials"
A). Navigation: Inventory > Setup > Flexfields > Segments
Query the KFF for "Item Categories" and check the Segments and Value Sets for "PO Item Category"
Note down the Value Set for both the Segments
Item Category = PO Item Category
Commodity = Commodity
B). Add the new values "Purchase" & "Materials" in both the value sets
Navigation: Inventory > Setup > Flexfields > Values
Add the new value "Purchase" in "PO Item Category" Value Set
Add the new value "Materials" in "Commodity" Value Set
C). Create the purchasing category as "Purchase.Materials"
Navigation: Inventory > Setup > Items > Categories > Category Codes
D). Add this new purchasing category "Purchase.Materials" into "Purchasing" Category Set
Navigation: Inventory > Setup > Items > Categories > Category Sets
Step 3: Item Creation:
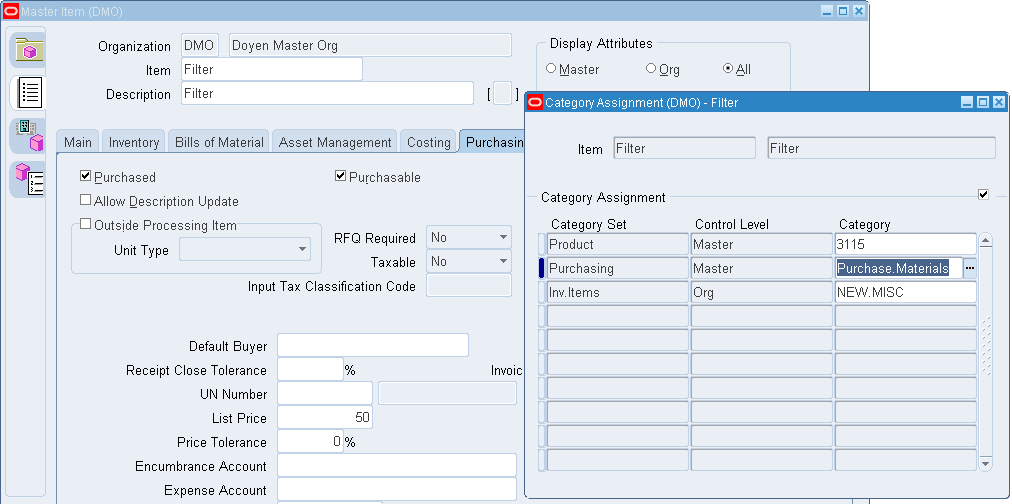
Create a new item "Filter" with List Price USD 50 and assign the new Purchasing Category "Purchase.Materials".
Step 4: Check the Category Mapping:
Responsibility: iProcurement Catalog Administrator
Navigation: Schema > Category Mapping
Query the newly created purchasing category "Purchase.Materials"
Automatically Shopping Category has been created with the same Purchasing Category name and it's Mapped. This is because of that profile option.
Step 5: Item availability in iProcurement:
Check this item is available in iProcurement for shopping or not
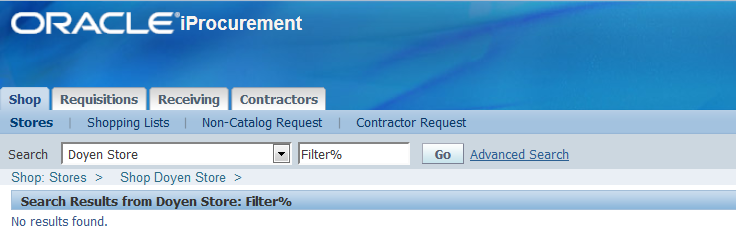
Item not available in iProcurement. Because we have restricted the catalog by category name "Marketing.Items".
Step 6: Check our content zone "Doyen Content Zone" for our Store:
Responsibility: iProcurement Catalog Administrator
Navigation: Stores > Content Zones
Click on "Update" button for our content zone "Doyen Content Zone"
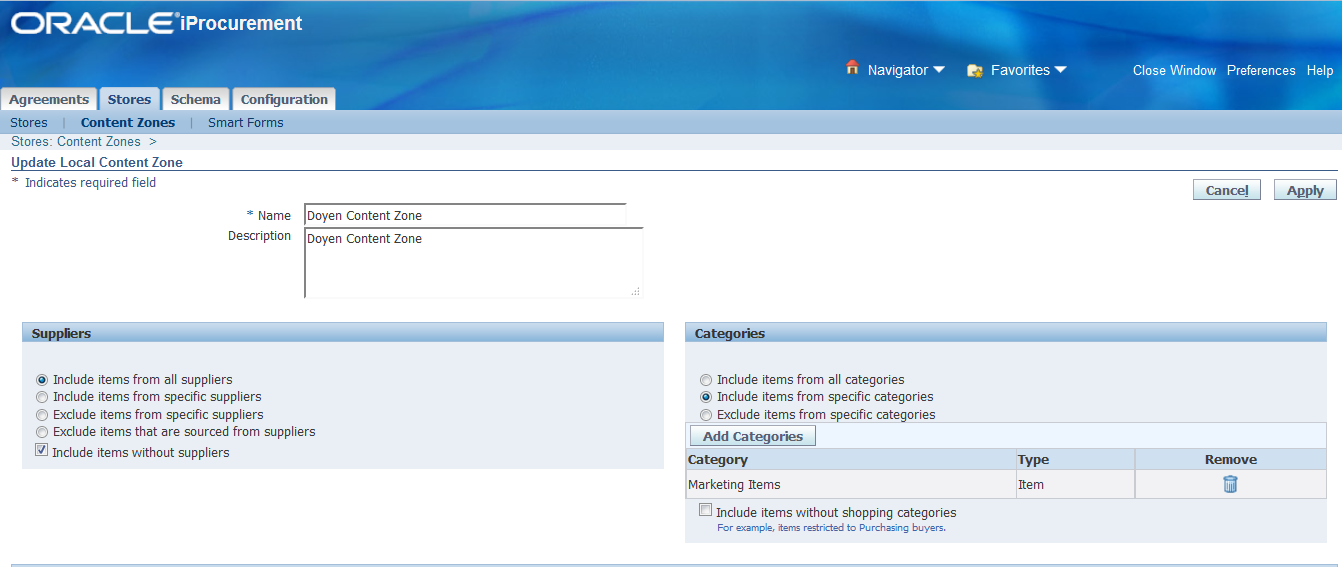
It's restricted to "Marketing Items" category.
Change this restriction and enable "Include items from all categories"
Apply.
Now, check the item "Filter" is available in iProcurement for shopping or not
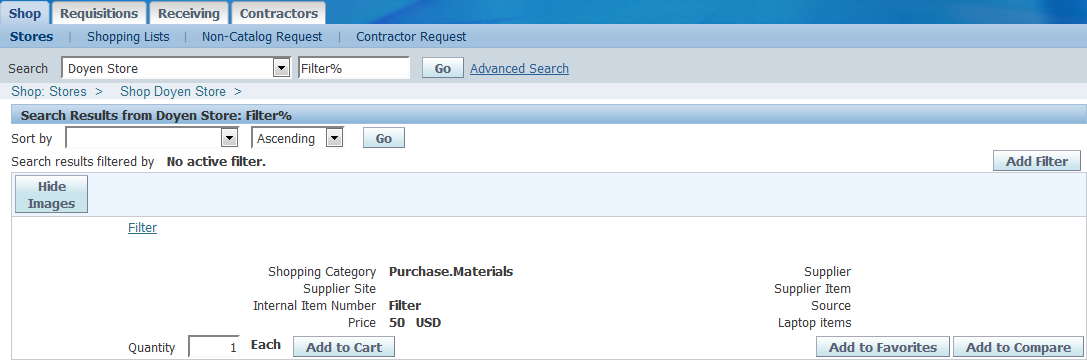
Yes. Now, the item is available for shopping in iProcurement.
Case V - Internal Requisition through iProcurement
Step 1 - Profile Option:
Responsibility: System Administrator Navigation: Profile > System
Set the profile option "POR:Allow Manual Selection of Source" to "Yes"
Step 2 - Create a Item and Assign it to two Organizations:
Responsibility: Inventory Super User Navigation: Items > Master Items
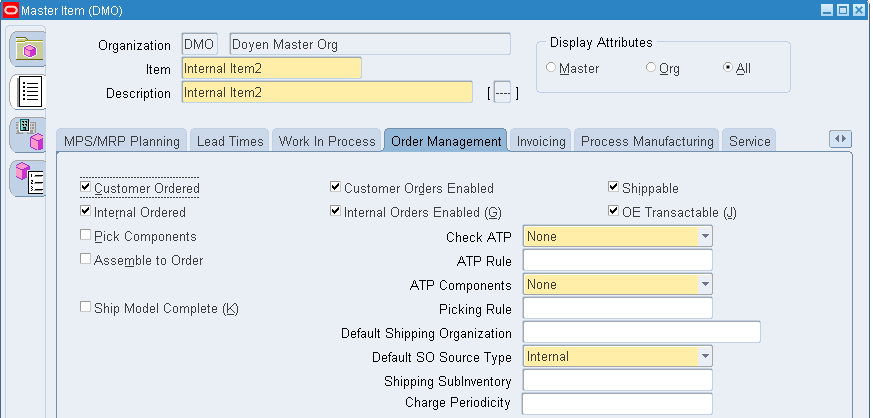
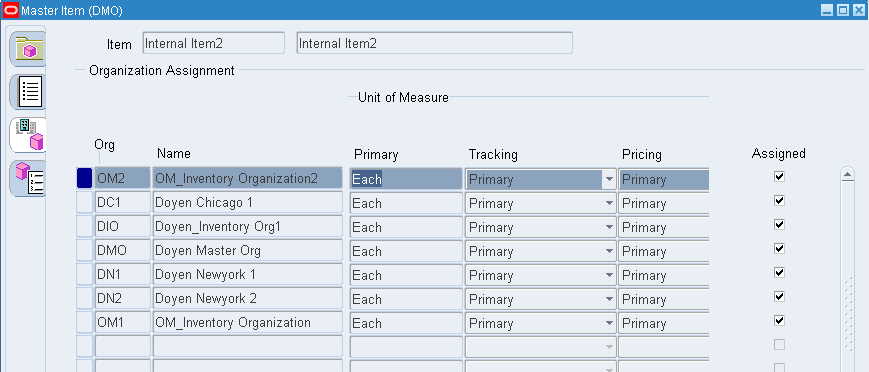
Created the Internal item "Internal Item2" with Purchasing Category "Purchase.Materials" and assigned to OM1 & OM2
Step 3 - Attach Inventory Organization into Location:
Navigation: Inventory > Setup > Organizations > Organizations
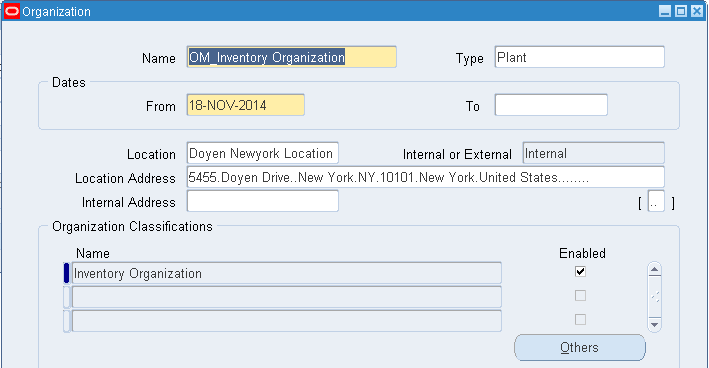
Query the Organization OM1 "OM_Inventory Organization" and note down the Location.
Location is "Doyen Newyork Location 1"
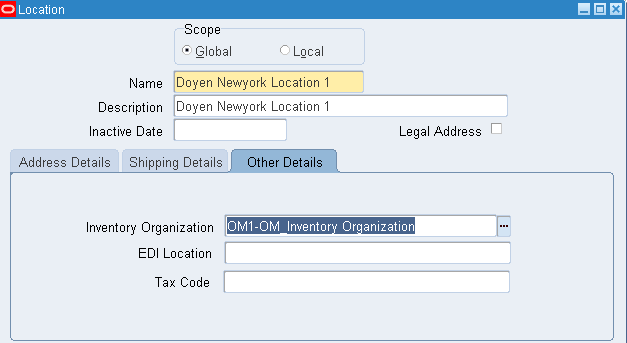
Now, attach the Inventory Org in Location.
Navigation: Inventory > Setup > Organizations > Locations
Query the Location "Doyen Newyork Location 1" and attach the Inventory Organization "OM1-OM_Inventory Organization"
Step 4 - Shipping Network:
Navigation: Inventory > Setup > Organizations > Shipping Networks
Define the Shipping Networks between both the Inventory Organizations OM1 and OM2
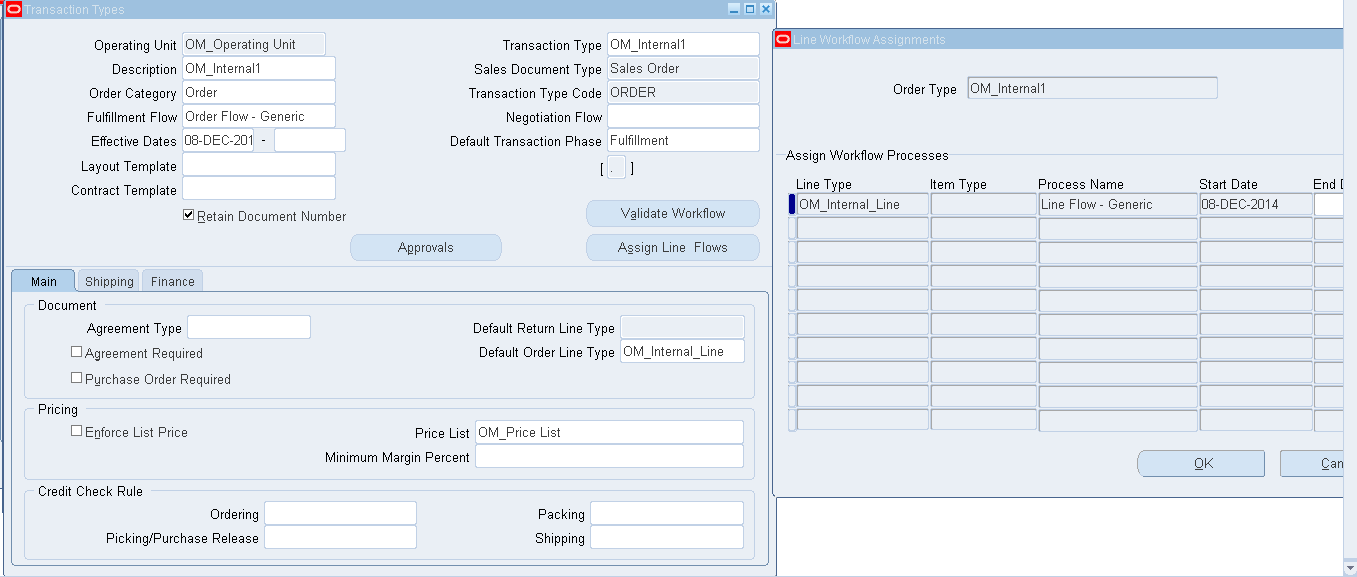
Step 5 - Define Internal Order Transaction Type
Responsibility: Order Management Super User
Navigation: Setup > Transaction Types > Define
Defined the Internal Order "OM_Internal1"
Step 6 - Define Internal Customer
Responsibility: Order Management Super User
Navigation: Customers > Standard
Defined the Internal Customer "OM Internal Customer" and attached the internal location and organization in Ship To site.
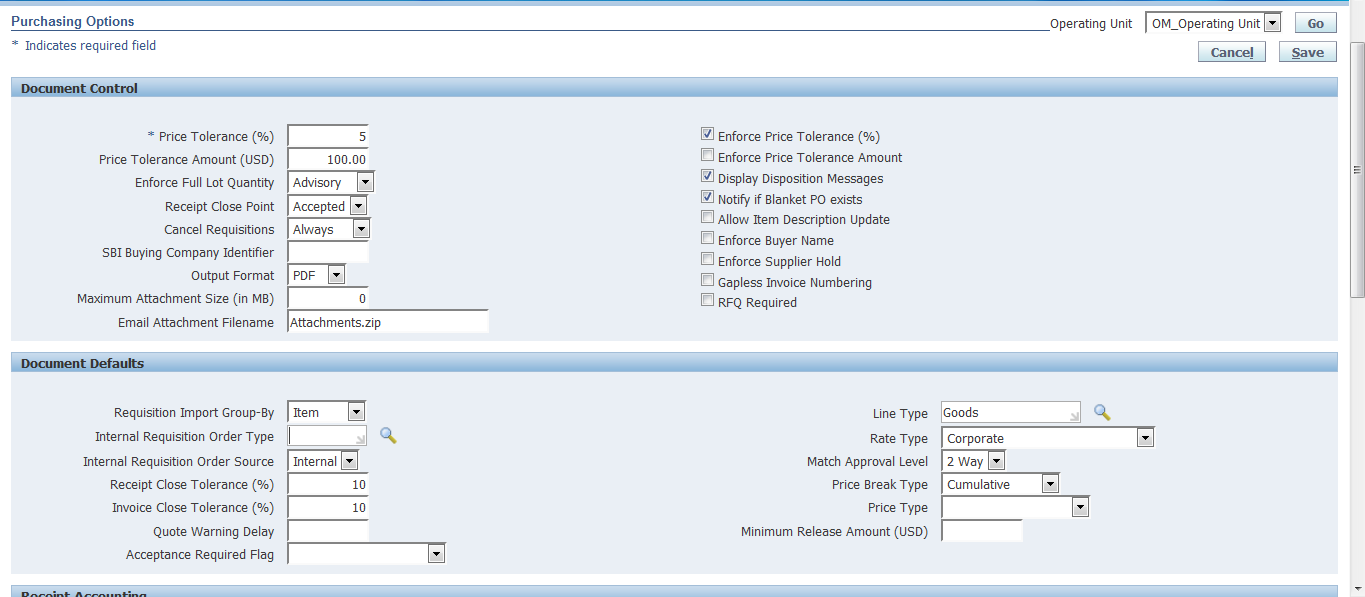
Step 7 - Assign Internal Requisition Source Type in Purchasing Options
Responsibility: Purchasing Super User
Navigation: Setup > Organizations > Purchasing Option
Step 9 - Create Internal Requisition in iProcurement
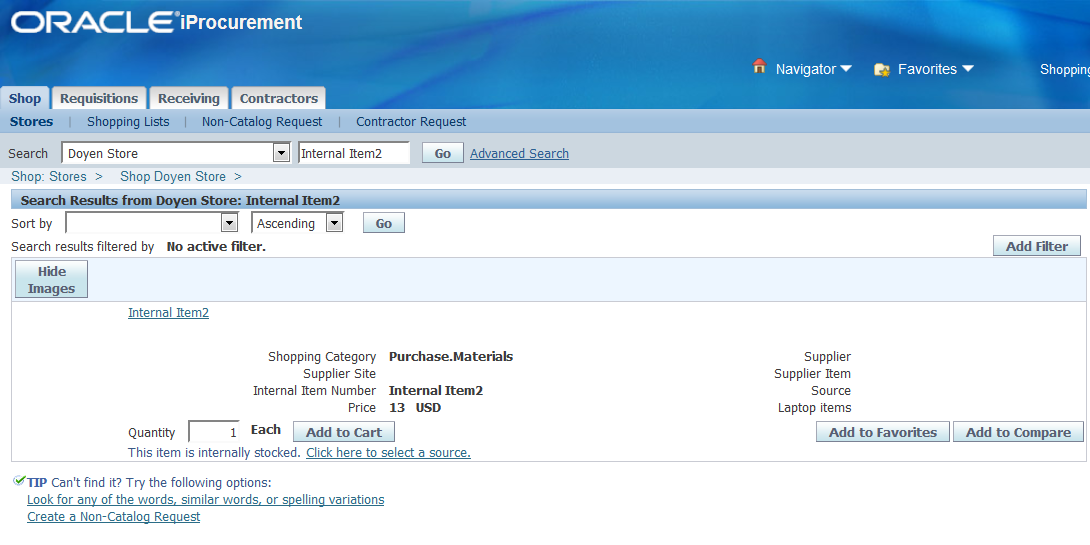
Responsibility: iProcurement Navigation: iProcurement Home Page
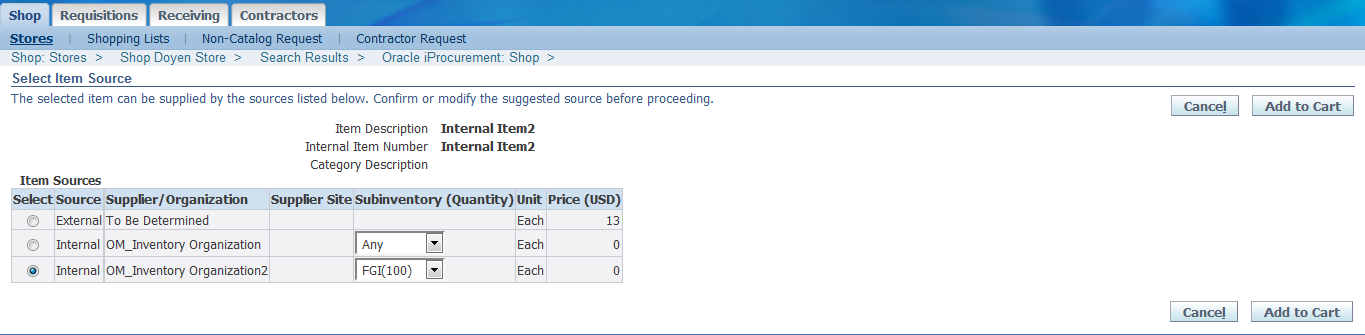
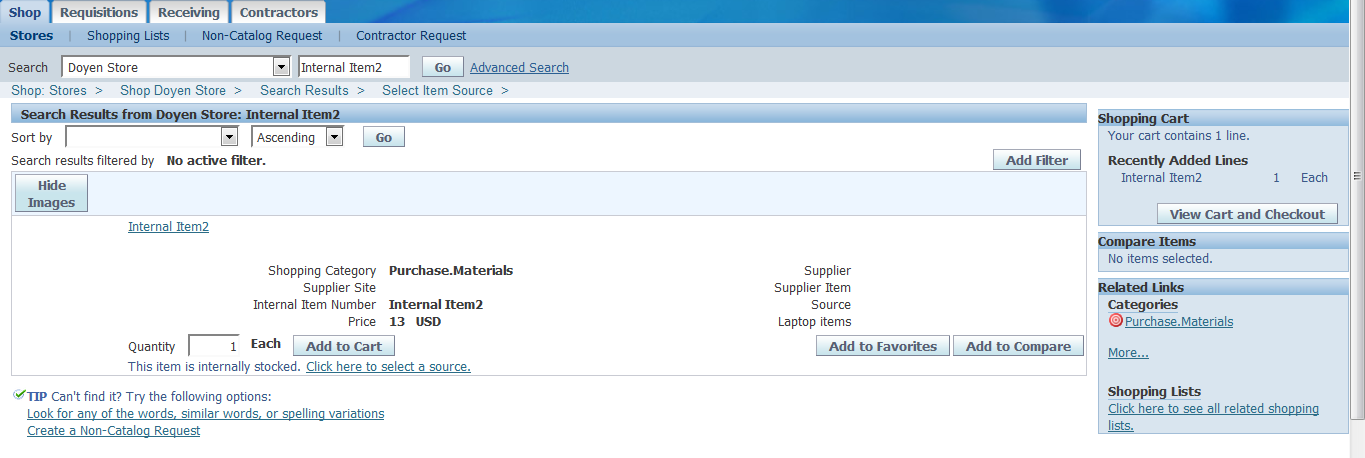
Search for the item "Internal Item2"
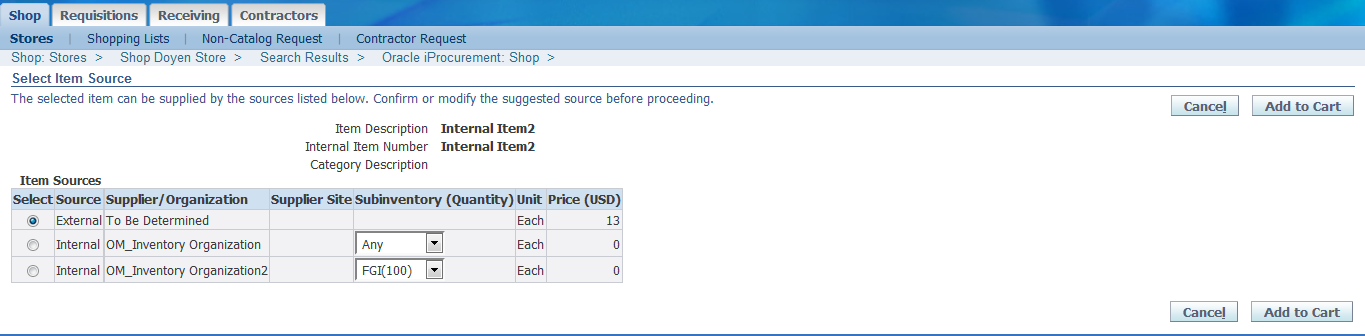
Click on "Click here to select a source" link
We have the 100 quantities stock in OM_Inventory Organization2.
Select the Source as "Internal" and the organization is "OM_Inventory Organization2"
Click on "Add to Cart"
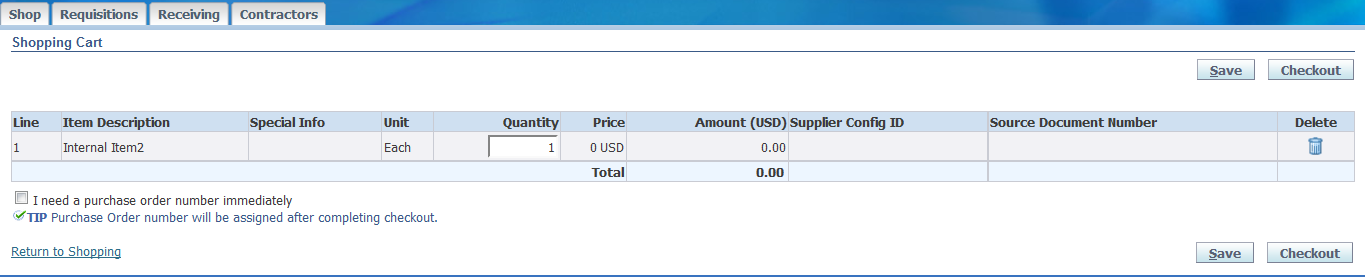
Click "View Cart and Checkout"
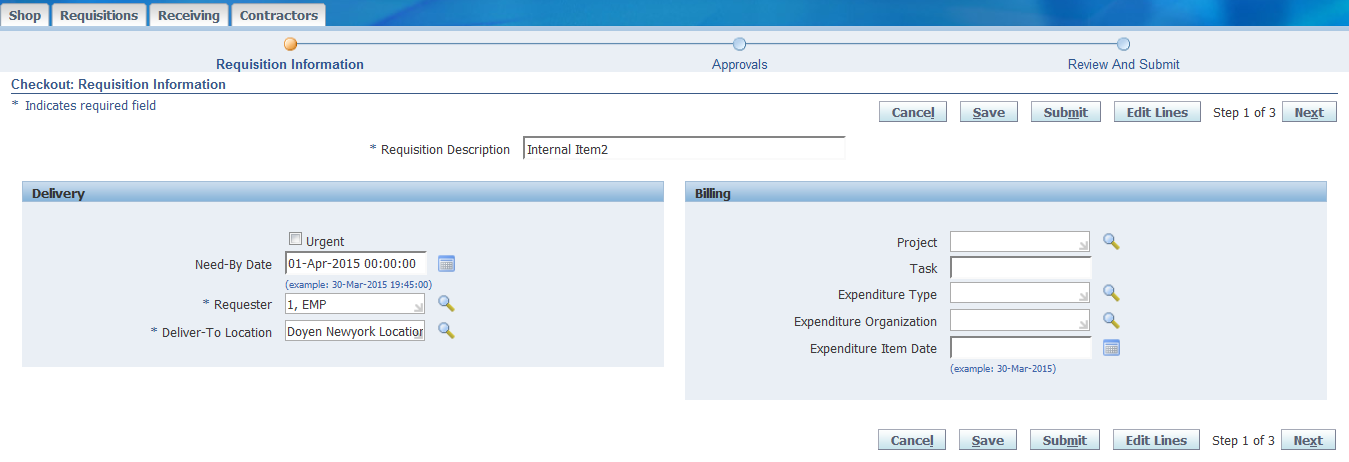
Click "Checkout"
Click "Next"
Click "Submit"
Step 10 - Requisition Summary
Check the Requisition Type and Status in Requisition Summary
Navigation: Purchasing > Requisitions > Requisition Summary
Step 11 - Run "Create Internal Orders" and "Import Orders" program
Step 12 - Query Internal Orders
Responsibility: Order Management Super User
Navigation: Orders, Returns > Order Organizer
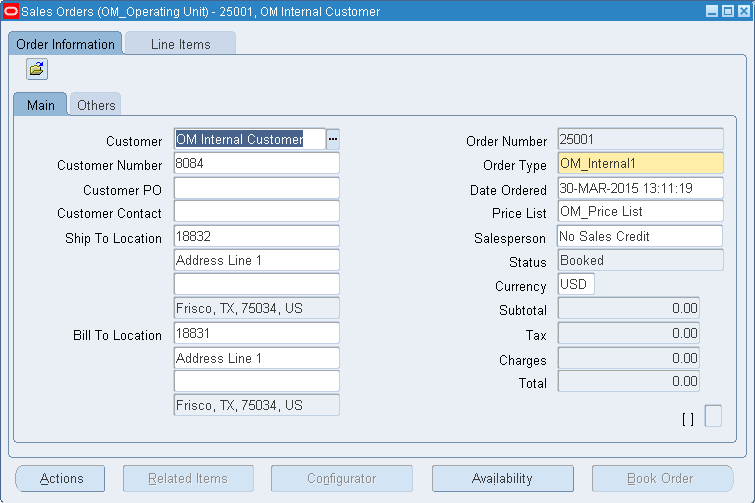
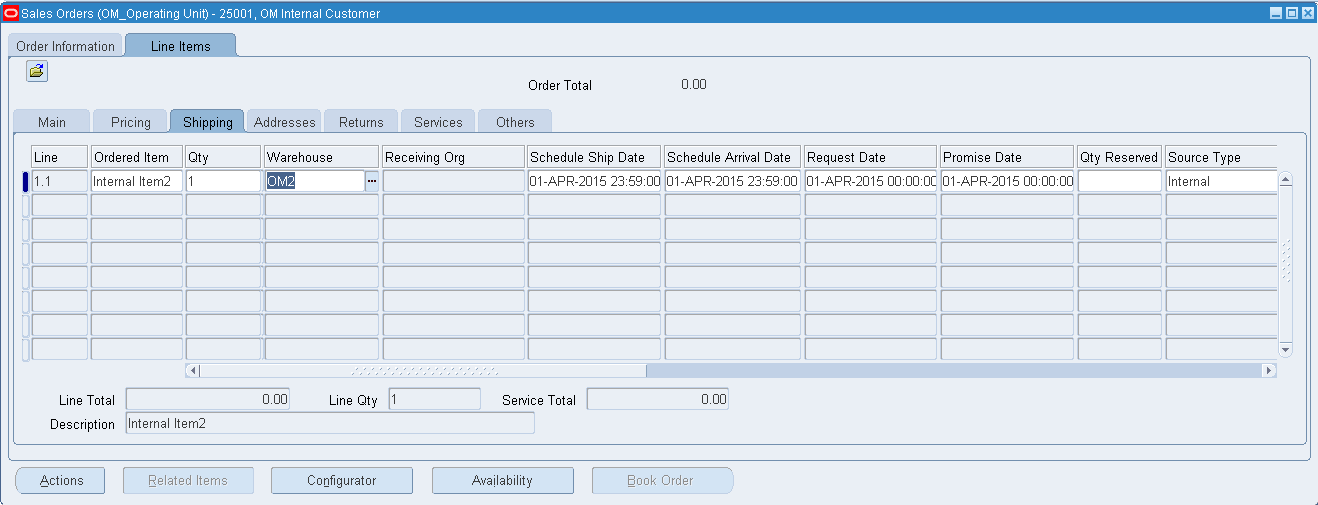
Internal Order# 25001 has been created and it's Booked
Pick Release the order and do Shipping and then receive the item in OM1.
=================================================================================