Showing posts with label Inventory. Show all posts

Wednesday, December 28, 2016

Query to get transactions of inventory items with available onhand quantity

SELECT   recs.doc_type, recs.item_number, recs.doc_no, recs.po_number,
         recs.organization_id, recs.inventory_item_id, recs.primary_quantity,
         recs.transaction_date
    FROM (
/* receipt transactions*/
          SELECT '2-REC' doc_type, msi.segment1 item_number,
                 rsh.receipt_num doc_no, poh.segment1 po_number,
                 mmt.organization_id, mmt.inventory_item_id,
                 TO_NUMBER (NVL (mmt.primary_quantity, 0)) primary_quantity,
                 TRUNC (rt.transaction_date) transaction_date
            FROM inv.mtl_material_transactions mmt,
                 inv.mtl_system_items_b msi,
                 po.rcv_transactions rt,
                 po.rcv_shipment_headers rsh,
                 po.po_headers_all poh
           WHERE mmt.transaction_type_id IN (,,,) --Enter your transaction type ids
             AND mmt.inventory_item_id = msi.inventory_item_id
             AND mmt.organization_id = msi.organization_id
             AND mmt.primary_quantity > 0
             AND mmt.rcv_transaction_id = rt.transaction_id
             AND rt.shipment_header_id = rsh.shipment_header_id
             AND rt.po_header_id = poh.po_header_id
          UNION ALL
/*production transactions*/
          SELECT '1-PROD' doc_type, msi.segment1 item_number,
                 we.wip_entity_name doc_no, '' po_number, mmt.organization_id,
                 mmt.inventory_item_id,
                 NVL (mmt.primary_quantity, 0) primary_quantity,
                 TRUNC (mmt.transaction_date) transaction_date
            FROM inv.mtl_material_transactions mmt,
                 inv.mtl_system_items_b msi,
                 wip.wip_discrete_jobs jobs,
                 wip.wip_entities we
           WHERE mmt.transaction_type_id IN (,,,) --Enter your transaction type ids
             AND mmt.inventory_item_id = msi.inventory_item_id
             AND mmt.organization_id = msi.organization_id
             AND mmt.transaction_source_id = jobs.wip_entity_id
             AND mmt.inventory_item_id = jobs.primary_item_id
             AND mmt.organization_id = jobs.organization_id
             AND jobs.wip_entity_id = we.wip_entity_id
             AND jobs.organization_id = we.organization_id
             AND mmt.primary_quantity > 0
/*adjustment transactions*/
          UNION ALL
          SELECT '3-ADJ' doc_type, msi.segment1 item_number,
                 TO_CHAR (mmt.transaction_id) doc_no, '' po_number,
                 mmt.organization_id, mmt.inventory_item_id,
                 TO_NUMBER (NVL (mmt.primary_quantity, 0)) primary_quantity,
                 TRUNC (mmt.transaction_date) transaction_date
            FROM inv.mtl_material_transactions mmt,
                 inv.mtl_system_items_b msi
           WHERE mmt.transaction_type_id IN (,,,) --Enter your transaction type ids
             AND mmt.inventory_item_id = msi.inventory_item_id
             AND mmt.organization_id = msi.organization_id
             AND mmt.primary_quantity > 0) recs
   WHERE (SELECT SUM (motv.on_hand)
            FROM apps.mtl_onhand_total_v motv
           WHERE recs.inventory_item_id = motv.inventory_item_id
             AND recs.organization_id = motv.organization_id) > 0
     AND recs.organization_id = :p_org_id
     AND recs.inventory_item_id = :p_item_id

Query to get current onhand quantity of inventory Items.

SELECT ALL mtl.organization_id, orgs.NAME organization_name,
           mtl.inventory_item_id, mtl.segment1 item_number,
           mtl.description item_description, mtl.item_type,
           mtl.inventory_item_status_code, mtl.primary_uom_code,
           mtl.secondary_uom_code,
-- get current onhand
                      (  TO_NUMBER ((SELECT SUM (NVL (motv.on_hand, 0))
                            FROM apps.mtl_onhand_total_v motv
                           WHERE mtl.inventory_item_id =

                                                        motv.inventory_item_id
                             AND mtl.organization_id = motv.organization_id)
                        )
            + NVL ((SELECT -1 * SUM (NVL (primary_quantity, 0))
                                 FROM   mtl_material_transactions mmt
                     WHERE mmt.inventory_item_id = mtl.inventory_item_id
                       AND mmt.organization_id = mtl.organization_id
                       AND mmt.costed_flag IN ('N', 'E')
                       AND mmt.transaction_action_id NOT IN
                                                     (24, 40, 41, 50, 51, 52)
                       AND NVL (mmt.owning_tp_type, 2) = 2
                       AND mmt.organization_id =
                              NVL (mmt.owning_organization_id,
                                   mmt.organization_id
                                  )
                       AND NVL (mmt.logical_transaction, -1) <> 1),
                   0
                  )
           ) current_onhand  ,
           TO_NUMBER (NVL ((SELECT SUM (cict.item_cost)
                              FROM apps.cst_item_cost_type_v cict
                             WHERE mtl.inventory_item_id = cict.inventory_item_id(+)
                               AND mtl.organization_id = cict.organization_id(+)
                               AND cict.cost_type = 'Frozen'),
                           0
                          )
                     ) current_cost,
           DECODE (mtl.planning_make_buy_code,
                   2, 'Buy',
                   1, 'Make',
                   'Other'
                  ) make_buy_code,
           (SELECT organization_code
              FROM org_organization_definitions ood
             WHERE orgs.organization_id =
                                        ood.organization_id)
                                                            organization_code
      FROM apps.mtl_system_items_b mtl,
           apps.hr_all_organization_units orgs,
           apps.mtl_item_categories_v cat
     WHERE orgs.organization_id = mtl.organization_id
       AND (    mtl.inventory_item_id = cat.inventory_item_id(+)
            AND mtl.organization_id = cat.organization_id(+)
            AND cat.category_set_id = 1
           )
       AND (SELECT SUM (motv.on_hand)
              FROM apps.mtl_onhand_total_v motv
             WHERE mtl.inventory_item_id = motv.inventory_item_id
               AND mtl.organization_id = motv.organization_id) > 0;

Monday, June 15, 2015

Move Order Approval Process in R12.2


Move Order Approval Method through Planner.
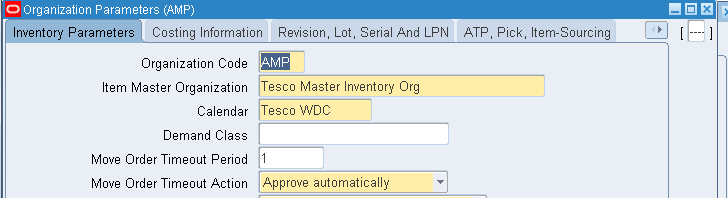
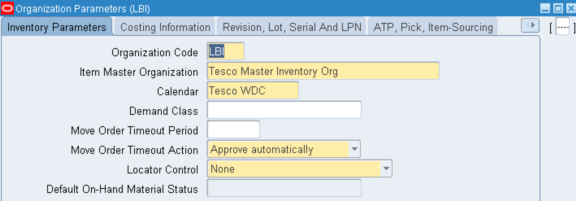
Before we learn about Move order, let us check the only setup for the move orders in organization Parameters.
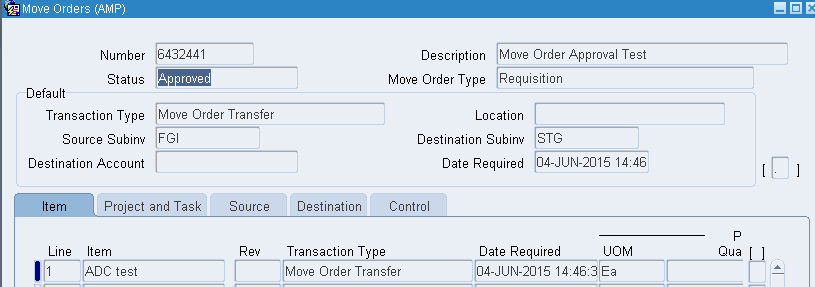
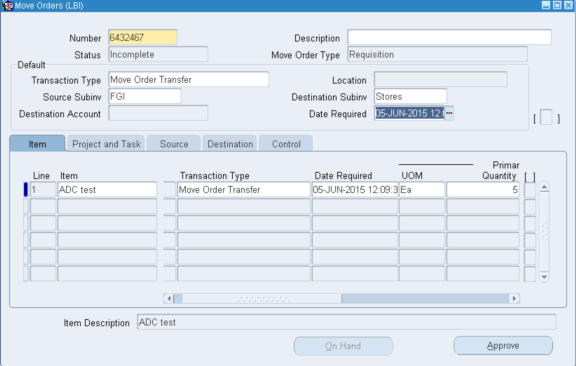
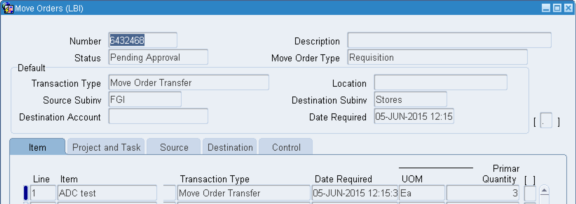
Create a Move order for the same item and click on the approval button on the bottom of the form.
Navigation: Setup > Organizations > Parameters.
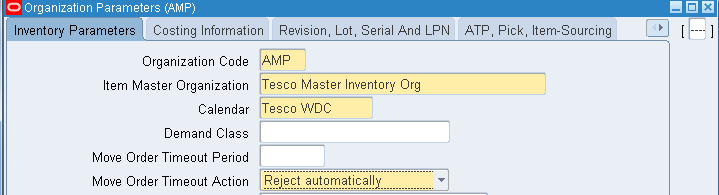
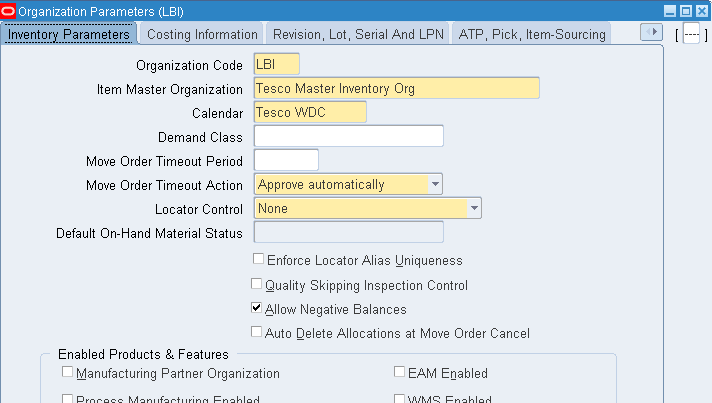
Here in the below Org parameters form we can make out two fields of setup for Move orders, we will go through the importance of those in later exercises below.
Step 1: Create a Planner.
Responsibility: Oracle Inventory.
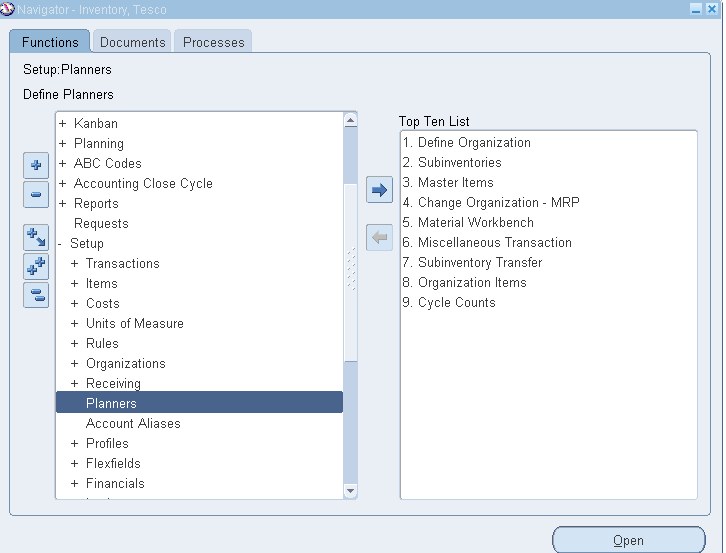
Navigation:  Setup > Planners.
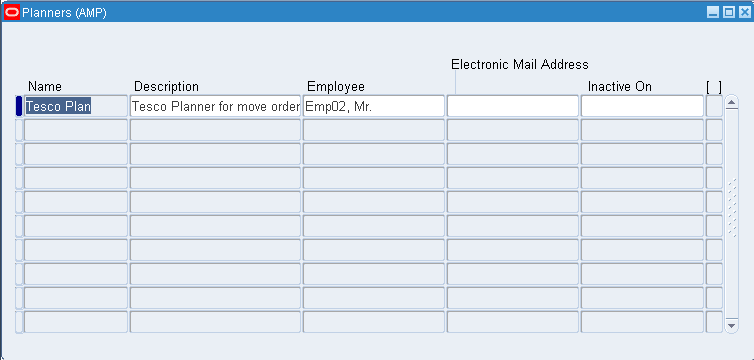
Open the Planner form and enter the details as below:
Name: Name for your Planner. (Tesco Plan here)
Description: As you like
Employee Field: Here the employee you enter will be the approver for the Move order.
Inactive On: End date action for this Planner.
Save the form.
Step 2: Assign the Planner to the Item.
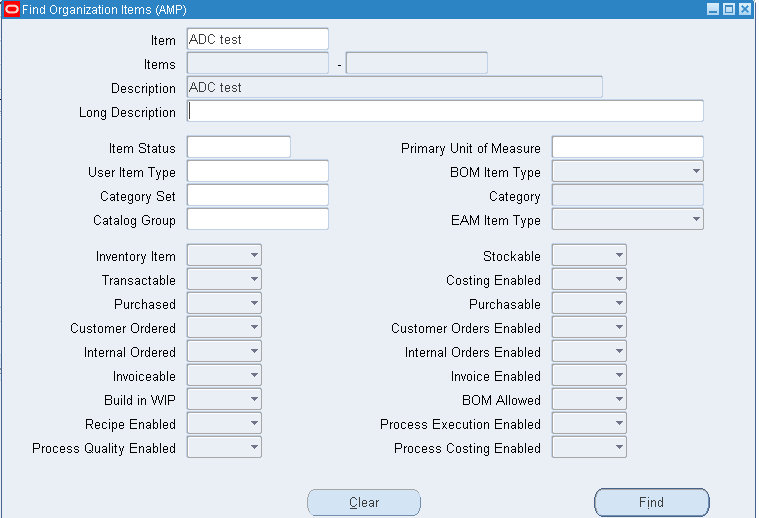
Navigation: Items----- Org Items.
Select the item you wanted the approval process.

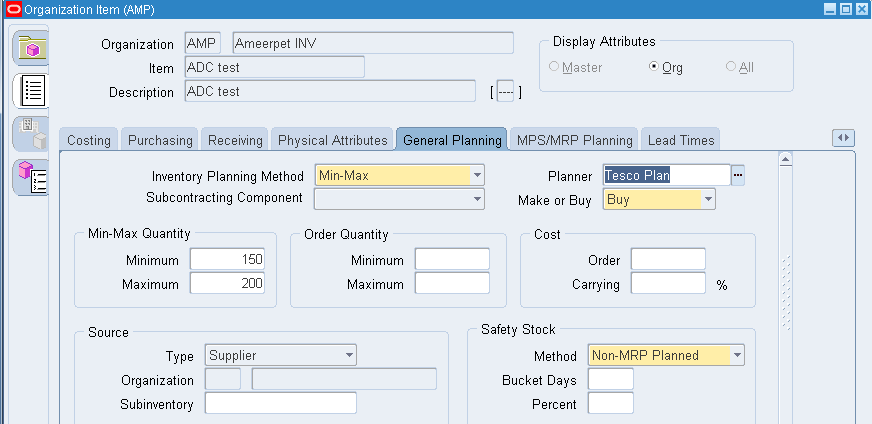
Go to General planning tab and assign the planner as below and save.
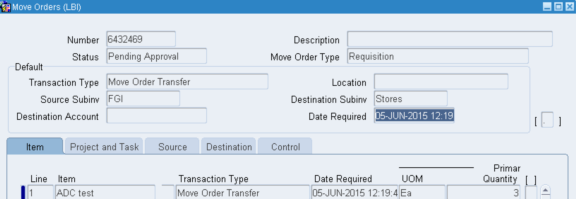
Step 3:  Move Order creation.
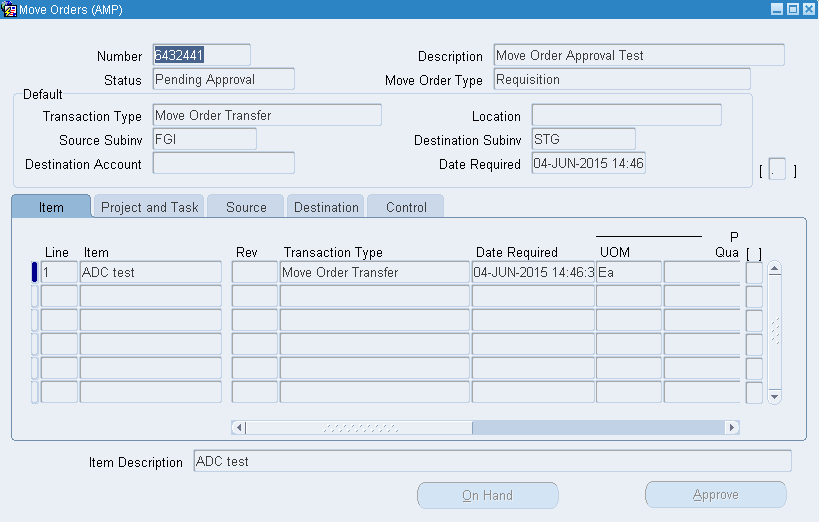
Let’s create the move order now and check the normal approval cycle as per the planner.
Once you click on approve you can observe the Move order status changes to Pending approval.
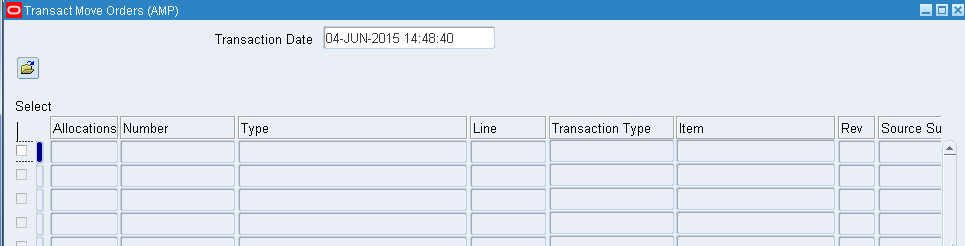
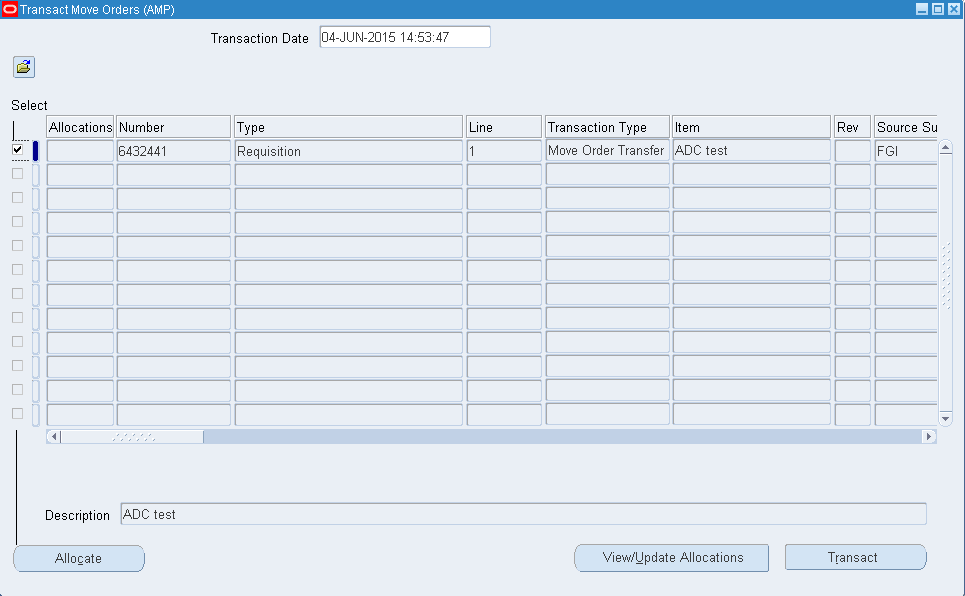
Now if you come to the Transact Move Order form you will get the move order created to transact.

Step 4: Approving the Move Order.
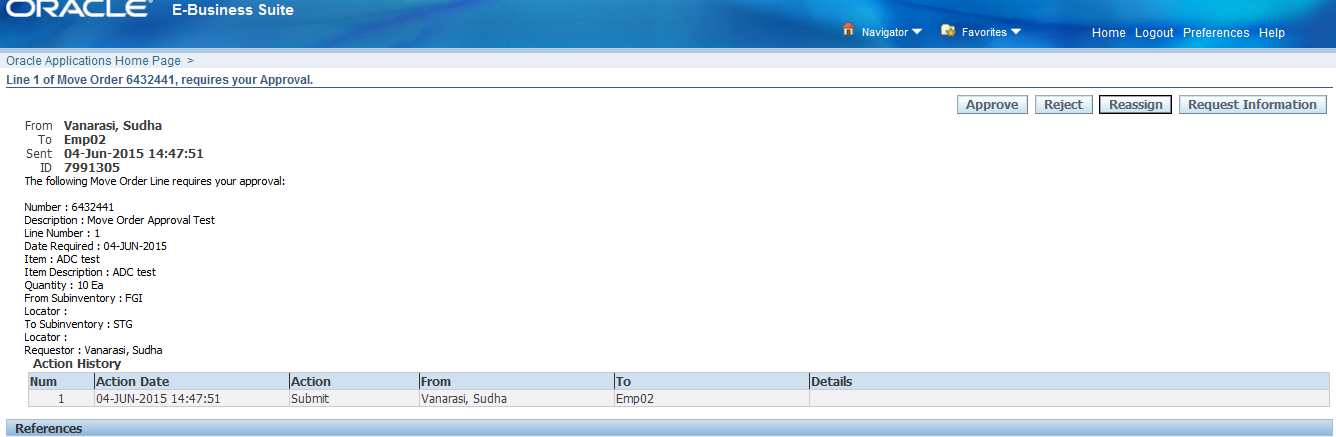
Now log in to the user whom we entered as the approver and check for the approval notification.
Check the Order and approve.
Again log into the requestor and check the notification which says that the Move order has been approved as below.

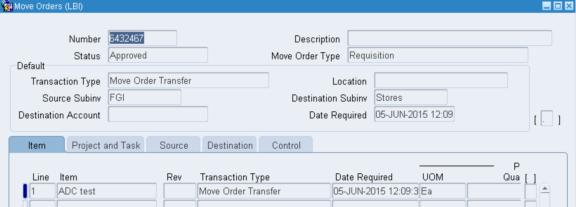
Now go to the move Order form and note the move order status has been changed to Approved.
Now go to the Transact Move order form and try to query the Move Order.
Select the Move Order and transact.
You will get the below note saying the item has been moved to the destination sub inventory.
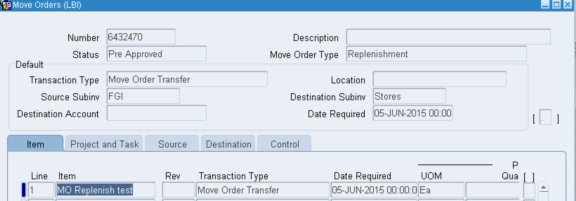
Note: Replenish Move orders and Pick Wave Move orders are Pre-approved and will follow the approvals through Planners. The status of those move orders is Pre approved and ready to transact the materials.
Replenishment move order:
Pick Wave Move order:

Understanding move order time out period and time out Action. (Setups seen in Org parameters)
Let us now look into few scenarios on move orders with time out period and action.
Scenario 1: Move order Timeout Period: Null
                    Move order Timeout Period: Approve Automatically.
Here the system does not have any time out period and the move order will be approved automatically without considering the planner even if we assign.      
Create a Move order and click on Approve.

Move order will be approved even if we have planner assigned.


Scenario 2: Move order Timeout Period: Null
                    Move order Timeout Period: Reject Automatically.
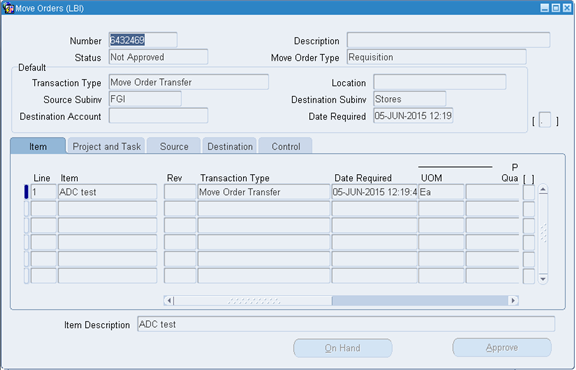
This scenario will behave as same as above but the move order will be directly rejected (Not Approved) as per the Timeout action we have given. (Planner and Approvals are not considered)

Scenario 3: Move order Timeout Period:  1
                    Move order Timeout Period: Approve Automatically.
The Move Order Timeout Period field specifies the number of days the Move Order waits for approval. In the screenshot below we see that the Timeout Period has been set to 1 day. The first time the move order is created a notification is sent to the approver. If the approver does not take any action, then there will be a wait time of 1 day after which he will receive a second notification. Then after a second Timeout Period the move order is automatically accepted or rejected depending on the value in the Move Order Timeout Action field.
So if we create and approve the move order the move order goes through the approval method in the form of planner as below and the approver can either approve within the given timeout period or the system itself takes the decision either to Approve or Reject as based on the timeout action in the Org parameters.

Scenario 3: Move order Timeout Period:  1
                    Move order Timeout Period: Reject Automatically.
Here the Move order is in pending approval status and let us not approve it and note what happens to the Move order.
Notification (Primary) has been sent to the approver based on time out period value which again depends on the inventory calendar.
If the approver ignored the notification the system based on the timeout action rejects the Move order as below.

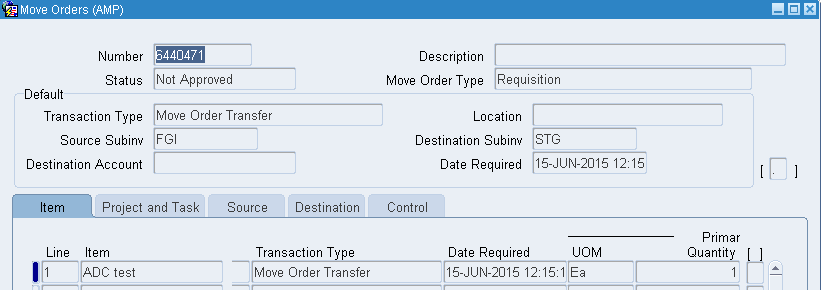
Now let’s query the Move order and note the order has been rejected (Not approved) status as below and observe the Approve button has been freezed.
Additional Info:
The Move Order Timeout Period attribute determines the number of days the order can wait for approval. After one time out period, if the recipient has not approved or rejected the order, a reminder notice is sent. After a second time out period, the order is automatically approved or rejected depending on the Move Order Timeout Action attribute you set.


---- Sudhakar Vanarasi


Tuesday, March 31, 2015

UOM and Conversions


Define Units Of Measure:
  • Define units of measure, unit of measure classes, and base units of measure for tracking, moving, storing, and counting items. You can convert between the units of measure you define. This facilitates you to manufacture, order, or receive items in any unit of measure.
1.    Define unit of measure classes.
2.    Define units of measure.
3.    Define unit of measure conversions.
4.    Define lot-specific unit of measure conversions.


Defining Units of Measure Classes
  • Unit of measure classes represent groups of units of measure with similar characteristics. Creating unit of measure classes is the first step in unit of measure management.  Each unit of measure you define must belong to a unit of measure class.
  • You can define one base unit of measure to the units of measure in the class.
  • Navigate to the Inventory Super User responsibility.
    Setup>Unit Of Measure>Classes


Defining Units of Measure:
  • The base unit of measure to achieve conversions between units of measures in the class. The primary unit of measure is the stocking unit of measure for an item in a particular organization. The primary unit of measure is an item attribute that you specify when defining each item.
  • Navigate to the Inventory Super User responsibility.
    Setup>Unit Of Measure>Unit Of Measure


Defining Unit of Measure Conversions:
  • Unit of measure conversions are numerical factors that enable you to perform transactions in units other than the primary unit of the item being transacted. You can define:
    •    a conversion common to any item (Standard)
    •    a conversion for a specific item within a unit of measure class (Intra-class)
    •    a conversion for a specific item between unit of measure classes (Inter-class)
  • As below,
    Unit of measure conversions are not organization-specific.
    You must define a conversion between a non-base unit of measure and the base unit of measure before you can assign the non-base unit of measure to an item.
  • Navigate to the Inventory Super User responsibility.
    Setup>Unit Of Measure>Conversions


Lot-Specific Unit of Measure Conversions:
  • Lot specific conversions enable you to perform a specific inter-class conversion for a given lot. This enables you to establish more granular control over the transactional quantities of a lot. You can create lot-specific unit of measure conversions for on-hand lots or lots with a zero balance. If you create a lot-specific conversion for a lot with on-hand quantities, you can automatically update the quantities in the system to more accurately reflect the on-hand quantity.
    You can also view the history of changes made to the lot unit of measure conversion, and the corresponding quantity changes.

  • This concludes the explanation about unit of measure.


||Raja||


Thursday, March 5, 2015

Allow Negative Quantity functionality in Shipping Process

Purpose:
The purpose of this Document is to provide some troubleshooting guide for issue where sales orders are not getting backordered even though insufficient inventory is available.
Goal:
Book a sales order, Pick and ship confirm the order even if  the tem does not have the On hand quantity in the inventory.
Pre requisities:
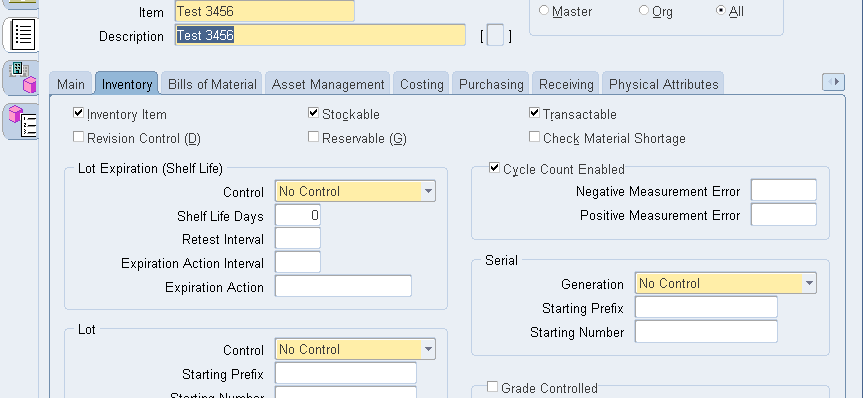
1. The item must be set to NOT Reservable ( the Reservable flag in the Master Items form should be Unchecked).
Go to Organization Item form and uncheck the Reservable flag as below.

2. Negative balances must be allowed (Check the 'Negative Balances Allowed attribute in the Organization Parameters form) as below.
Go to Organization Parameters form, select your Inventory Org where you are performing the entire cycle and check Allow Negative Balances check box.
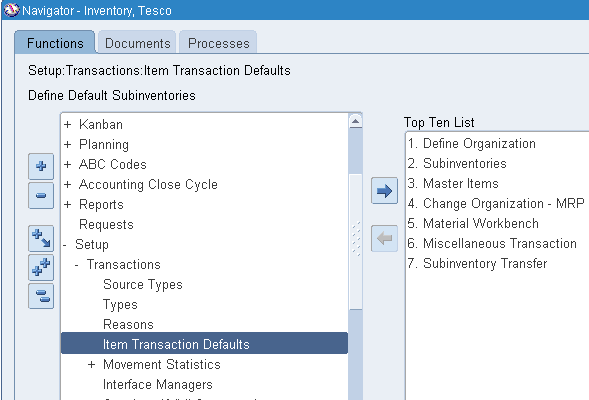
3. Setup a Default Sub-inventory for the item using the Item Transaction Default window.
Responsibility: Inventory.
Navigation:  Setup > Transactions > Item transaction Defaults.

Select the Item and default its sub-inventory for Shipping. (This setup is for shipping the order)
Apart from the above setups make sure the below Profile Options are there as below.
  1. Set profile WSH: Over picking Enabled to YES
  2. Set profile GMI: Allow Negative Inventory to YES
Mandatory Check:
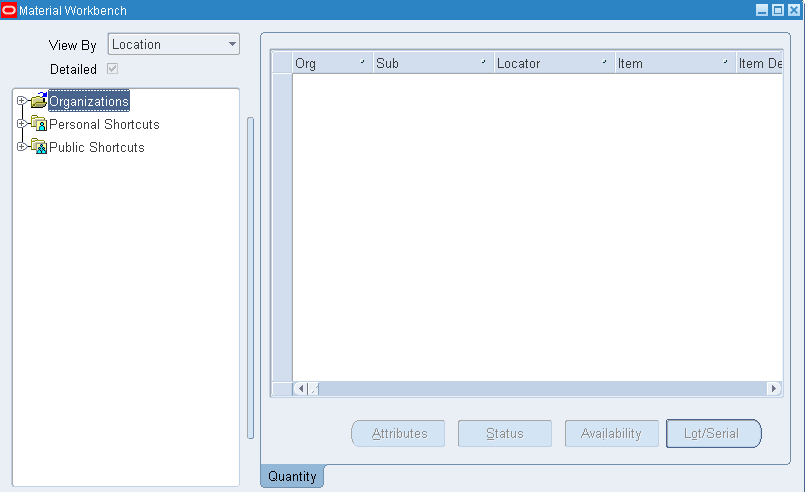
Make sure that no On Hand Quantity is available for the Item in the sub-inventory as below.
Go to Material work bench in inventory responsibility and query the item and check the OHQ.

Exercise: Now let us perform the sales order flow and check the required functionality.
Step 1: Book the Order.
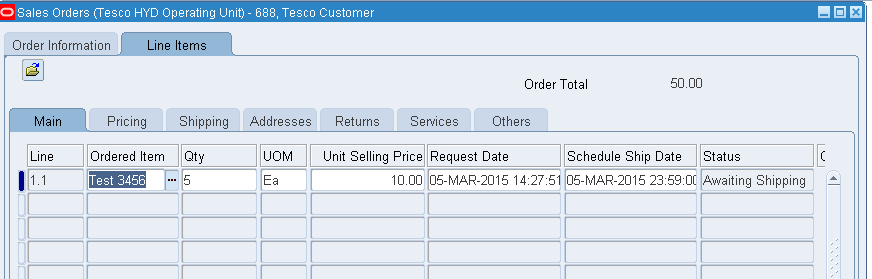
Go to Order management responsibility and book the order for 5 quantities as below.

Make sure that you are using the inventory (Ware house) which we have allowed negative balances.

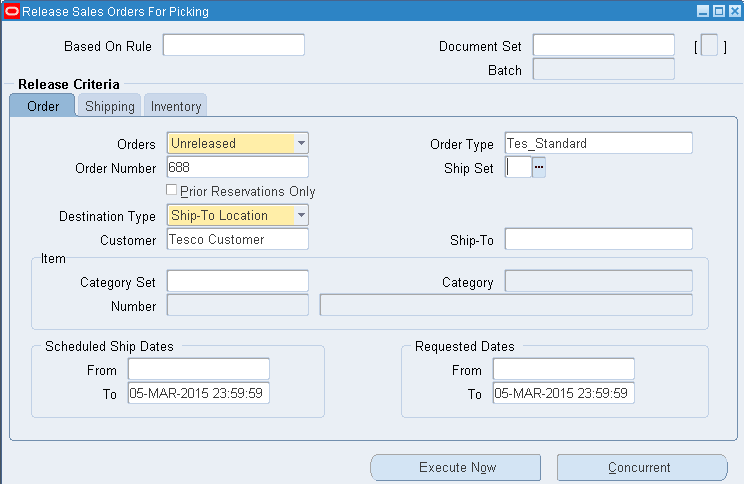
Step 2: Release the Order as below by the sales order number.
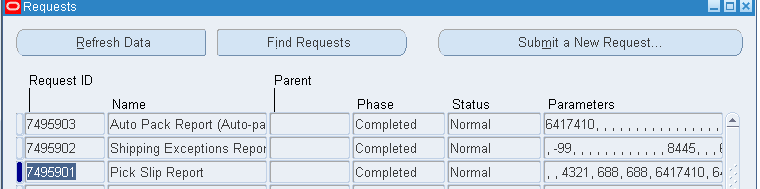
Make sure the concurrent programs are running.
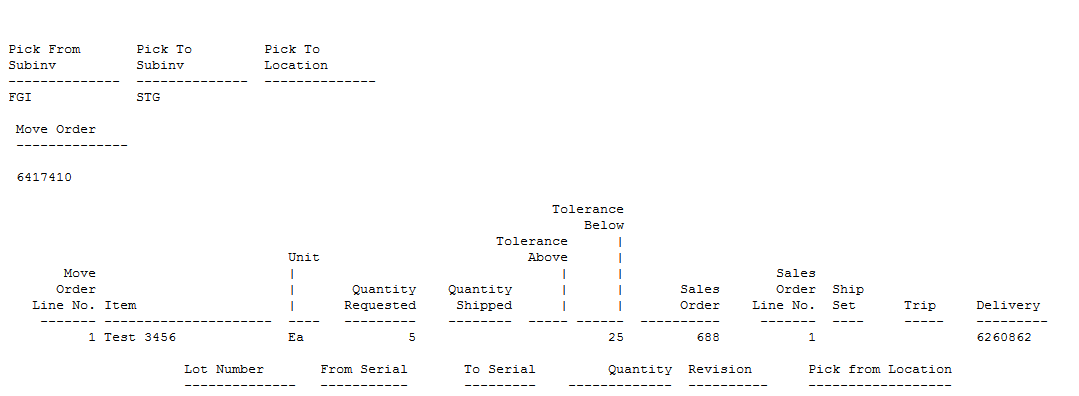
Now once the reports are done, check the Pick slip report.
You can now notice the item has released from the warehouse with Move order and Delivery numbers.
(Actually in the normal business flow items should have backordered as we do not have enough quantity in the inventory to fulfill.)
Check the Line status of the order where we can observe as picked.

Step 3: Ship Confirm the Order.
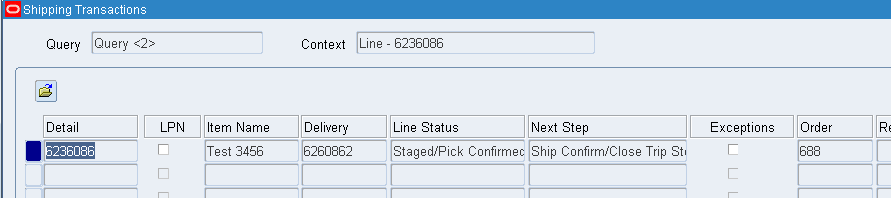
Now Ship Confirm the same by using shipping transaction form as below.
The order will be shipped. (Check the order Line status).
Step 4: Now Go to Inventory Responsibility and check the On Hand quantity for the Item.
We will be now able to see -5 quantities in the Sub-Inventory as below.
Additional Notes:
The Reservable attribute enables you to create material reservations for the item. You can reserve an item only when you have sufficient inventory.
Oracle Inventory has enhanced support for picking non-reservable items. This feature can be employed when on-hand quantities are not closely tracked and when inventory is often driven negative during shipment confirmation. When a line for a non-reservable item is pick released, the system will not attempt to generate allocations for the material; pick confirm will not be required. Instead, the line status is immediately changed to Released and the delivery line becomes eligible for shipment confirmation. The sub-inventory and locator on the delivery line, which will become the sub-inventory and locator from which the ship confirmation transaction issues the inventory, is taken from the Shipping Item Transaction Default for that item. If insufficient quantity is available in that location, and if negative quantities are enabled in that organization, the shipment confirmation will drive inventory negative. Reservation control for a sub-inventory overrides reservation control for an item. In other words, if an item is reservable but a sub-inventory is not, the item quantity in that sub-inventory is not reservable.

Note: If the reservable attribute is checked, Oracle Order Management allows reservation of the item during order entry. If material hasn't been reserved prior to pick release, pick release creates reservations for material when the pick wave move order is allocated.