Showing posts with label Receiving. Show all posts

Friday, 28 November 2014

Un-Ordered Receipts in Oracle Purchasing - R12.2

Un-Ordered Receipts

Allow Unordered receipts allows to receive the goods without a PO. But these goods can only sent to receiving area and not for the sub-inventory.
Later we have to raise a PO then match against the receipt to allow the goods to reach the required sub-inventory.

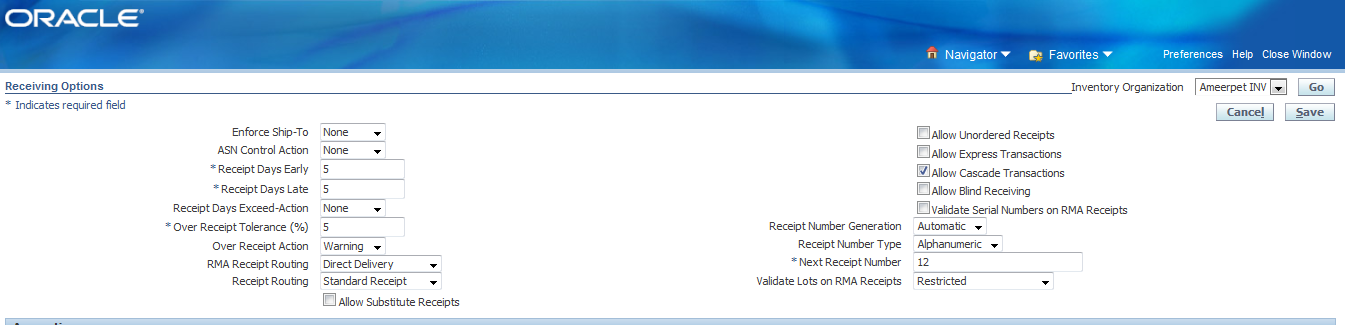
Firstly enable "Allow Unordered Receipts" in Receiving Options in purchasing.

Responsibility: Purchasing.

NAV: Setup----Organizations------Receiving Options.


Enable "Allow Unordered Receipts" and save the record.

Step 1: Enter the receipts.

NAV: Receiving--------Receipts.

Click On "Unordered" option. (This option will not be available if you do not check the Unordered Receipt option in receiving options)
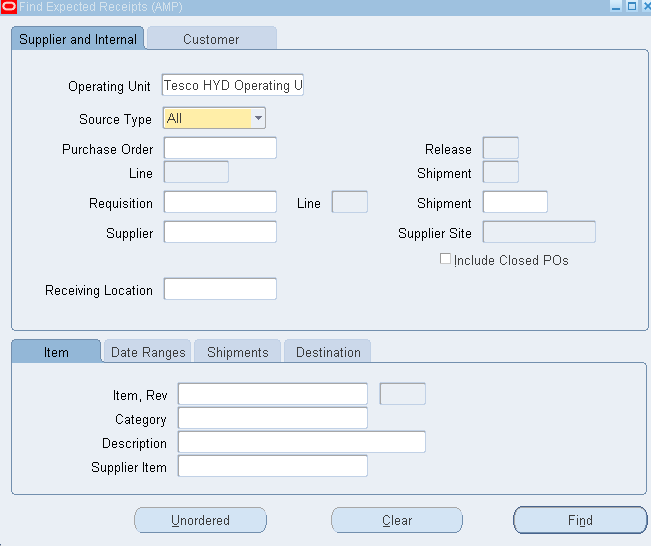

Enter the "Supplier Name" in the Receipt Header page and then enter Item, UOM, Quantity in Receipts page and save.


Step 2: Enter the PO for the above Receipt.

NAV: Purchase Orders------- Purchase orders.

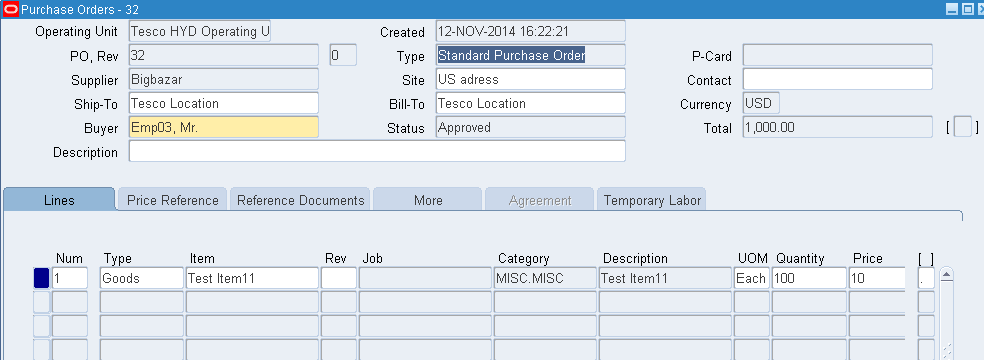
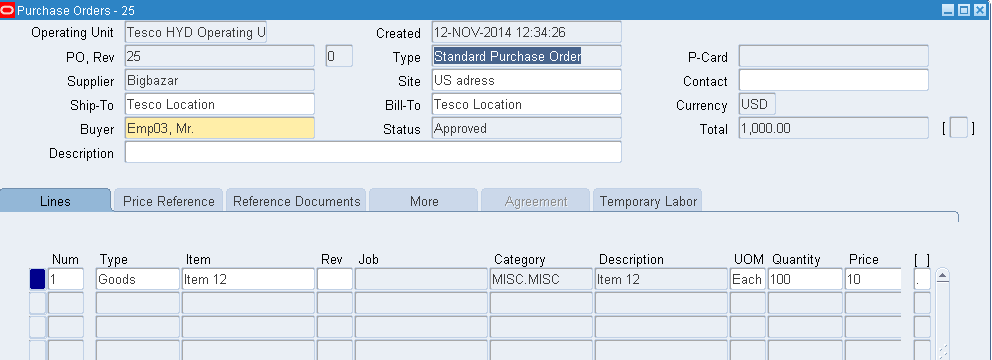
Enter and approve the Purchase order for the same Item and quantity, price and supplier which we have made the receipting.

Step 3: Matching the Receipts with PO.

NAV: Receipts------ Match Unordered Receipts.


Give the Receipt number and supplier and click on Find.


Now you will get the Item and supplier details.

Give the PO number, Line and shipment line number and save.


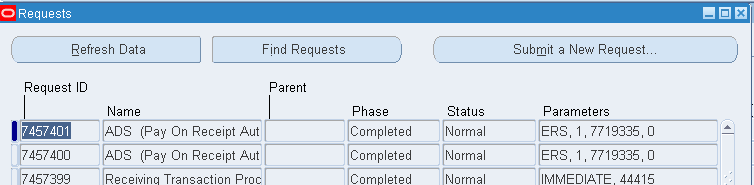
Once saved, a concurrent program will run.


Give OK.
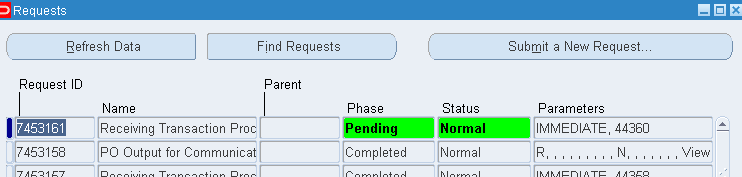

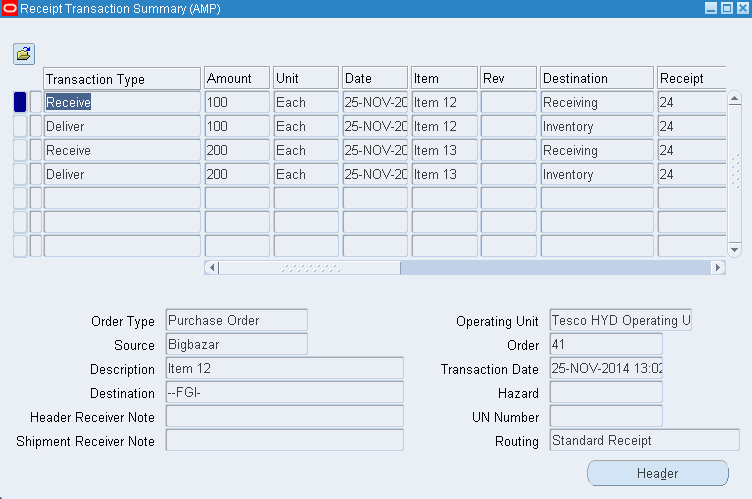
Now check the "Receiving Transaction Summary" form to check the transaction.

NAV: Receiving-----Receiving Transaction Summary.

You will find two lines (Unordered and match) as below. Check the destination type (Receiving), which means that the item is received to the receiving place and not yet moved to the required sub-inventory.


Step 4: Receiving to the sub-inventory.

Now we will receive the items from the receiving location to the sub-inventory.

NAV: Receipts--- Receiving Transactions.

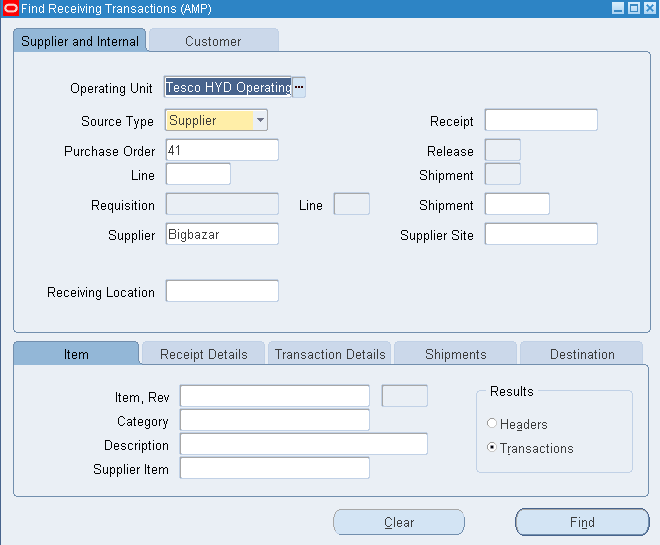
Give the PO number and find.


Give the destination type as Inventory where the sub-inventory (here FGI) becomes mandatory and save.
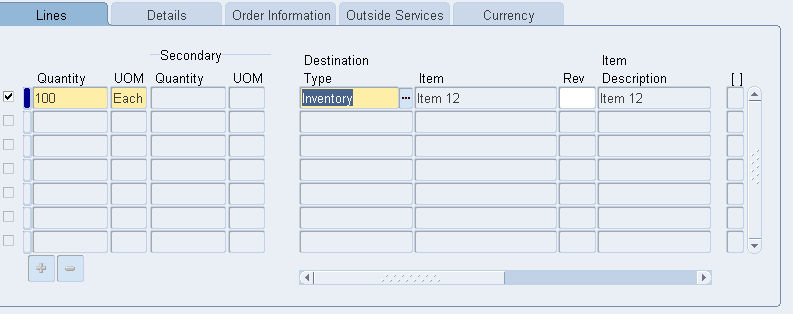


Now check the receiving transaction summary form and you will now see an additional line as Deliver which means the items is delivered to the specific sub-inventory.


Thursday, 27 November 2014

Substitute Receipts in Oracle Purchasing - R12.2

Substitute Receipts

This option can be used when we can receive the substitute item. Means we can receive item B, where as we ordered item A.


Firstly for this we have to define the item relationship between the items.


Step 1: Define Item Relationships.


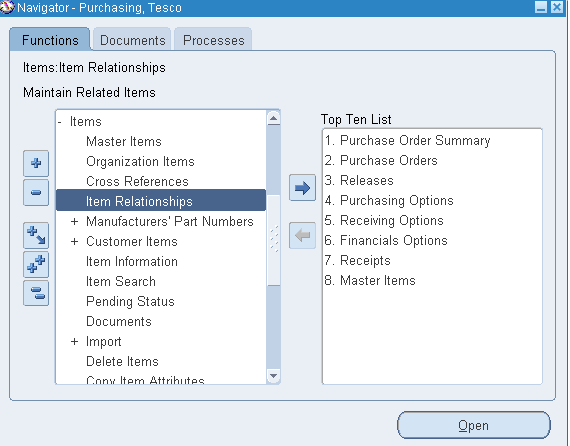
NAV: Items---- Item Relationships.


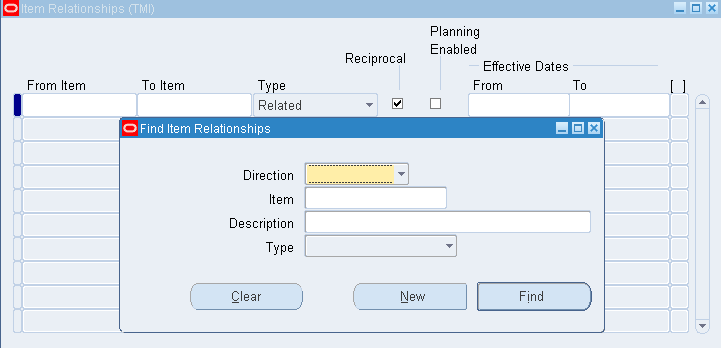
Click on New.


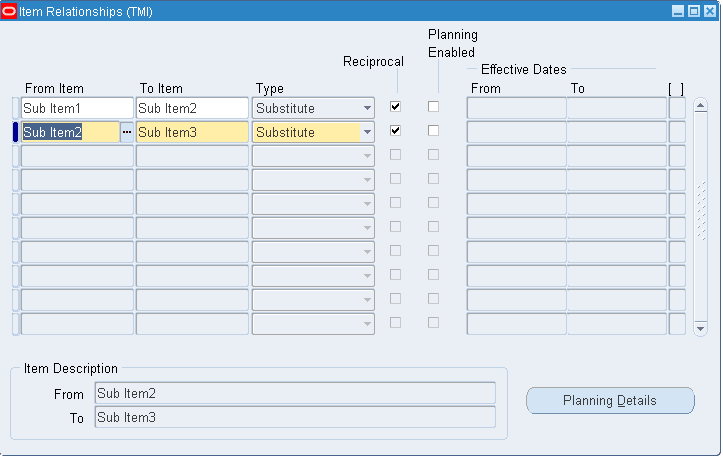
Here we will create the From item and To items, type as "Substitute" and check Reciprocal if you want to apply the same logic between those.


Here we have given Sub item2 as substitute for Subitem1 and Subitem3 for Subitem2.


Give the details as below and save.


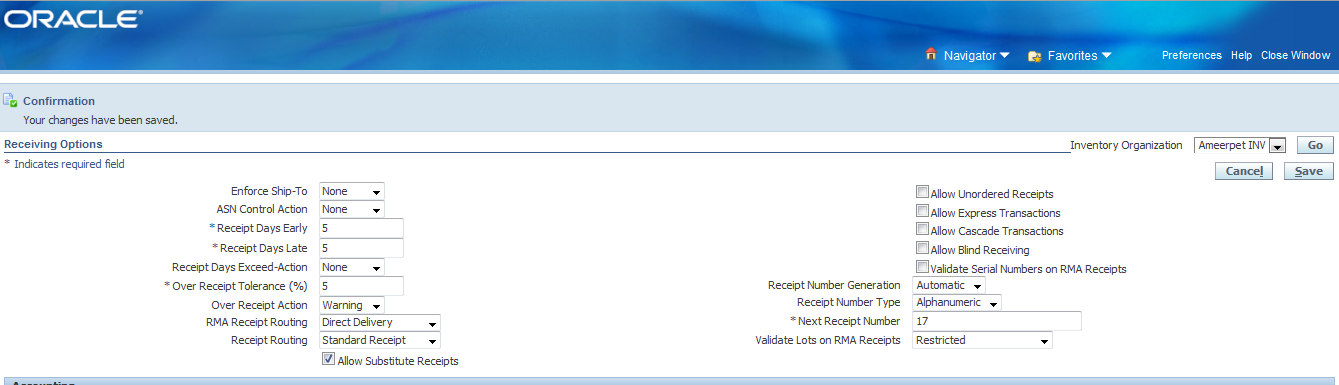
Now go to receiving options and enable "Allow Substitute Receipts" option.


NAV: Setup--- organizations-----Receiving Options


Step 2: Create PO.


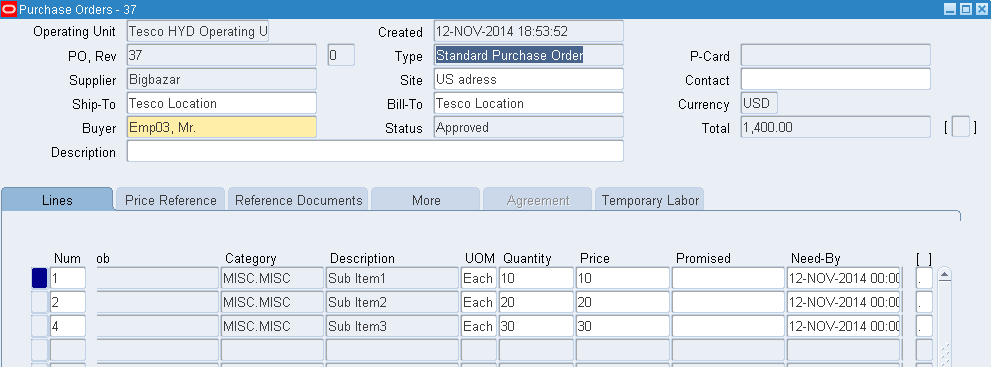
Raise a Purchase Order for three items and approve.


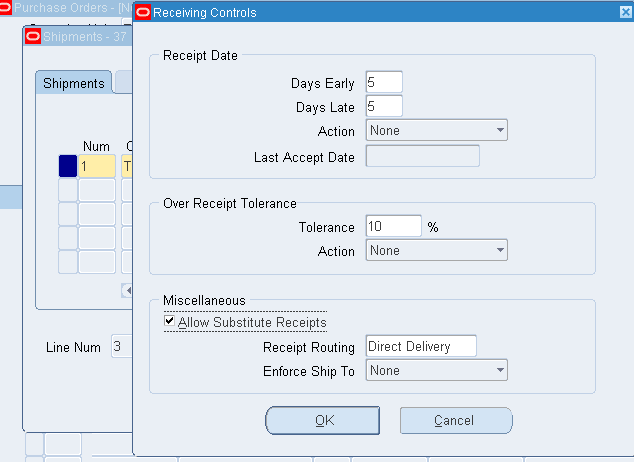
Go to Each individual line level shipments and check the allow substitute receipts as below and lick OK.


Step 3: Taking Receipts.


NAV: Receiving--- Receipts.


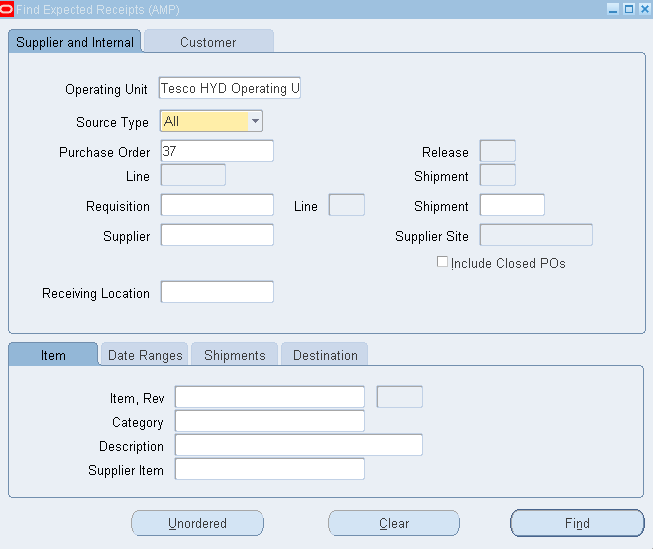
Query with the PO number and Find.


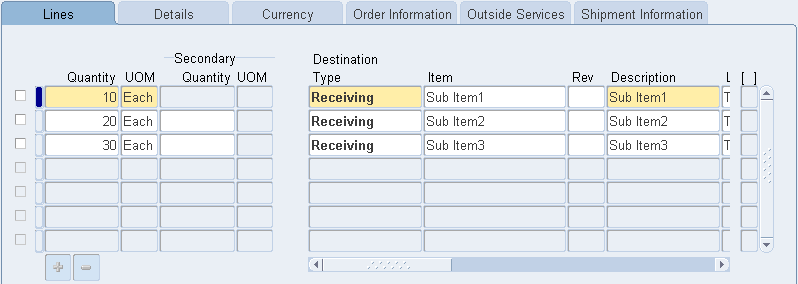
Now you will find all the three Items under receipting and the Item field will be active to edit.


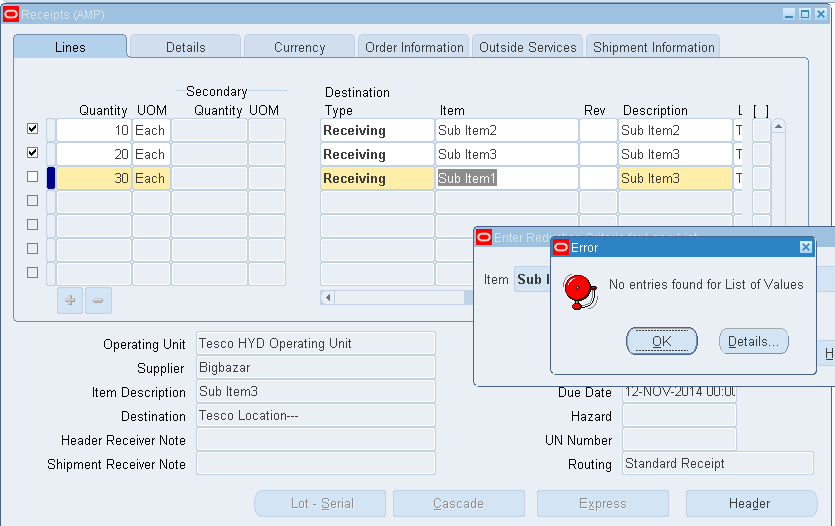
Now try to change Item2 in place of item1 as below and the system allows for the change.
Same item3 for item2 but if you change item1 for item3 the system throws the error.


This is because we have not defined the Item Relationship between Item3 and Item1 and thus the system is not allowing doing so.


Express Receipts in Oracle Purchasing - R12.2

Express Transactions


The express transaction function is a quick method of entering receipts and receiving transactions.

Step1: Create a PO.

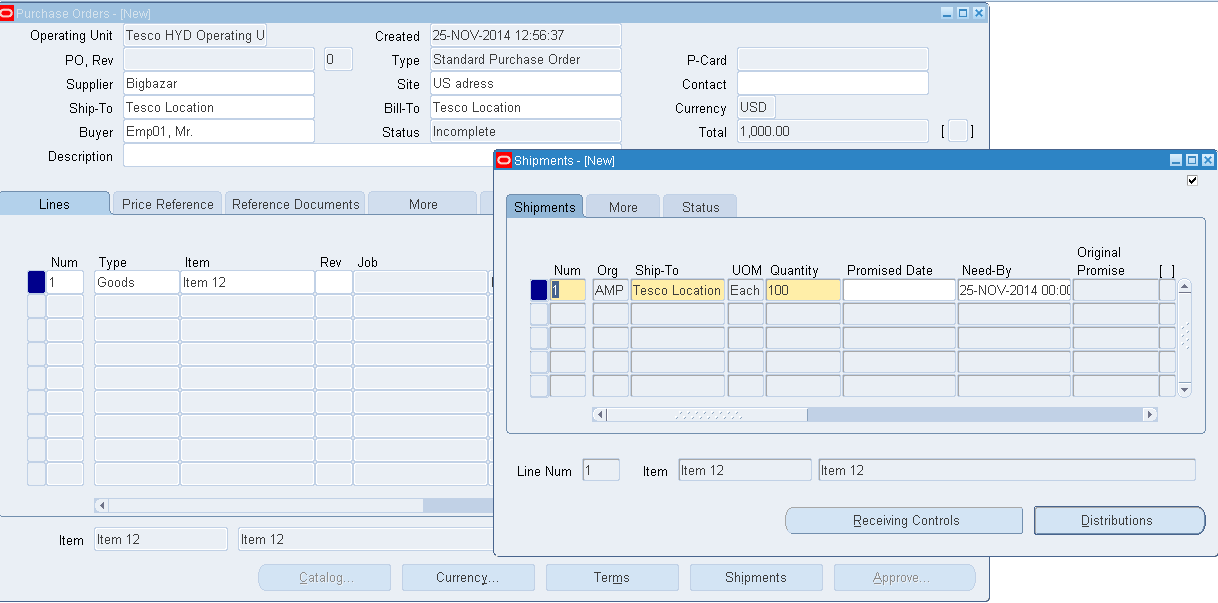
Create a purchase order and go to line level shipments and select the inventory organization.


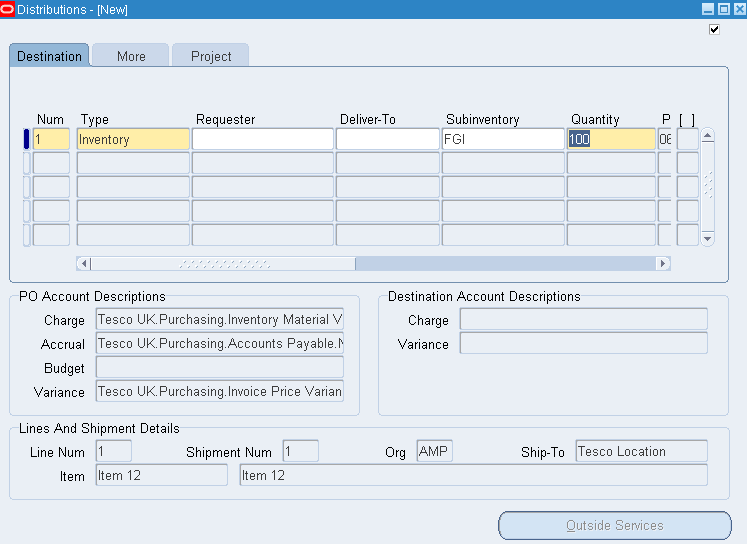
Click on Distributions and give the sub-inventory details.


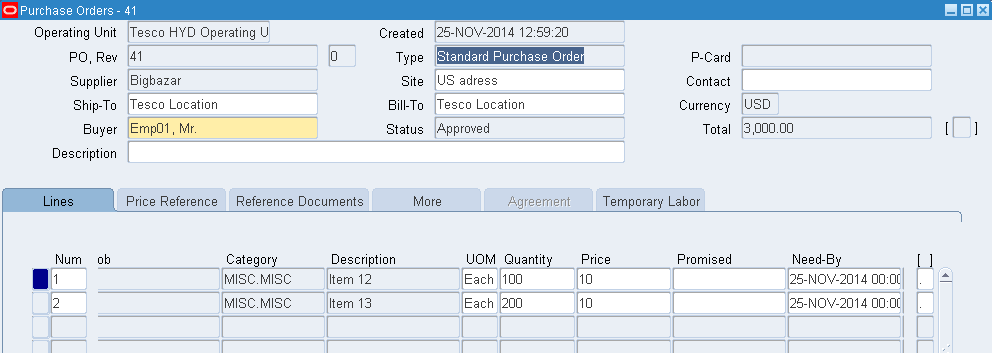
Do the same exercise and create an additional line in the PO as below.


Step 2: Receiving Options

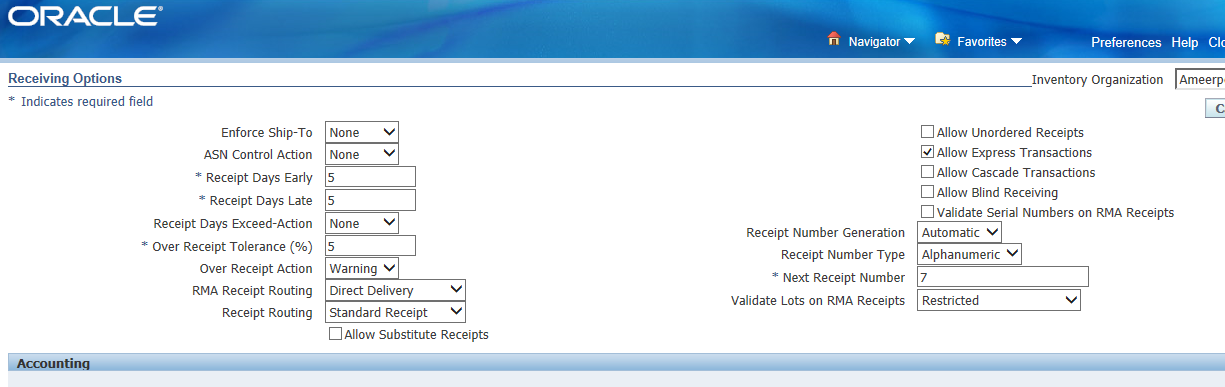
Go to receiving options and enable "Allow Express Transactions" box.

NAV: Setup------ Organizations------ Receiving Options.


Step 3: Receipting.

NAV: Receiving--- Receipts.

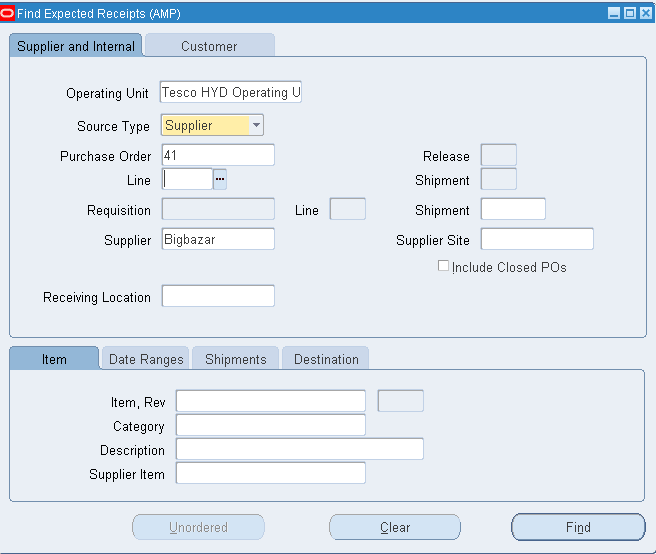
Come to receiving form and enter the PO number and supplier details and Find.

(In case if you have multiple Po’s for the same suppliers, you can query with only supplier)


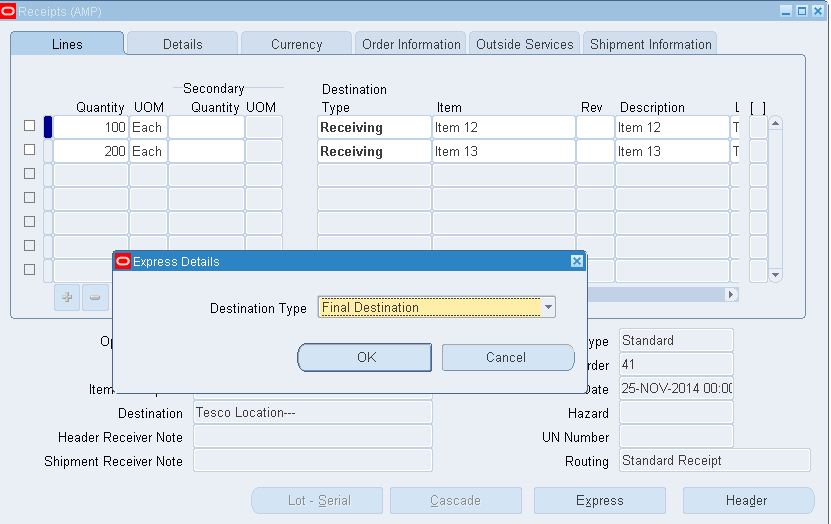
Click on "Express" ad select the destination type as "Final Destination" and click OK.


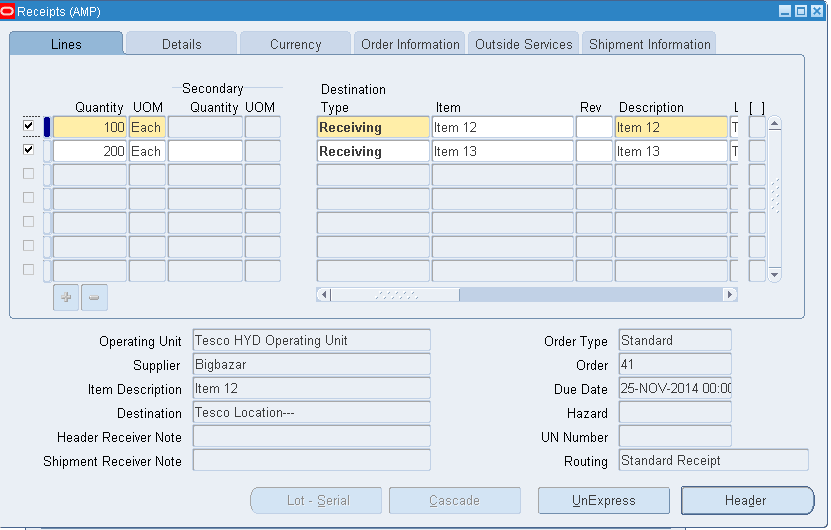
Select the lines and save.

Here if we observe the destination type in the form says Receiving.


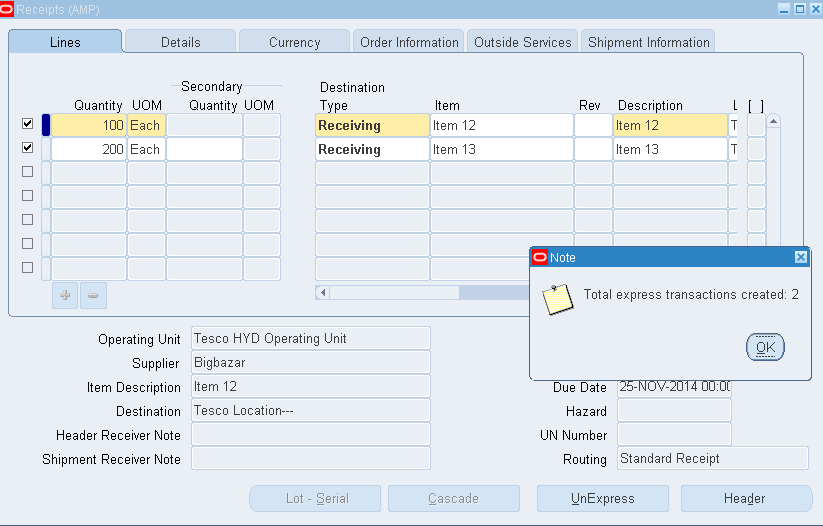
Once saved you will find the below note saying that there were two express transactions created. Click OK.


Now there will a concurrent program which runs as below and make sure that ends without any error.


Step 4: Check the transaction.

Now check the Receiving transaction summary form and check the transaction.

NAV: Receiving----- Receiving Transaction Summary.

Give the PO number, supplier and select the transactions below and find.


Now we will find two lines created for one transaction which is Receive and Deliver.


Cascade Receipts in Oracle Purchasing - R12.2


Cascade Receipts


The Cascade function facilitates the distribution of a given quantity of an item and UOM from a single supplier across multiple shipments and distributions


When you select the Cascade button, Purchasing displays the Cascade Details window in which you must enter the cascade quantity and the unit of measure. When you select the OK button, the cascade process begins.


The process starts at the first displayed line and allocates the supply available to receive/deliver to that line from the cascade quantity you entered. The process continues to the next line and again allocates the quantity available to receive/deliver, continuing until either the process reaches the last queried line or the cascade quantity is exhausted.


Step 1: Create a PO


NAV: Purchase Orders ------ Purchase Orders.


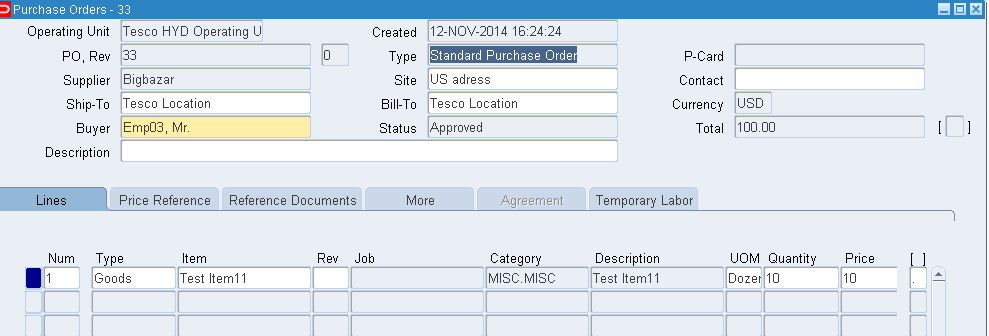
Create two different purchase orders for the same items and for the same supplier.


Make sure that the UOM and the quantity differs as below.


Approve the purchase order.


Step 2: Receiving Options.


Go to receiving options and enable the "Allow Cascade Transactions".


Step 3: Receipting.


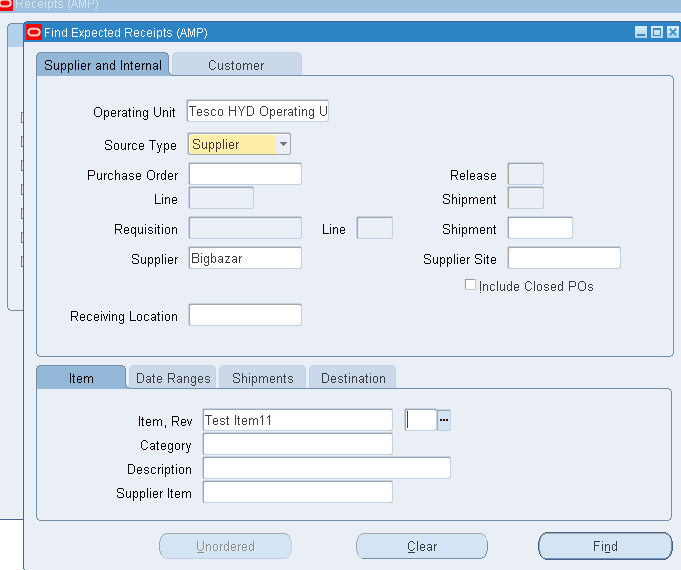
Go to receiving form and search with supplier and the item number.


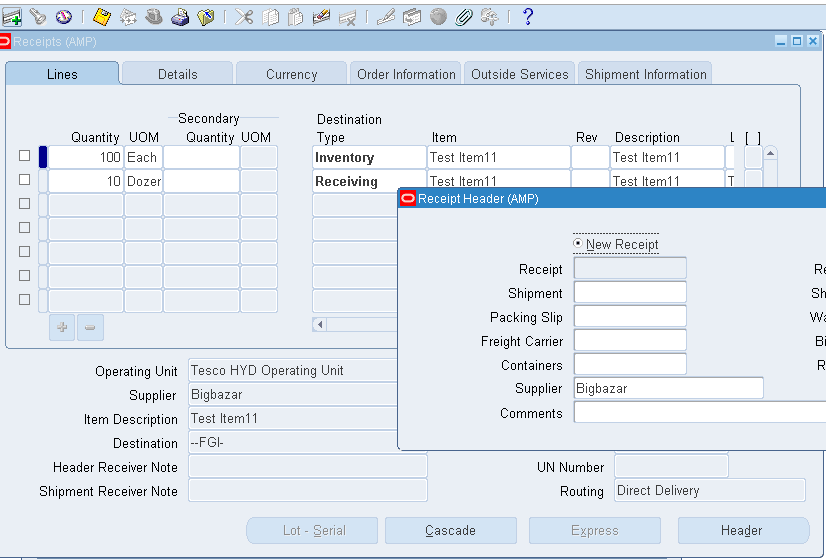
Now select the line and click on "Cascade" option available at the bottom of the form.


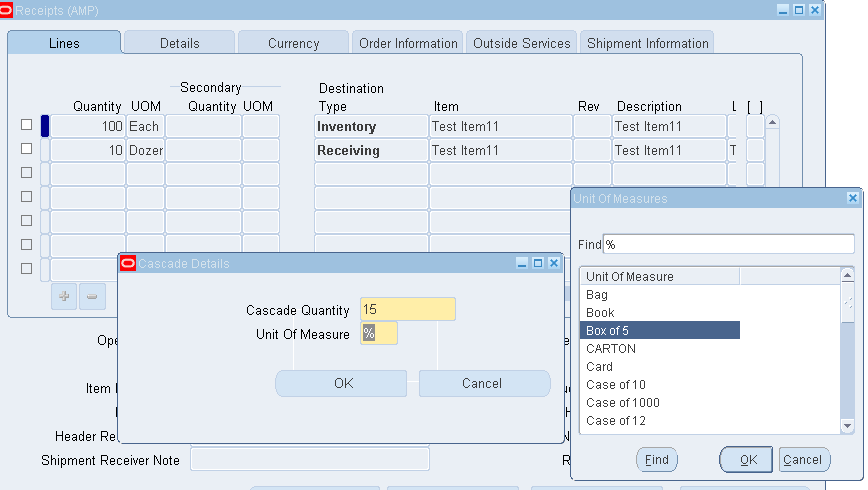
The cascade details pop up appears.


Now try to change the quantity and UOM and say OK.


Here we have taken the quantity as 15 boxes of 5. (15*5=75).


Give OK and notice the line quantity below.


Also give the Sub-inventory details in the line level.


Save the form. (Receiving is done)


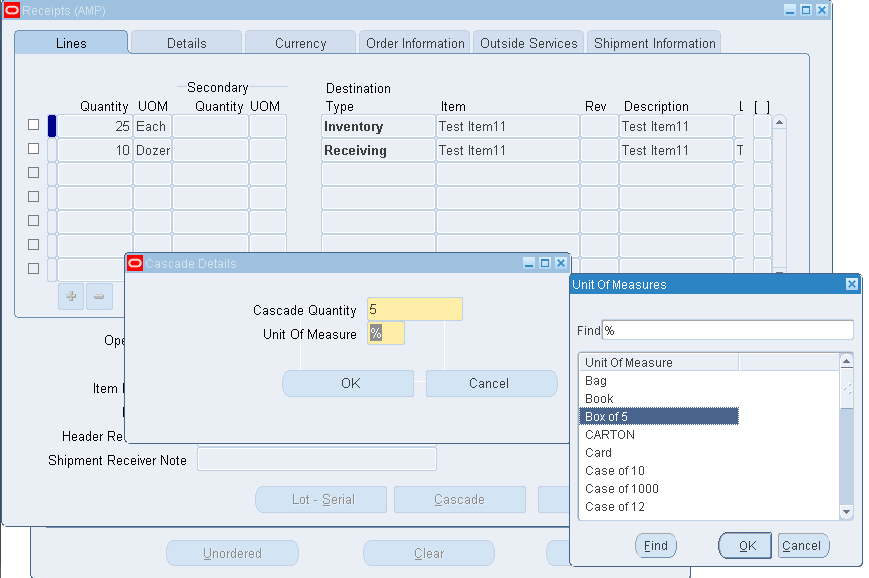
Now again come to the receipts form and you can now notice the remaining quantity in the first line.


Do the same exercise as above by giving quantity as 5 boxes of 5. (5*5=25).


Give OK and save the form.


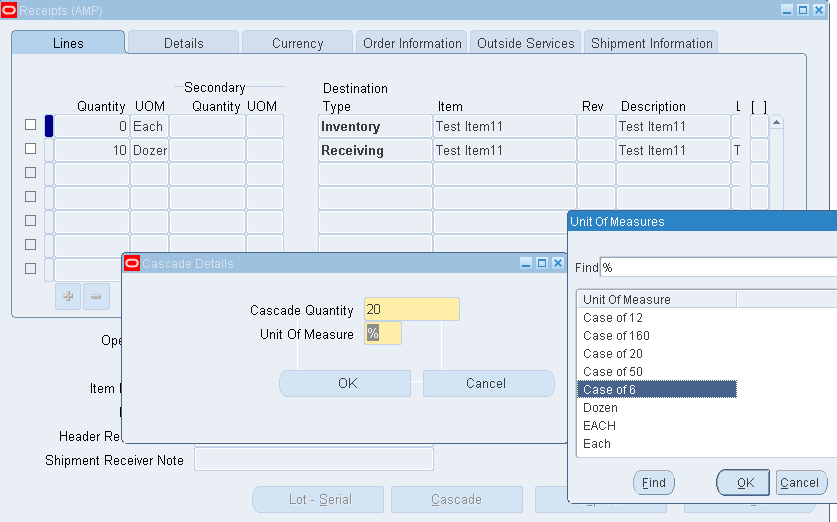
Now if we come to the receipts form again we can see that the first line quantity has completed and now we can receive the other items as 20 quantities with box of 6.


Where 20*case of 6=120 which is same as 10 dozens i.e. 120 items.


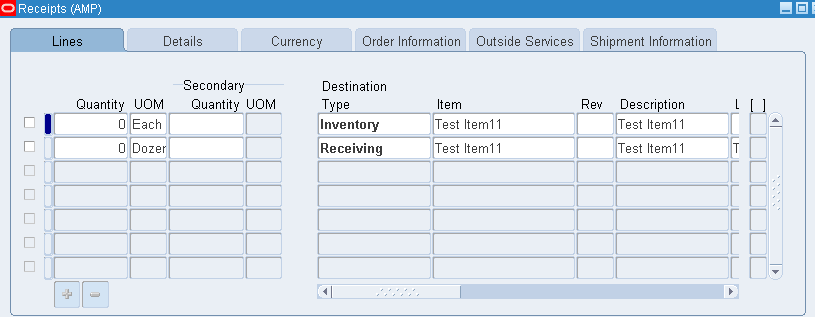
Now if we come to receipts form you cannot see any items left as both the lines were zeroed out.