Setups Required:
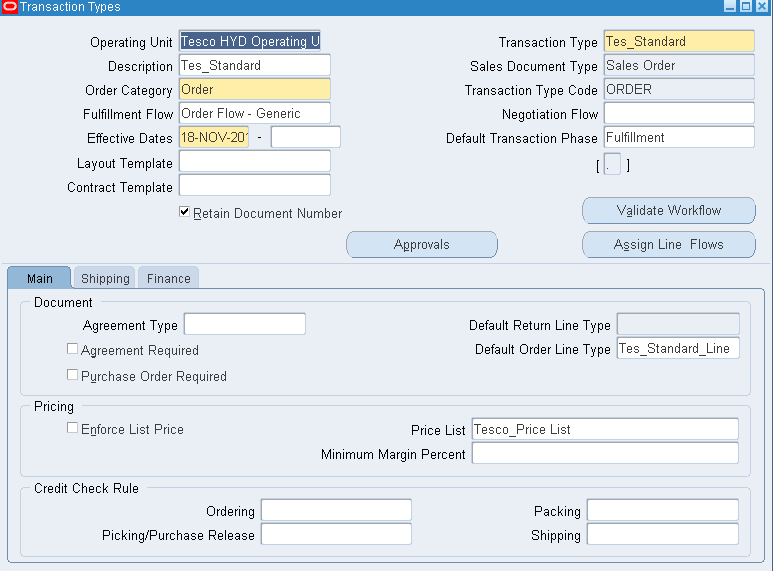
1. Transaction Type:
Create an order transaction type.
Sales Document type should be "Sales Agreement".
Fulfillment flow: Sales Agreement - Generic
Negotiation Flow: Negotiation Flow - Generic with Approval
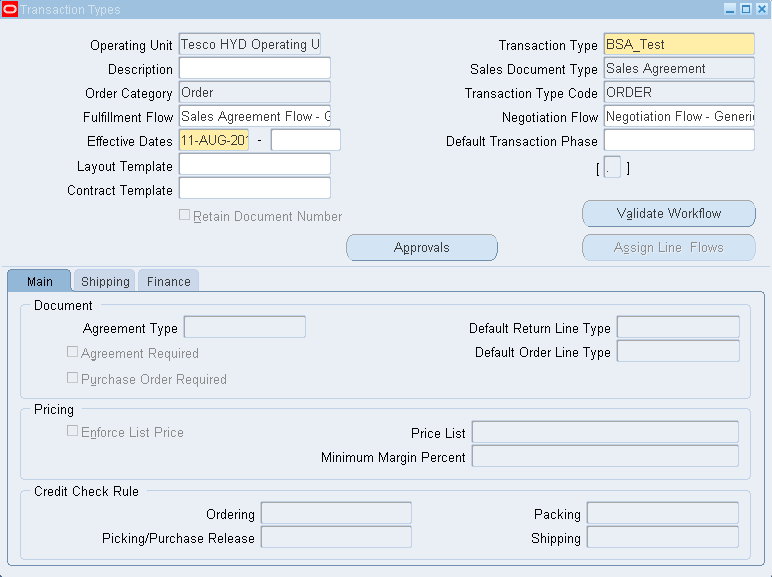
Note: Please note that for sales agreement does not require separate line transaction type, as it follows the regular fulfillment flow as like sales order.
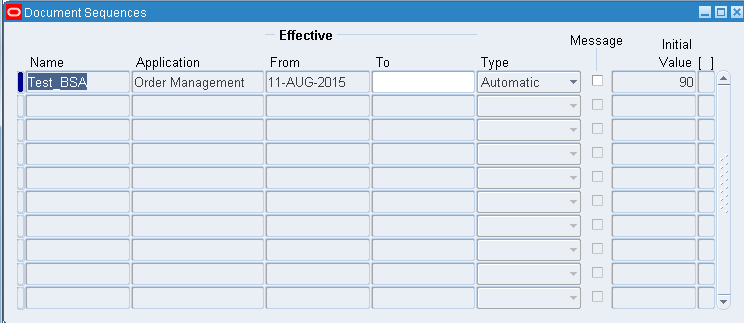
2. Document Sequence:
Create a document sequence for the Order type we created above.

Create the document sequence with some initial value as below (here 90) and make it automatic.
Now assign the document sequence to the Order type that was created for blanket sales agreement.
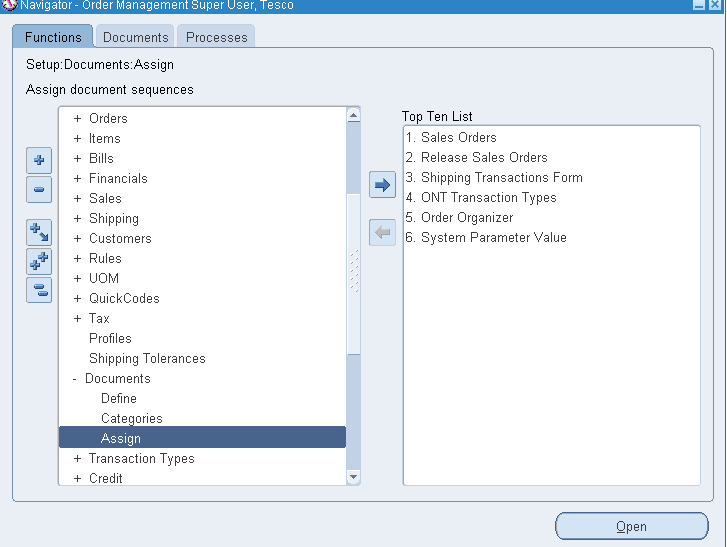
Select the application, category (Order type) and your sequence as below.

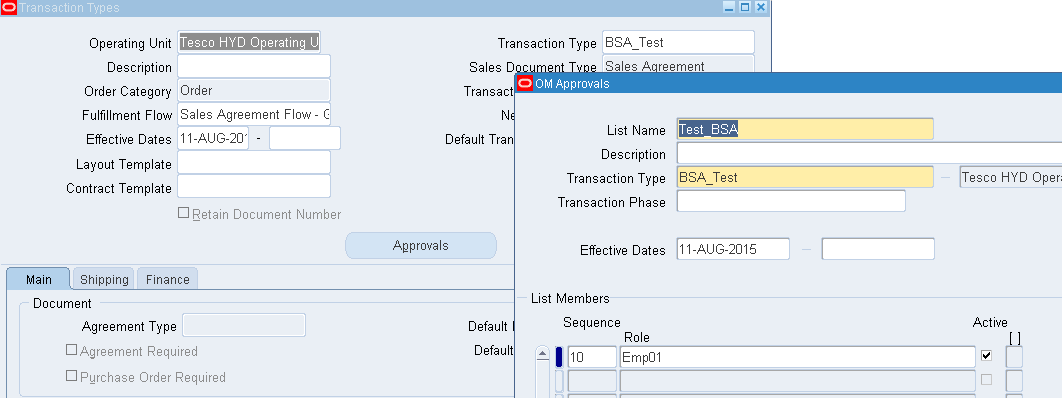
3. Create Approval List
We can create and add an approval list for the order type so that the sales agreement goes for an approval process. We can attach the approval list in the order type as below.
Select the transaction type and click on “Approvals” button and create a list of approvers as below by giving the sequence and note that we can have multiple levels of approvers by listing in the approval list form below.
Now the sales agreements will follow the approval process as mentioned here in the form to those users.
Sales Agreement process flow
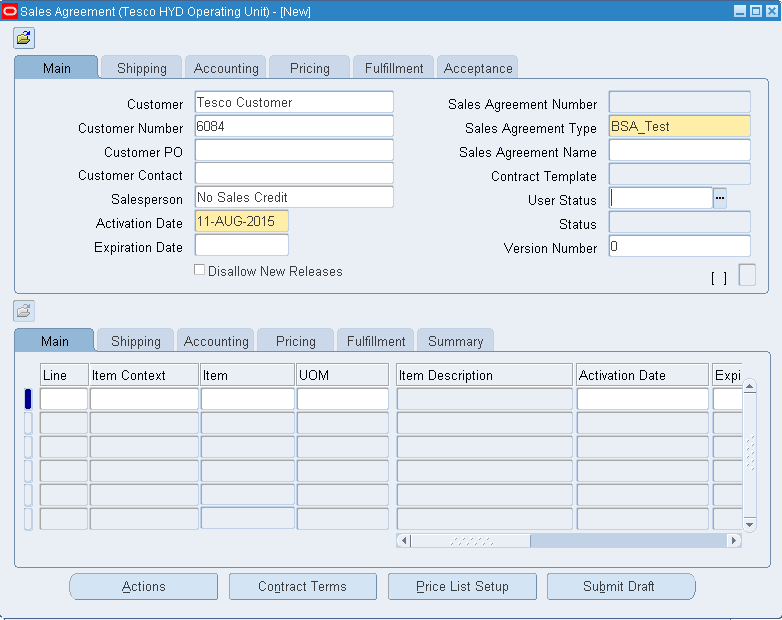
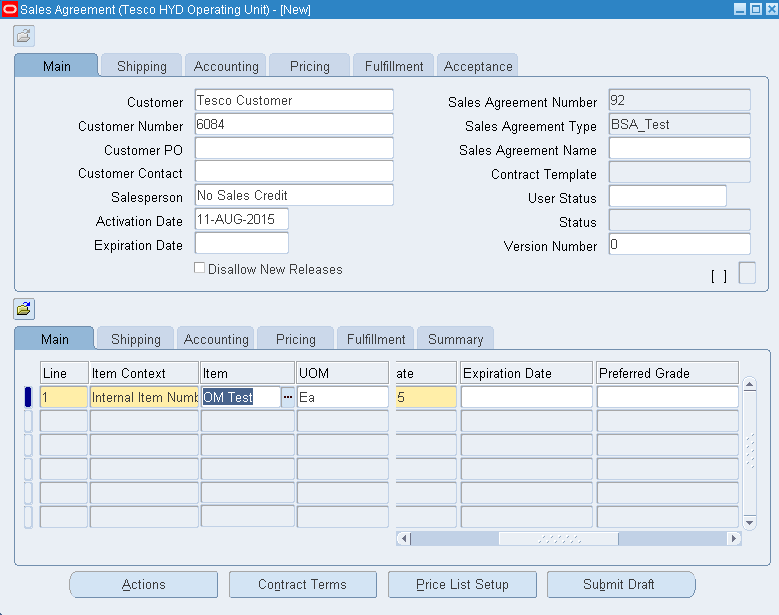
1. Create a Sales Agreement:
Navigation: Sales Agreement > Sales Agreements.
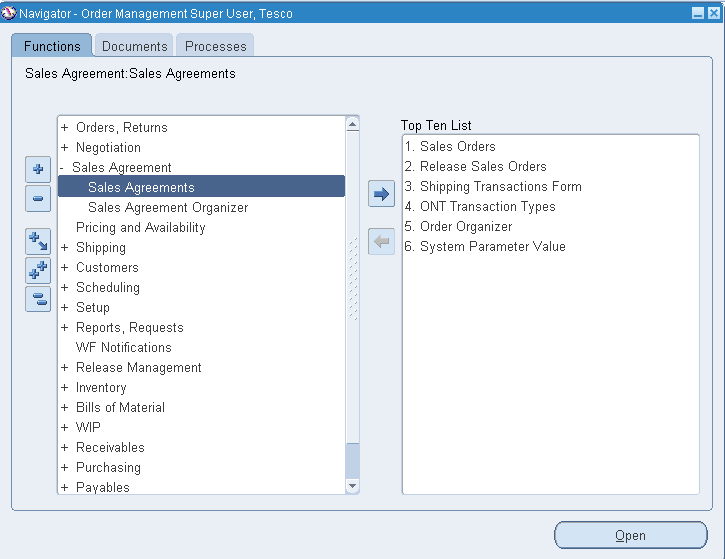
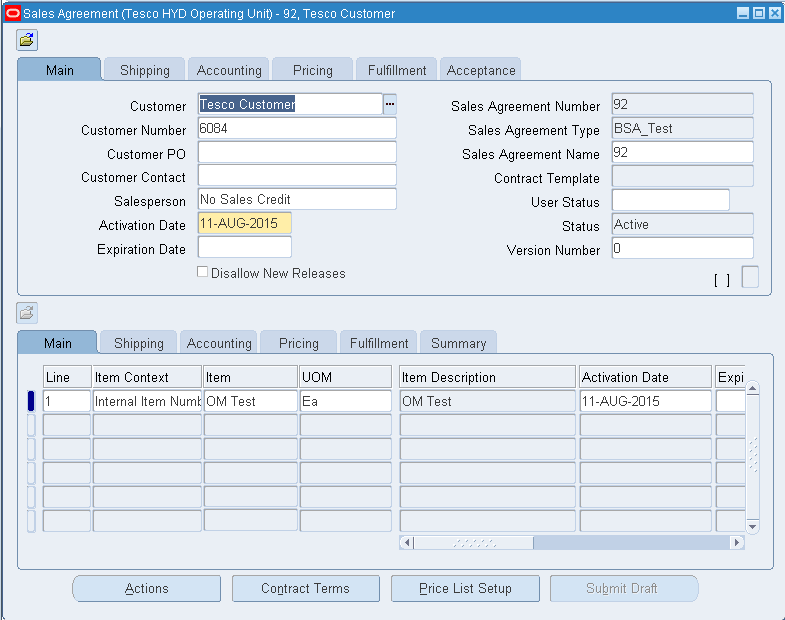
Select the Customer and transaction we have defined for sales agreements.
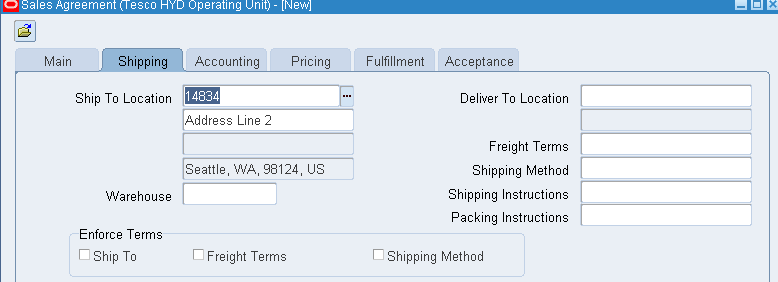
Come to "Shipping" tab and give the ship to location.
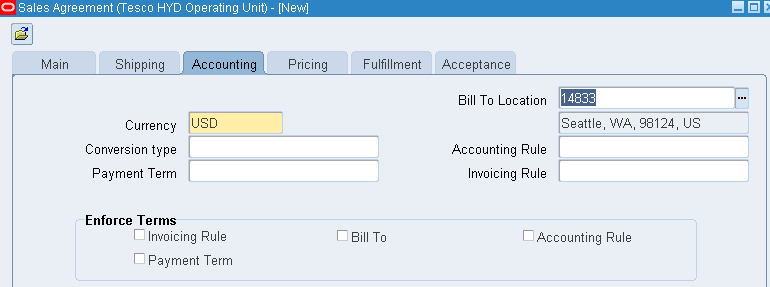
Come to "Accounting" tab and give the currency and Bill to location.
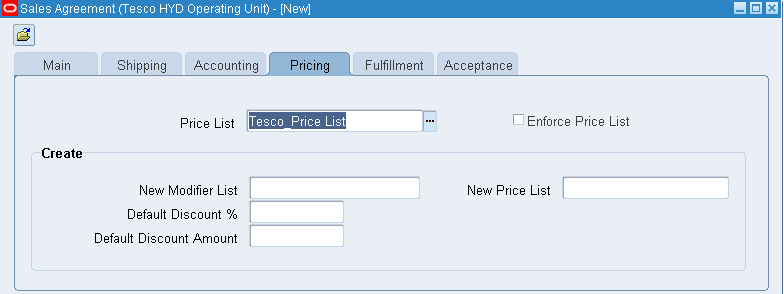
Enter the price list name in "Pricing" tab as below.
Now go to the line level. Select the item in item field where item context should be “Internal Item Number”
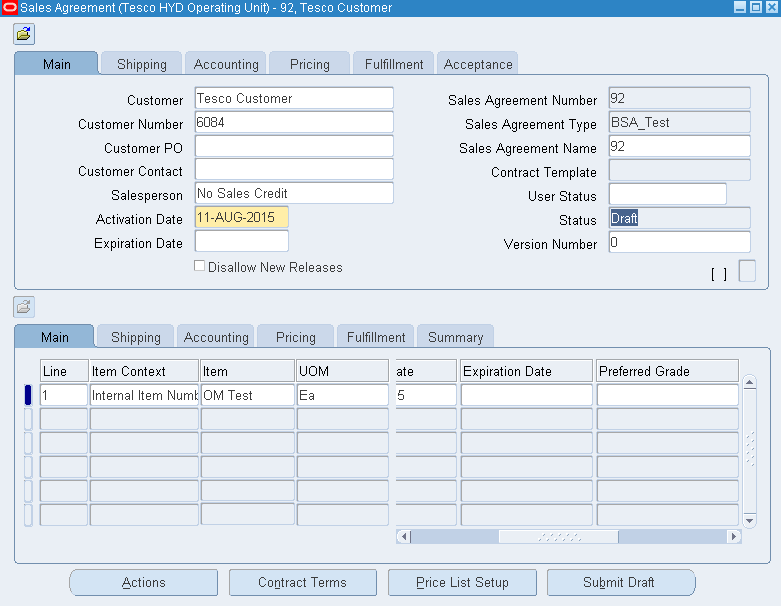
Save the form and note the agreement status will change to “Draft” as below.
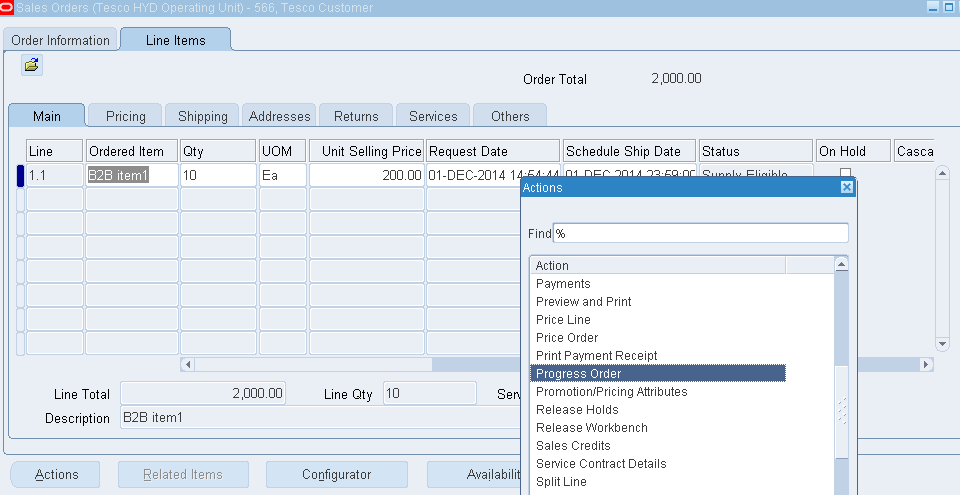
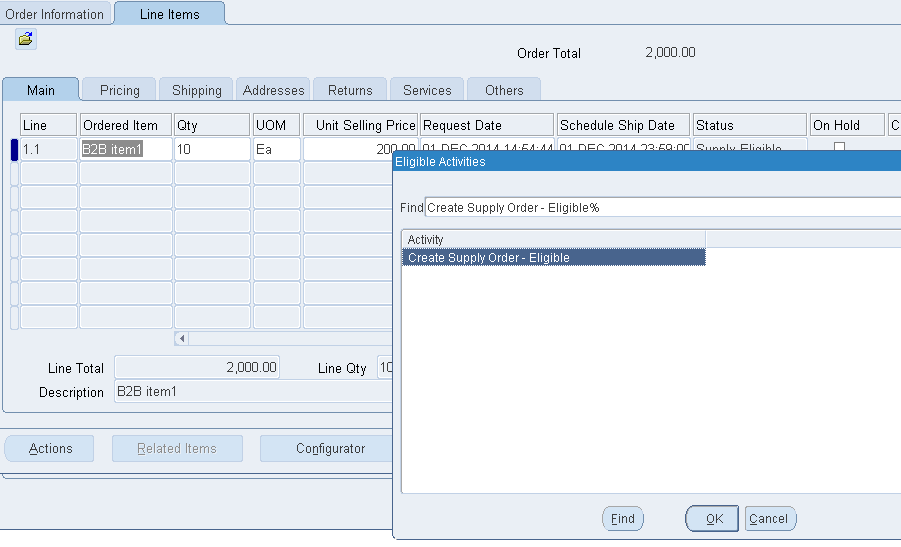
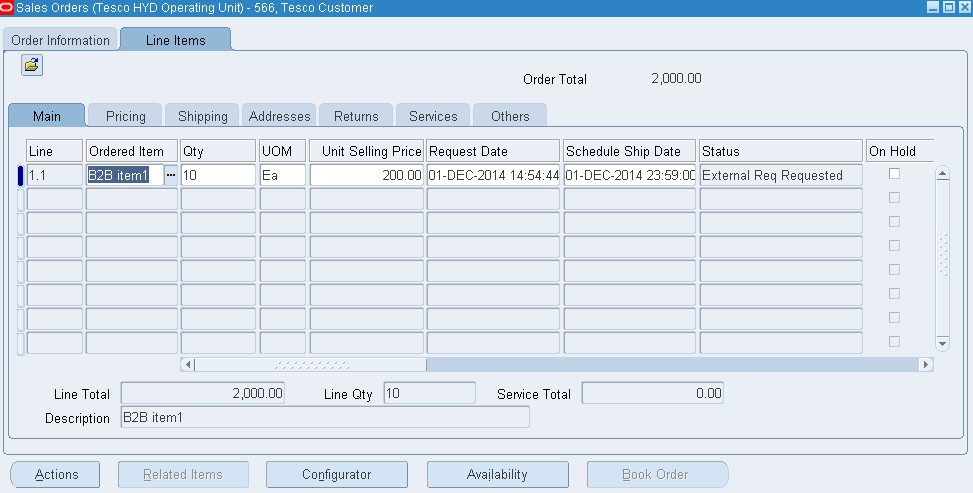
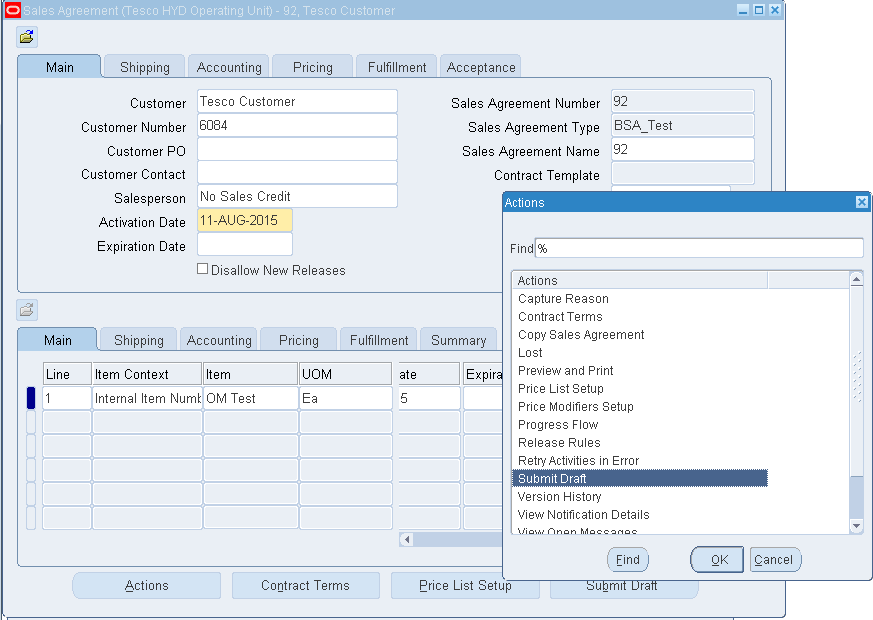
Now go to “Actions” button at the bottom of the form or click “Submit Draft” and click OK.
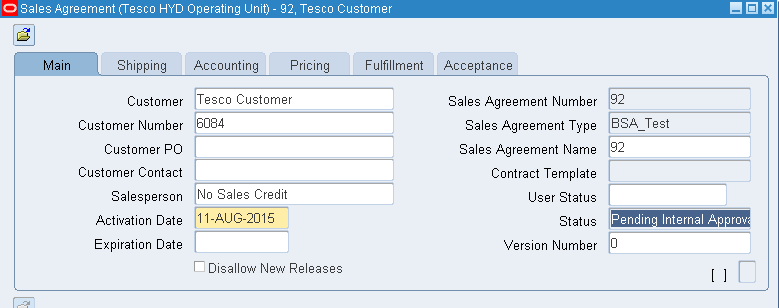
Note that the status changes to “Internal Approval Required”. That means the Sales Agreement has gone to the user for approval whom we defined as the approver in the approval list at the transaction type.
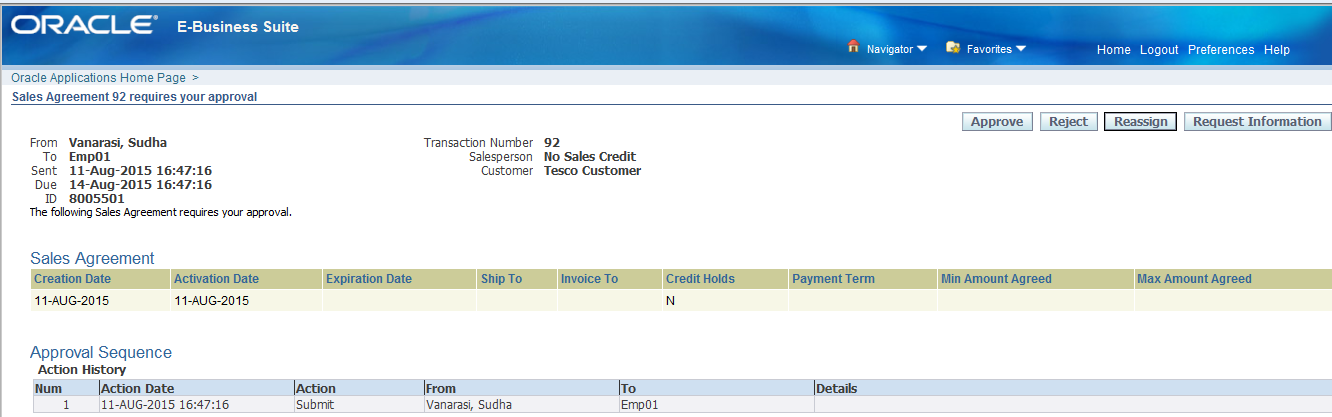
Now login as approver.
Note that the Sales agreement notification is received.

Open the notification and say “Approve”.
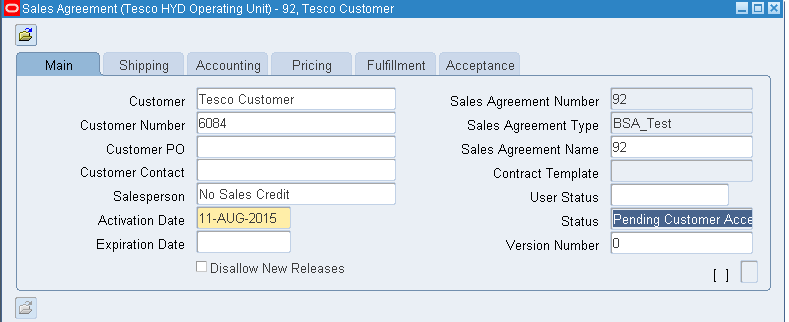
Now check that the sales agreement status changes to “Pending Customer Acceptance”.
Now assume that, customer has signed and accepted the agreement. Capture the customer acceptance under "Acceptance" TAB by clicking on “Customer Accepted”
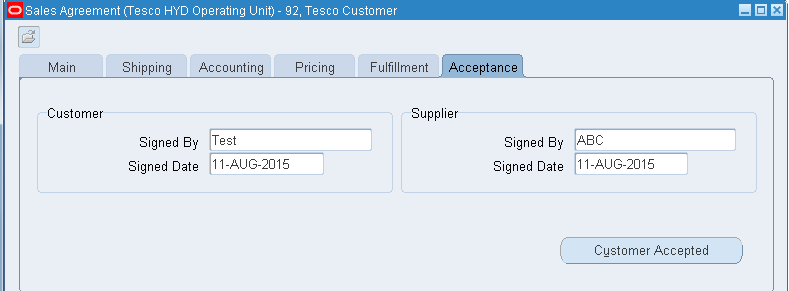
Once the agreement has been accepted by the customer the status of the agreement becomes “ACTIVE” and ready for releases.
Sales Agreement release
Select the sales agreement.
Go to actions button on the bottom, select “Create Releases” and say OK.
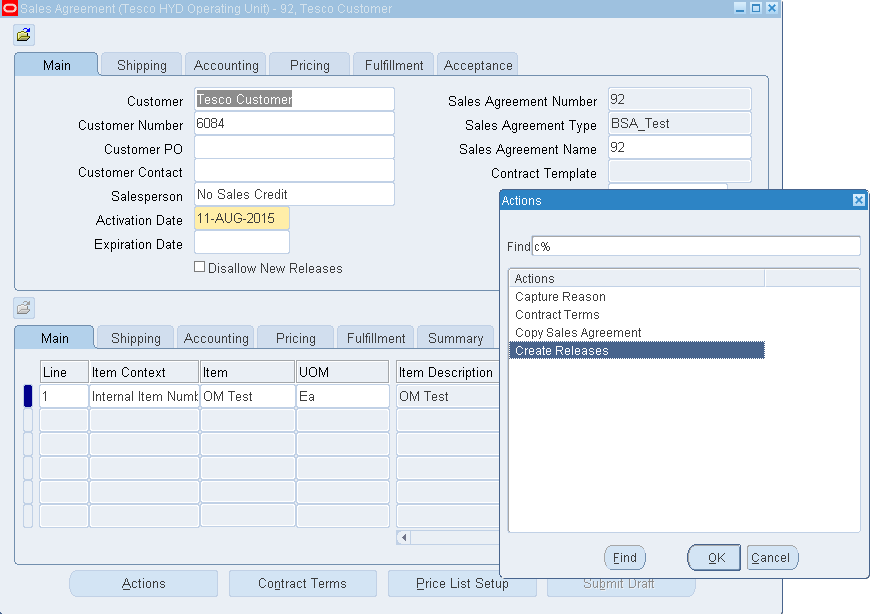
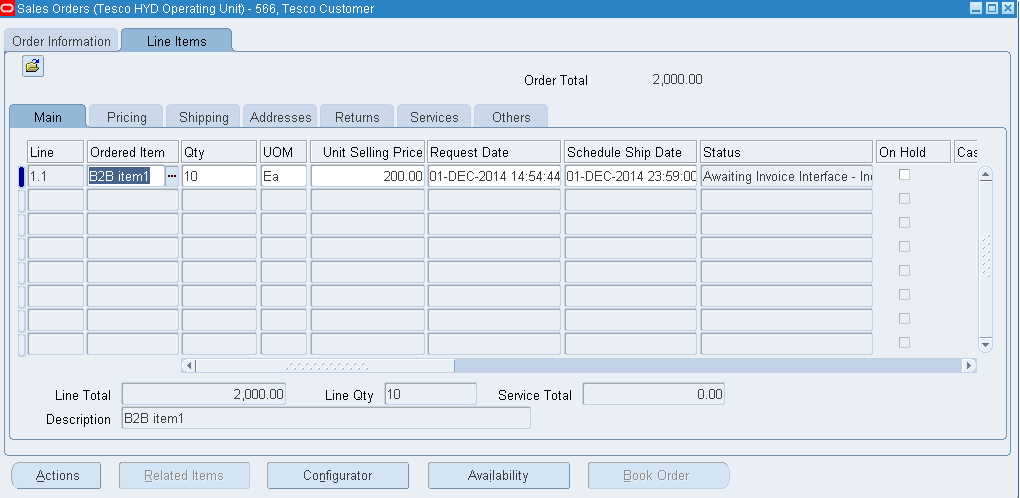
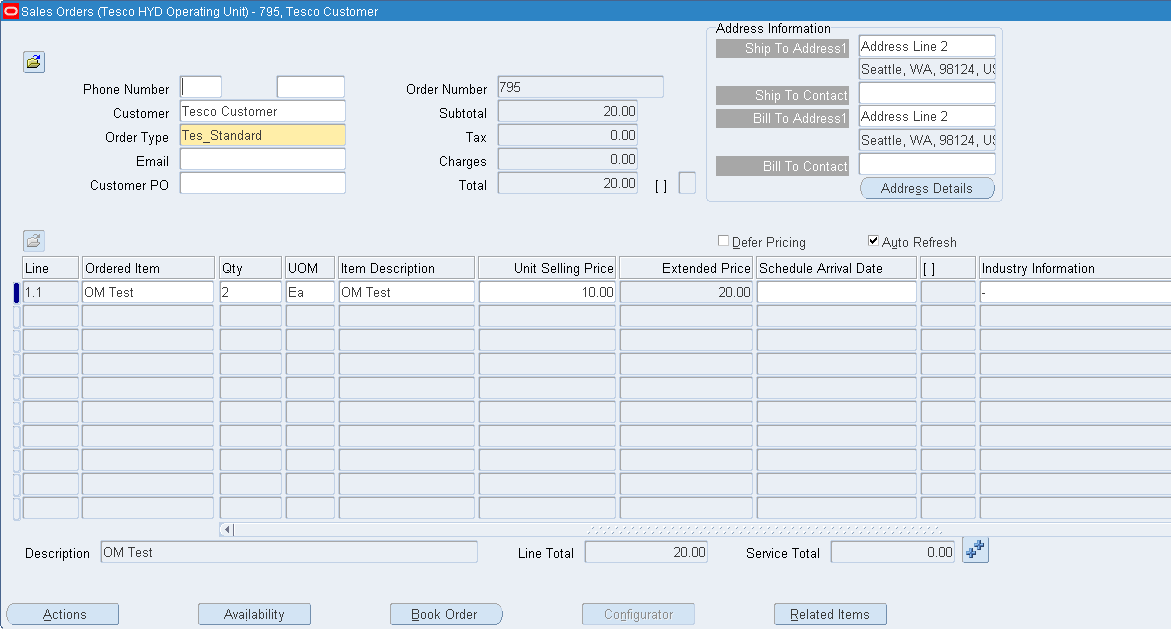
Note the system redirects to the quick sales order form and from here the sales order flow starts.
Author Details:
SUDHAKAR VANARASI
Email: sudhakar.vanarasi@doyensys.com