Friday, 22 April 2016

                                                 Oracle Test Manager

Oracle Test Manager is an easy to use tool that allows you to organize and manage
your overall testing process. It provides a single unified platform for sharing
information among team members.
Oracle Test Manager has the following features and advantages for integrated
requirements management and defect tracking for both manual and automated tests:
1.Requirements Management
2.Test Planning and Management
3.Defect Tracking
4.Integration with Oracle Application Testing Suite
5.Reporting
6.Administration 
7.Custom Fields 
8.Database Repository


Step 1: Test Plan

1. Create a Test Plan for a script Testing.
2. The number of test plans displayed is determined by the number enter in the
    maximum Tree Nodes field in options. 
3. Edit this Test Plan,Print,e-Mail ,Navigation options are available in the Test Plan
4. Click on an associated requirement to view its details.
5. Click on an attachment to open it in the appropriate application.
6. Click on a link to view the URL in a separate browser window.
7. Select Add/Edit to add or edit attachments, links, or associated items.


Step 2: Requirement
  
1.Create Requirements for the Script Testing
2.To Create a Requirement.
3.Search requirements by clicking the Find button.
4.Group requirements by clicking Group.
5.Filter requirements by clicking Filter.
6.Toggle between the tree view and grid view by clicking the Tree View and Grid
  View buttons.
7.The color of the icon in front of the requirement indicates its priority. The default
colors are as follows and can be changed by changing the order of the Requirement
Priorities in the Administrator.
a)  Red, high priority
b)  Yellow, medium priority
c)  Green, low priority


Step 3: Test 

1.It allows to create a New Test or run/edit an existing script.
2.Schedule when to run tests by clicking the Schedule button.

3.The icon in front of the test indicates the type of test as follows:
a) Manual test - blue with a pencil.
b) Test folder - blue with a spiral.
c) Oracle OpenScript - blue with a pencil.
d) Test group - blue with a plus sign.
e) 3rd Party test - blue with two stars

Manual Test:


4.The color of the icon in front of the test indicates the last result from running the test,
as follows:
a) Green, passed
b) Red, failed
c) Yellow, warning
d) Blue, not run
e) Silver, currently running


Automated Test:

5.Create a new test and run the test in Oracle OpenScript

Type:Oracle OpenScript


Select script from the mounted repository.


6.Click Run this Test and Testing will be automated .
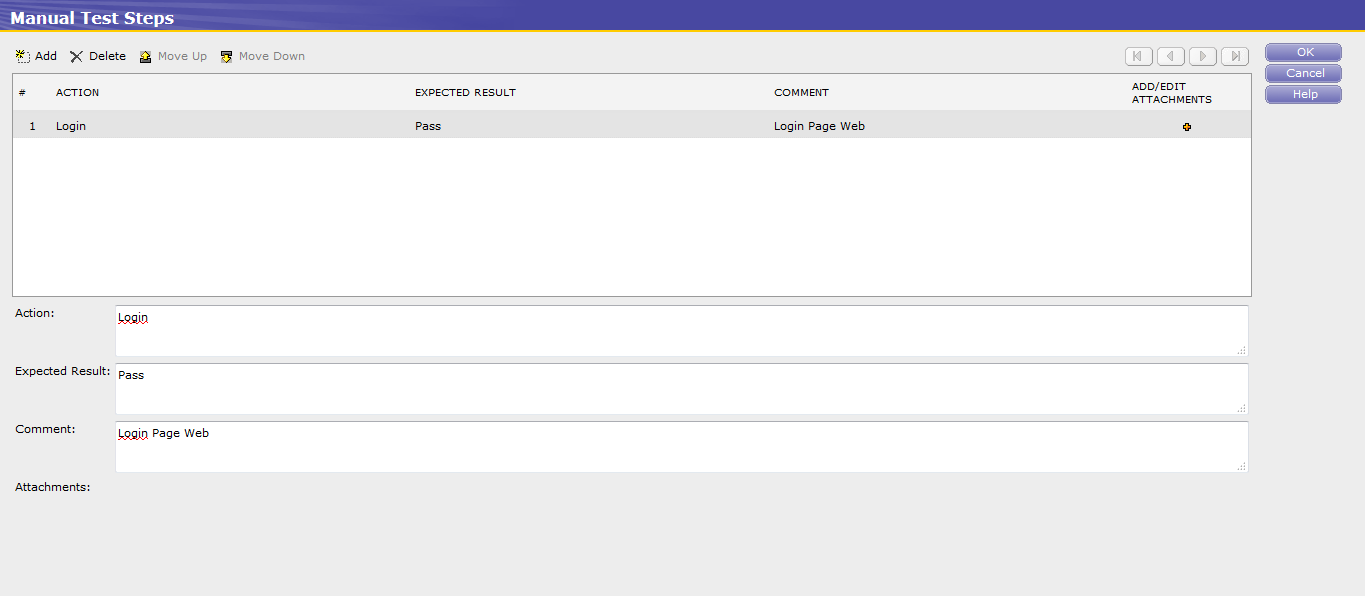
7.Allow to Add/Edit the Test Steps.


8.Click Edit this test to open the Edit Test dialog box.
9.Click Run this test to start the Run Manual Test wizard or run an Oracle
   OpenScript test.
10.Click Delete Results to display the Delete Results dialog box for deleting results
    from particular test runs.
11.Click the date in the Run History section to display result details for a particular
    run.

Step 4:Test Execution

Test Execution contains Test Set and Test Folder Type.


Step 5:Issues

Issues will be captured in the Issue tab.
In Issues tab,Add/Edit options are available.


Step 6:Reports

The Reports tab has both standard and custom reports.
Oracle Test Manager comes with a standard set of reports that can be viewed as either
a graphic or as data. In addition, Can create custom reports to display only the
data 
1. Clone an existing report to create a copy of it that you can then edit by clicking
   Clone.
2. Filter the fields in the report to display only the data in which you are interested.
3. Export reports to jpg, and xls formats.


Step 7:Dashboard

Dashboard report is available for requirements, tests, and issues. 
It allows to customize which reports are displayed for each and then save the view. 
In addition,Able to select the number of columns to use for the display.

Test Cases Dashboard:


Issues Dashboard:


                                             Oracle OpenScript 

OpenScript is the next generation environment for developing Oracle Application
Testing Suite scripts for Web application testing.

Features:
1)Scripting Workbench
2) Test Modules
3)Graphical/Tree View Scripting Interface
4)Programming/Code View Scripting Interface
5)Properties View & Results View
6)Data Parameterization
    a)Databank
    b)Database
    c)Data Table
    d)Shared Data Service
7)Correlation
8)OpenScript Preferences
9)Multi-User Execution

Settings:
The Following Settings required before recording a scenario,
1.Browser:IE or Firefox
  For IE:
  Enable Add-ons in IE
    Tools--->Manage Add -ons -->Toolbars and Extensions
    Oracle.OATS.OpenScript.IEToolBar.OpenScriptToolBar
    OpenScriptBHO

For Firefox:
Enable Add-ons in Firefox.


2. In OpenScript,Go to OpenScript Preferences
Select Browser
Select Playback and Record Browser(IE or Firefox)


Step1:
Create a new script using Oracle EBS/FORMS


The file will be created in repository.

Step 2:
The Script contains:
1.Initialize
2.Run
3.Finalize


Step 3:RECORD
Starts the selected OpenScript script recorder 
Record the Scenario for testing.

Browser Launch


Stop recording ,once the scenario is completed.
Step 4 : Navigation and java code will be generated in the Openscript.
Step 5:The following steps required to add CSV file in the Openscript
To configure Databanks to use with a script:
1. Select the Assets .
2. Select Databanks.
3. Click Add.
4. Select CSV file or Database. Once a databank is defined as CSV or Database
(SQL), the databank type cannot be changed to the other type.
5. For CSV files:
a. Select the Repository from the My Repositories tree.
b. Select the Databank file from the repository.
c. Set the Type to Databanks (*.csv, *.txt).
6. Click OK.


Step 6:Map the csv file column with the navigation fields.


Step 7: PLAYBACK
Plays back the currently open OpenScript.
Playback for multiple scripts is supported using any of the following:
– OpenScript Playback button
– Command-Line Interface
– Oracle Load Testing
– Oracle Test Manager

Select Playback Button

Playback get started for the recorded scenario.


Step 8:Script Result Summary Details:


Sunday, 17 April 2016

Report Carousel in APEX 5 UT [ Dynamic Content ]

                         Report Carousel in APEX 5 UT [ Dynamic Content ]

Overview:
1. Purpose.
2. Benefits.
3. Steps to pass URL in a new window.
4. Browser Related Issues & Solutions. 
5. Sample screen shots.
6. Conclusion.

1.  Purpose:

This document describes how to  dynamically moves your data from the report in oracle apex 5. 
 When you add a region to your page with a couple of sub-regions and you give the parent region the "Carousel Container" template it turns the regions into a carousel, so you can flip between regions.
I applied the same functionality but than on dynamic content.
So I build a report template that would be shown as carousel.

     2.  Benefits:
Ø Can able to move your Data in a report. 
Ø Don’t need to go for old jquery sliders.
Ø In-build Apex 5 Feature but needs modifications in region & report templates level.

In Our Apex 5 Internal Application we used this component in Home > Technology News.

3.  Steps to create a carousel report:

Step1: Create a copy of the Carousel Container region template called Carousel Dynamic Region.
Step 2: Modify lines 14-18 of the template so that the #BODY# substitution string is contained within div.t-Region-carouselRegions. 
Step 3: Create a new Report Template [ Carousel Dynamic Report ]. Make sure to select Named Column for the Template Type
Step 4:  Add following HTML into the Row templates :
<div id="SR_#ID#">
<div id="content-#ID#">  
   <!-- Start custom content-->  
     <dl>  
       <h3> #Title#</h3>  
      <dd><span class="underline">#POSTED_BY#</span></dd>  
    </dl>  
    <d2>  
     <dd>#Content#</dd>  
    </d2>  
   <!-- End custom content -->  
  </div>  
</div> 
That's it for the template.
Step 5: Now you can create a new report on your page and give it the template you just created [ Carousel Dynamic Region ]
Here's the SQL Statement I used:
SELECT NEWSID "ID",
('<b>'||TITLE||'</h4>') "Title",
  URL "Link",
  MESSAGE "Content",
    'Posted by '
    ||initcap(SUBSTR(posted_by,1,INSTR(posted_by,'@', 1, 1)-1))
    ||' on '
    ||TO_CHAR(POSTED_ON,'dd-Mon-yyyy') "POSTED_BY",
    Posted_On,
'no-icon' "ICON"
FROM HR.TECH_NEWSTASK
order by 1 desc;
Note 1: You have to use the same column aliases as you defined in the template.
Note 2: Turn off pagination and partial page refresh in the report attributes.
Step 6 : Go to Report Attributes and set report Templates as “Carousel Dynamic Report” 

5.  Sample Screen Shots:


6. Conclusion:

Thus a user can able to view a database data in a report and also we can able to pass a URL links along with this data. 

Notification Message Bar design change in Oracle APEX 4.2 using CSS

Objective:
 To change the “Notification Message Bar” design throughout the Oracle Application Express 4.2 application.

Requirement: 
Customer has asked us to change the default “Notification Message Bar”, because which is showing based on the page length. What we need to do is, we need to change the design for “Notification Message Bar” throughout the Oracle Application Express application instead of a page. We have attached the screen shot for your reference.

Step 1: Right click on the page -> choose Inspect Element
Step 2: Take required div id from the source page. <div id=”t20Messages”>
Step 3: Go to template. Then add below mentioned CSS into it.


Highlight Tabular Form Rows on addition from Pop-up

To Highlight Tabular Form Rows on addition from Pop-up:

1. Paste the following code in the dynamic action:

         On Refresh of region
         Execute java script code:

/*Reset the background colors of all cells*/

$('.t-Report-cell').css("background-color", "white");

/*Get Selected Value from the select list / on addition of rows from pop-up set the values in an page item as comma separated*/

var a = $v('P86_SEL_MAST_ITEMS');
a = a.replace(/(^,)|(,$)/g, "");
//alert (a);

$("input[name='f02']").filter(function(){return a.split(',').indexOf(this.value) > -1}).closest("tr").children("td").css("background-color", "yellow");

$("input[name='f02']").filter(function(){return this.value==temp[j]}).closest("tr").children("td").css("background-color", "yellow");

Set Interactive Report Filter with URL Parameters

Interactive Reports are very powerful, the end user can set filters, highlighting, add computed columns, do control breaks or groupings and much more.
As a Developer you might sometimes have the requirement to redirect from one page to another which displays an interactive report, but this report should be filtered by whatever value is selected on the first page.

Steps:
1. Give a Static ID for the IR region
2. Use RIR in the ClearCache Section to reset to the default Interactive Report (clear all filters, formats, …) on the target Page
3.Use CIR to clear all report settings
4. Syntax:
       IR<operator>_<column_name>  where operator can be EQ,LT,GT,LTE,GTE,NEQ,LIKE,N,NN,C,NC
        
you can omit the operator if you want to use “equal” as operator

Example: 
 f?p=&APP_ID.:58:&SESSION.::&DEBUG.:CIR:IR[CONT]IN_NEGOTIATOR,IR[CONT]IN_COUNTRY,IR[CONT]_STUDY_NUMBER:\&P1_NEGOTIATOR_DISP.\,\&P1_COUNTRY_DISP.\,&P1_STUDY_DISP.